Configure Your Application's Portal
A Case IQ portal is a streamlined, external intermediary for a Case IQ application, where individuals can quickly submit incidents to your organization’s administrators without logging in to the main application. Cases submitted via the online portal can then be managed in Case IQ just like cases added in the main application (see Add a Case In Application) or by email (see Add a Case via Email).
This article covers how System Administrators can configure their application's external portal using the main application's Settings. The portal settings can be managed via multiple pages in Settings: Options, Dialing Instructions, Forms, and Translations.
Enable Portal for Application
If the external portal is not active for your application, you will not be able to access the settings described in this article. Please submit a change request to your Customer Support team to enable a portal for your application.
Your organization can use your portal as a one- or two-way form of receiving case information:
- A one-way portal only allows reporters to submit a case. They cannot receive updates on their case via Case IQ.
- A two-way portal gives reporters the options to set up an account, which they can use to log back into the portal and see updates on their case.
This article covers how System Administrators can configure their application's external portal, whether one- or two-way using the main application's Settings. The portal settings can be managed via multiple pages in Settings: Options, Forms, and Translations. While most of the content is relevant for both kinds of portals, the additional settings specific to two-way portals are covered in the “Two-Way Portal” section of this article.
Manage Portal Reporting Options
There are three reporting options available for a portal:
- Report Online: the reporter types the details of their case in a form via the application. If two-way functionality has been enabled, reporters can set up an account to via the Report Online option.
- Dialing Instructions: the reporter selects a phone number for their location, calls the number, and describes the details of their case to an operator.
- Email: the reporter sends an email with the details of their case via their email client (e.g. Gmail, Outlook, etc).
You can choose the reporting options available on the application’s portal landing page, by showing or hiding the phone and email reporting buttons. For example, if your organization does not offer reporting via phone, you can disable the phone reporting option for the portal.
Navigate to the Options page in Settings under the System tab. Then, search for the “allowDialingReport” and “allowEmailReport” options in the grid, select “No” to hide the reporting option on the portal, and click Save. By default, both options will be set to “Yes”.

Disable Report Online Option?
You cannot hide the Report Online option on the portal.
Manage Dialing Instructions Options
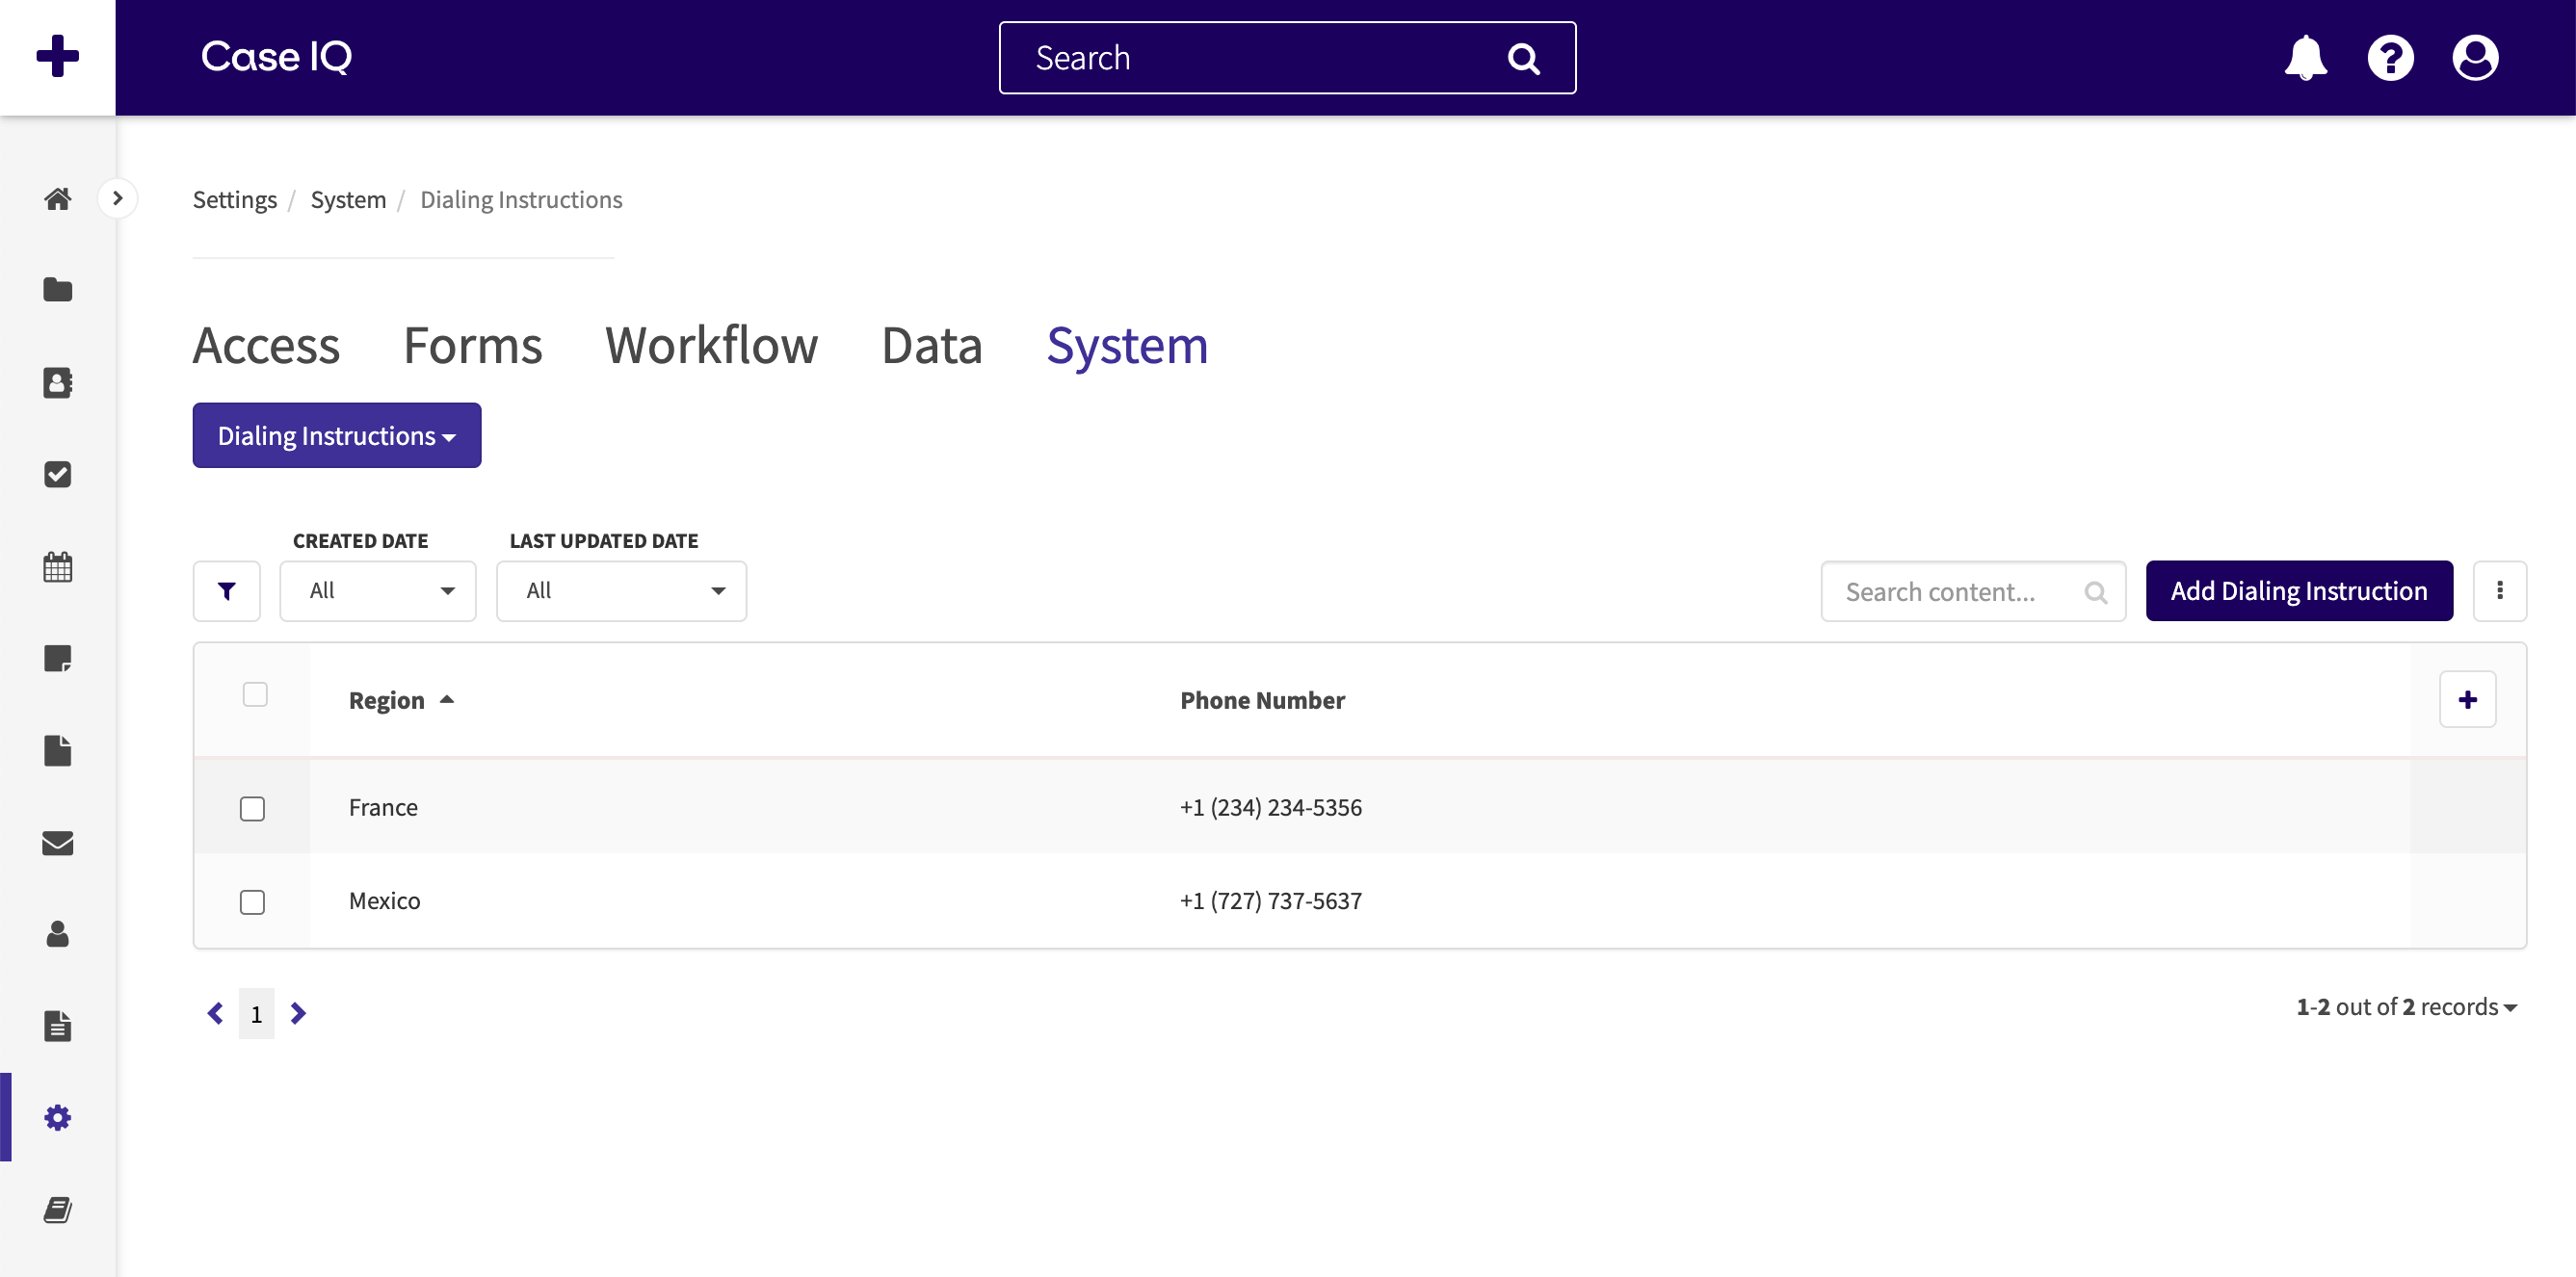
When a portal user clicks the “Dialing Instructions” button on the portal landing page, the portal will load a grid of phone numbers the user can call to report their case by region. You can add, edit, and delete phone reporting options from the Dialing Instructions page in the Setting's System tab.
If you have the appropriate permissions, you can:
- Add another phone number to the grid by clicking the Add Dialing Instruction button.
- Edit a dialing instruction by clicking its row in the grid and making updates on its page.
- Delete a dialing instruction either from the grid or on its page.
See the Dialing Instructions article for detailed steps on adding, editing, and deleting dialing instructions.
Set the Email Reporting Address
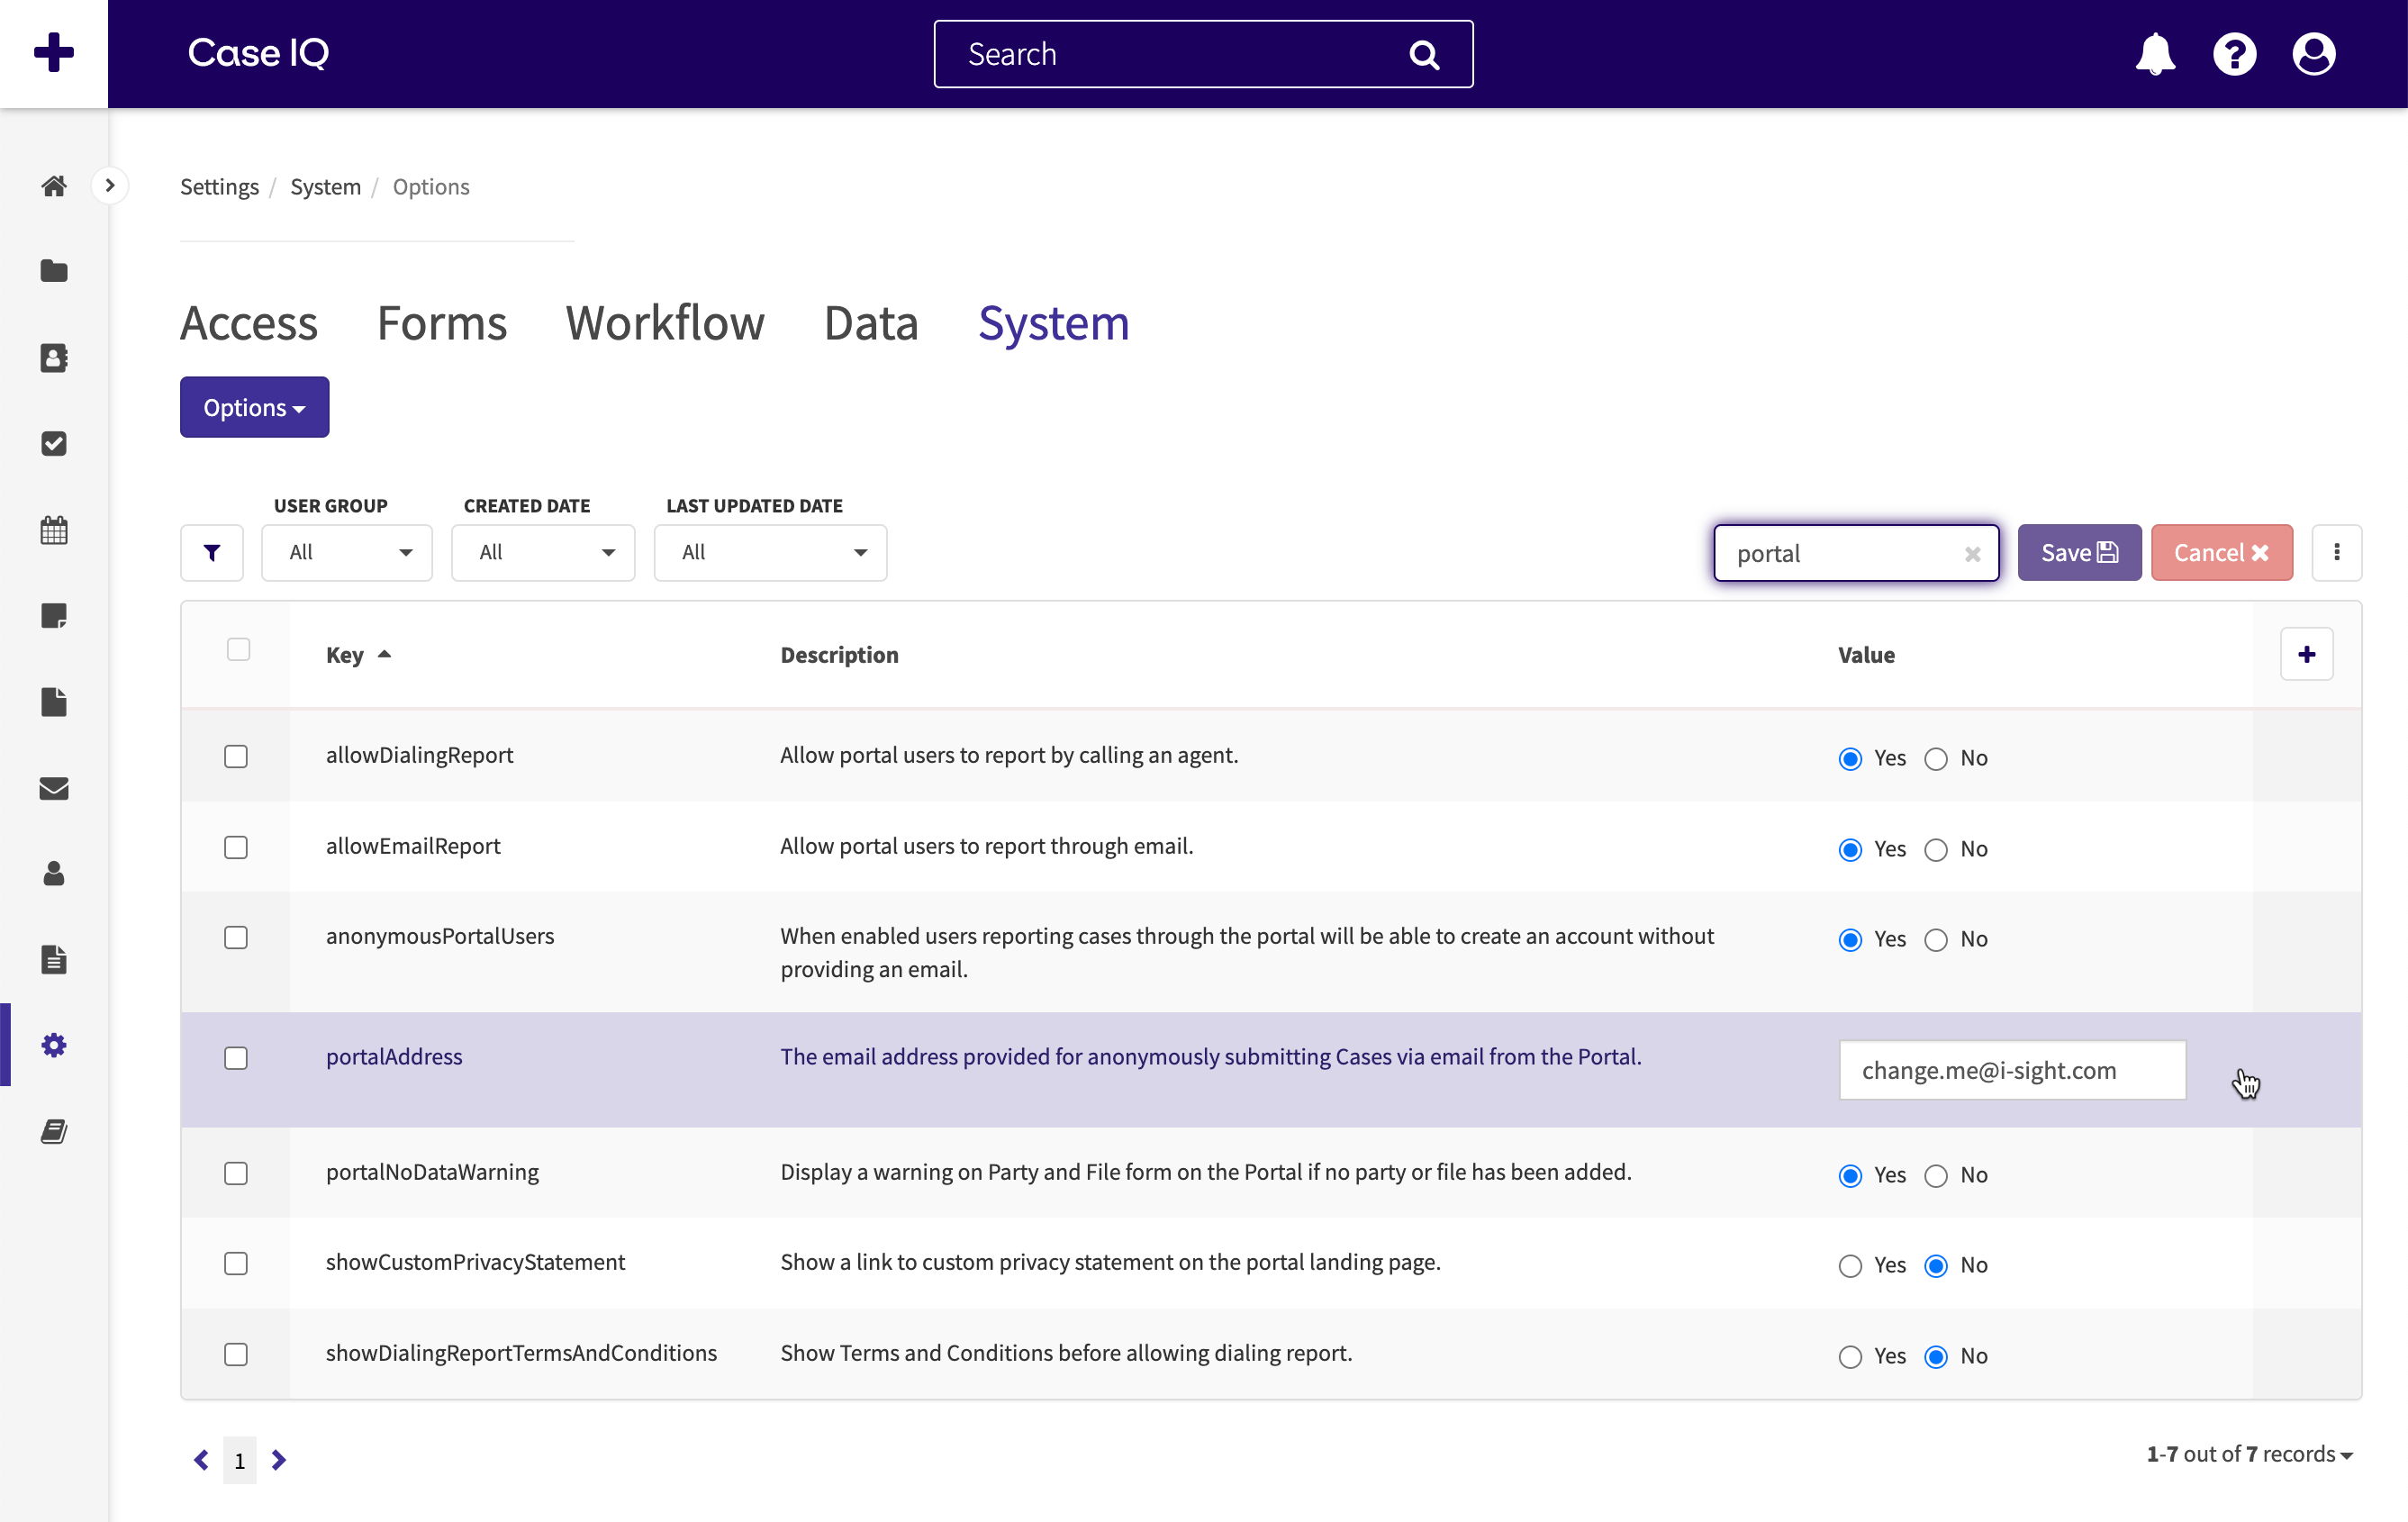
You can configure the email address that Case IQ provides to portal reporters with which they can submit a via email. When a user clicks the Send Email button on the portal landing page, the user's preferred email client (e.g. Microsoft Outlook or Gmail) will load a draft email and its recipient will be automatically populated with the email address you set.
Navigate to the Options page in Settings under the System tab. Then, search for the “portalAddress" option in the grid. Enter the email you want Case IQ to provide to portal users for email reporting.
Choose Fields to Show on the Report Online Form
You can select the fields that will appear on the Report Online form for portal users to control the information reporters provide on cases via the portal. You can only show fields from forms that are available on the portal. By default, only the case, party, and file forms will be included on the Report Online form.
To manage the fields shown on the portal for a form, use the following steps:
- Open the form layout in the Form Builder by navigating to the Forms tab in Settings, then clicking the form's row in the Custom Forms grid.
- Click the Edit button.
- To show or hide an existing field for the portal, click a field on the form layout.
- On the field properties sidebar, use the “Show on Portal” toggle to show or hide the field on the portal version of the form.
- Click the Save button on the field properties sidebar to update the field.
- The field will also be available in the internal application's version of the form, regardless of the “Show on Portal” setting, unless you add display rules for the field.
- To add a new field to show on the portal, click the + Insert Fields button or the right arrow icon to open the Field Type sidebar.
- Select the type of field you want to add to the form in the Field Types sidebar. Click and hold the field type, drag it to the Form Builder page, and let go of your cursor over the “+ Insert Fields” section.
- Fill in the Field Type pop-up form (see details on all field properties in Use the Form Builder), making sure to turn on the “Show on Portal” toggle.
- Click Save on the pop-up.
- Publish the form to make your changes available on the portal.
No “Show on Portal” Toggle?
If you do not see the “Show on Portal” toggle in the field properties sidebar or pop-up, the form you are editing is not available on your application's portal.
Show or Hide a Picklist Option on the Report Online Form
You can control the picklist options available on the portal, meaning you can choose to show some of a picklist's options to users on the portal but hide others.
To manage the options shown for a picklist field on the portal for a form, use the following steps:
- Open the form layout in the Form Builder by navigating to the Forms tab in Settings, then clicking the form's row in the Custom Forms grid.
- Click the Edit button.
- Click the picklist field on the form layout.
- Make the “Show on Portal” toggle for the picklist field is turned on. Click the Save button on the field properties sidebar if you had to turn on the toggle.
- Select the Values tab on the field properties sidebar.
- To show or hide an existing option for the picklist on the portal, click an option in grid. Check or uncheck the “External” checkbox to show or hide the picklist option respectively. Click the Save button above the grid to update the picklist option.
- To add a new option for the picklist to show on the portal, type the text you want to show in the picklist dropdown menu, then hit Enter or Return on your keyboard. Check the “External” checkbox, then click the Save button above the grid.
- Publish the form to make your changes available on the portal.
Set up a Custom Privacy Statement
Case IQ's privacy policy is available on all pages of the portal via the highlighted link in the screenshot below. However, you can choose to link your organization's privacy policy on your portal as well.
Use the following steps to set up a privacy statement for your portal.
- Navigate to the Options page in Settings under the System tab.
- Search for the “showCustomPrivacyStatement” option in the grid
- Select “Yes” to enable a link to your custom privacy statement.
- Search for “customerName” and enter your organization's name. The text you enter will be the displayed text for the link to your custom privacy statement. For example, if you enter “Sample Inc.” as the “customerName”, a “Sample Inc.” hyperlink will be displayed on the portal, which users can click to see your custom privacy statement.
- Click Save.
- Navigate to the Translations page in Settings under the Data tab.
- Look for the following rows in the Translations grid and type in the text you want to show in each location. Searching for “landing_page” or entering “landing_page” in the “Subgroup” grid filter will help narrow down the results.
- customer_privacy_policy: enter the text to show in the body of the pop-up
- customer_privacy_policy_title: enter the text to show in the pop-up's title.
- customer_privacy_statement_link_text: enter the text to show as a link at the bottom of the page.
- When you click outside the “Translation” text box, a checkmark will appear beside the text box to indicate that the system has saved the phrase you entered and it is now displayed on the portal.
Set up Dialing Report Terms and Conditions
If your organization wants to communicate the terms to which users must agree before they report a case by phone, you can set up your Dialing Reporting Terms and Conditions. Portal users will not be able to proceed to the Dialing Instructions page without accepting a Terms and Conditions pop-up if this you enable this option for your portal.
Use the following steps to set up your Dialing Reporting Terms and Conditions pop-up for your portal.
- Navigate to the Options page in Settings under the System tab.
- Search for the “showDialingReportTermsAndConditions” option in the grid.
- Select “Yes” to enable the Dialing Reporting Terms and Conditions pop-up.
- Navigate to the Translations page in Settings under the Data tab.
- Add the “Subgroup” filter for the grid and filter for “dialing_instructions”.
- Look for the following rows in the Translations grid and type in the text you want to show in each location:
- dialing_instructions_terms_and_conditions: enter the text to show in the body of the pop-up
- dialing_instructions_terms_and_conditions_title: enter the text to show in the pop-up's title.
- When you click outside the “Translation” text box, a checkmark will appear beside the text box to indicate that the system has saved the phrase you entered and it is now displayed on the portal.
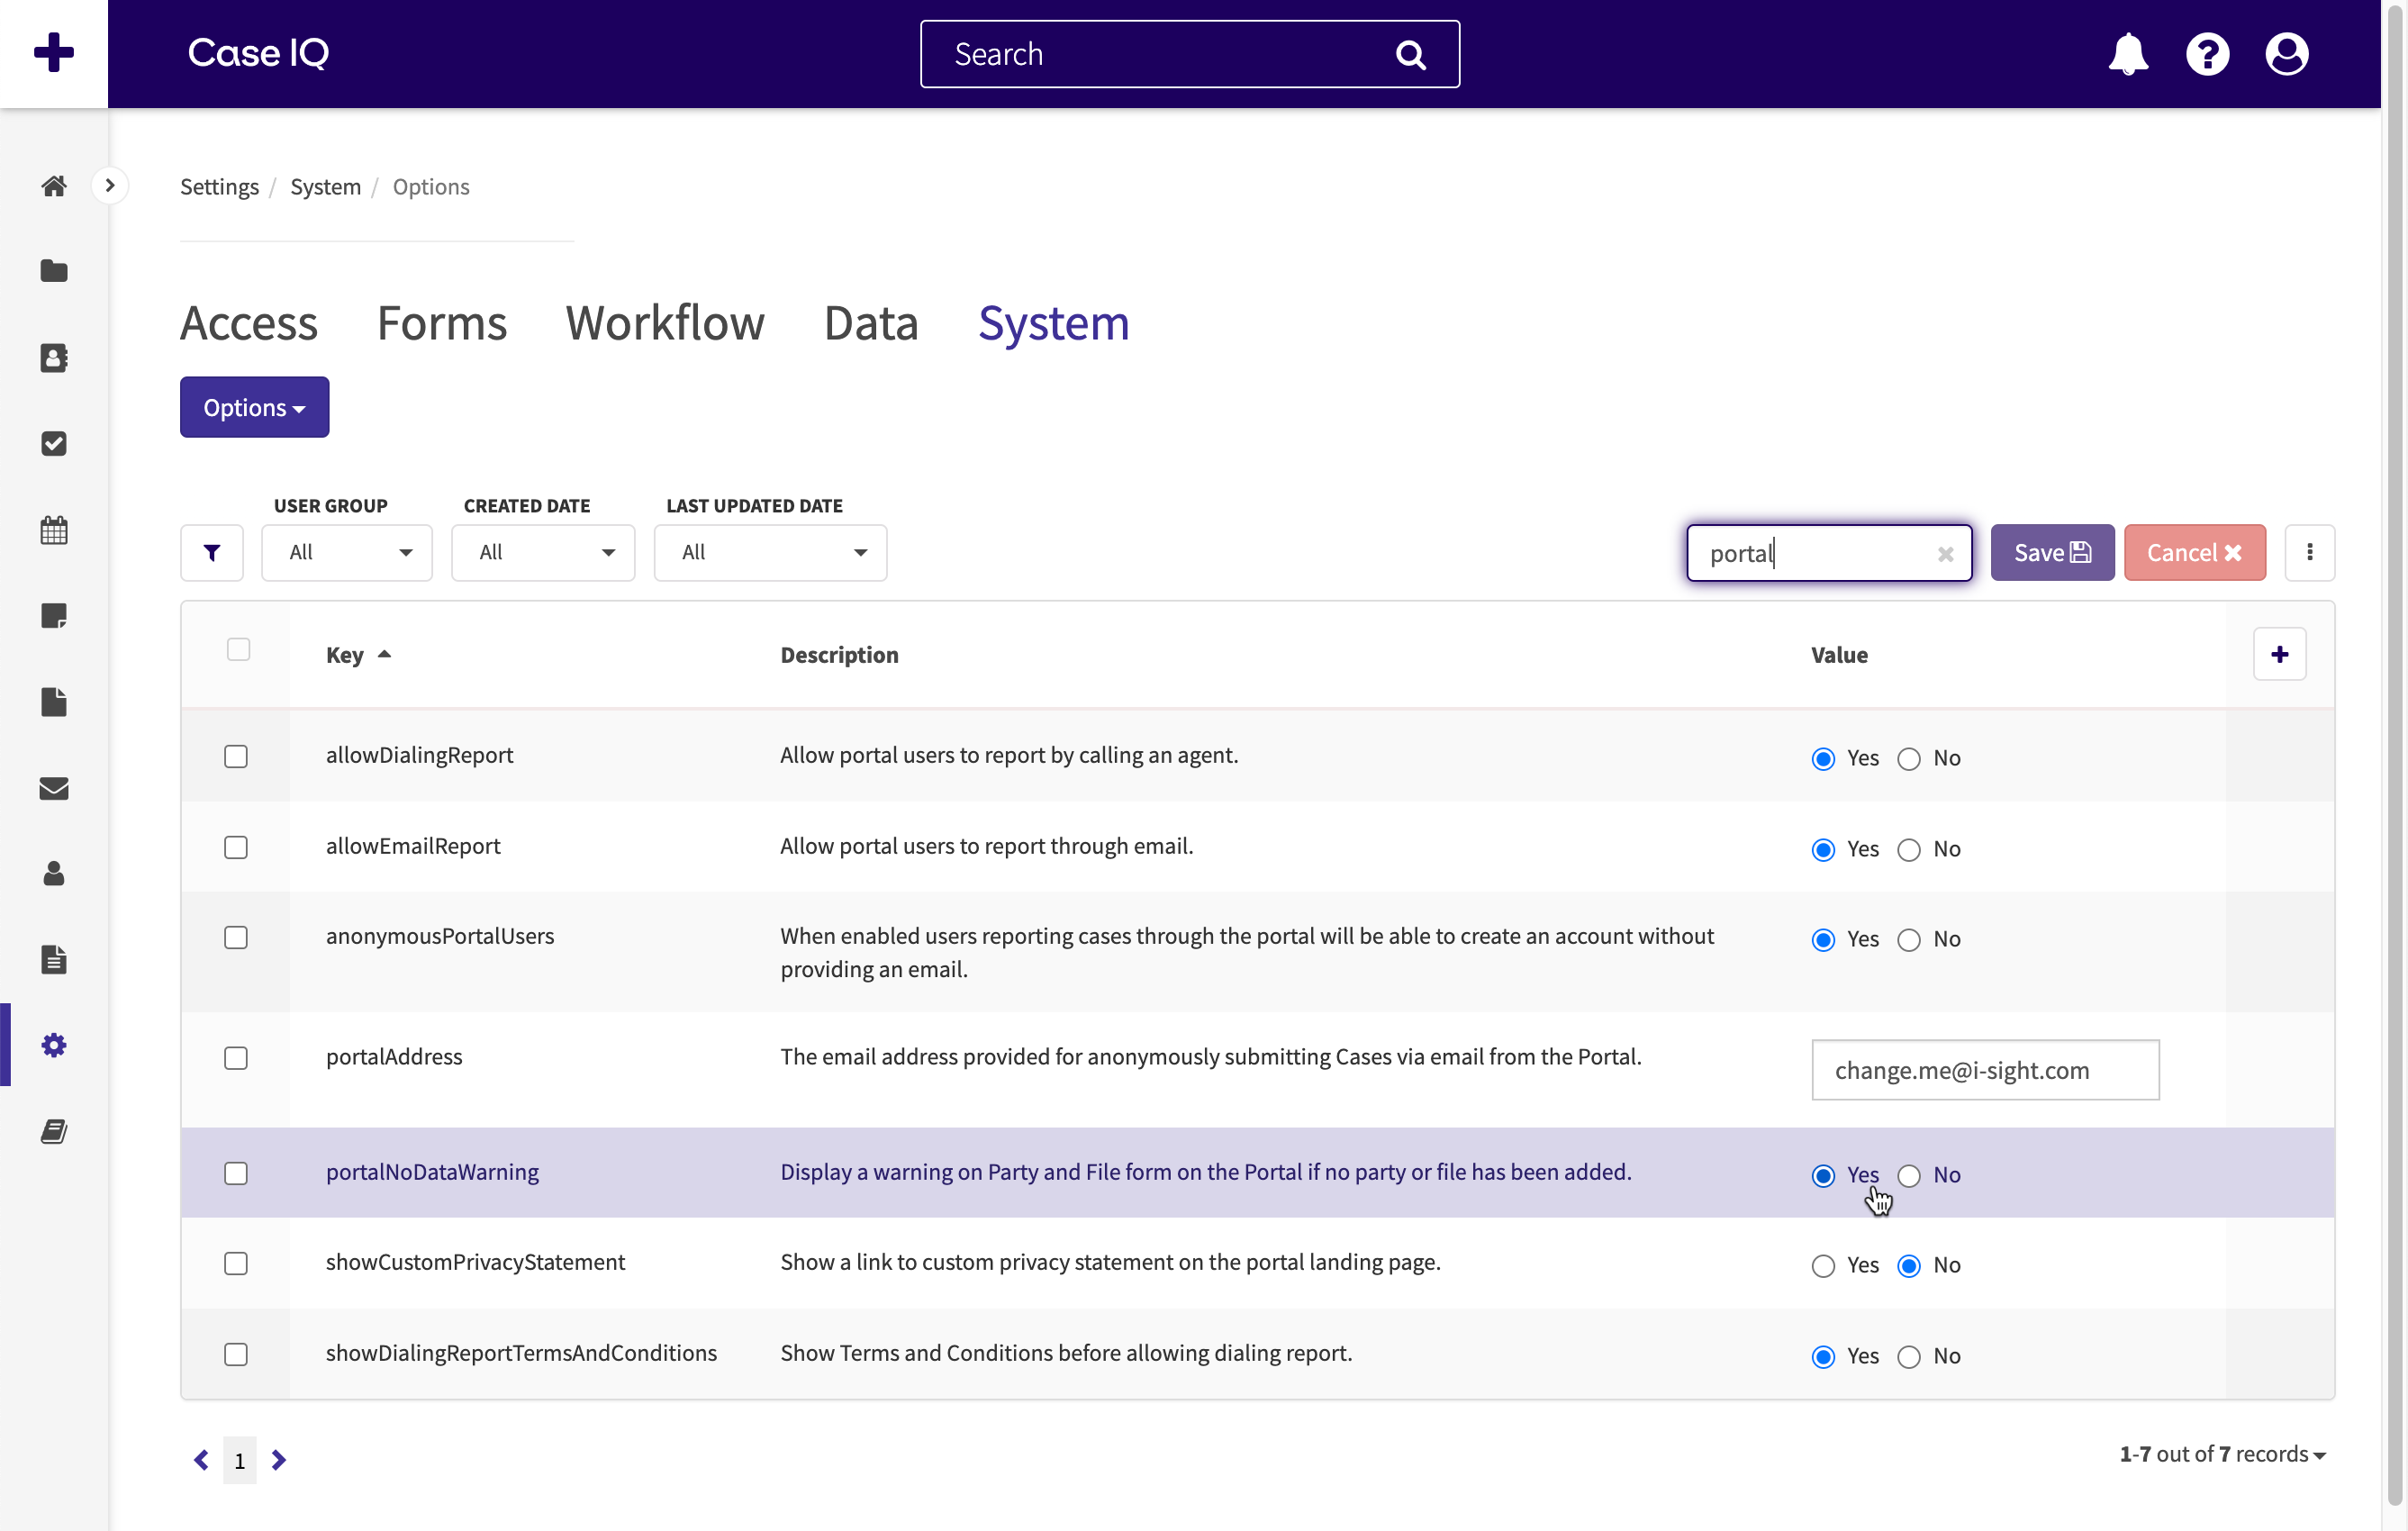
Remind Reporters to Add Parties and Files
portalNoDataWarning: choose if the portal should warn portal users if they have attempted to submit a case without adding a party or file record.
Two-Way Portal Settings
A two-way portal allows a case's reporter and investigator to communicate after the case was submitted. You can configure additional settings for a two-way portal to manage anonymous reporting and access to child records.
External Account Management
System administrators do not need to manage external accounts, as Case IQ automatically handles external account management. External accounts:
- Do not appear on the User Profiles page, nor will they be visible anywhere in the application. If the reporter chose to identify themselves, their information will appear in the “Reporter” party created for the case.
- Do not count towards an application’s user account limits.
- Will be automatically deactivated after a set number of days of inactivity (by default 90 days). If the reporter made their account using an email address, they will be notified in advance of their account’s deactivation.
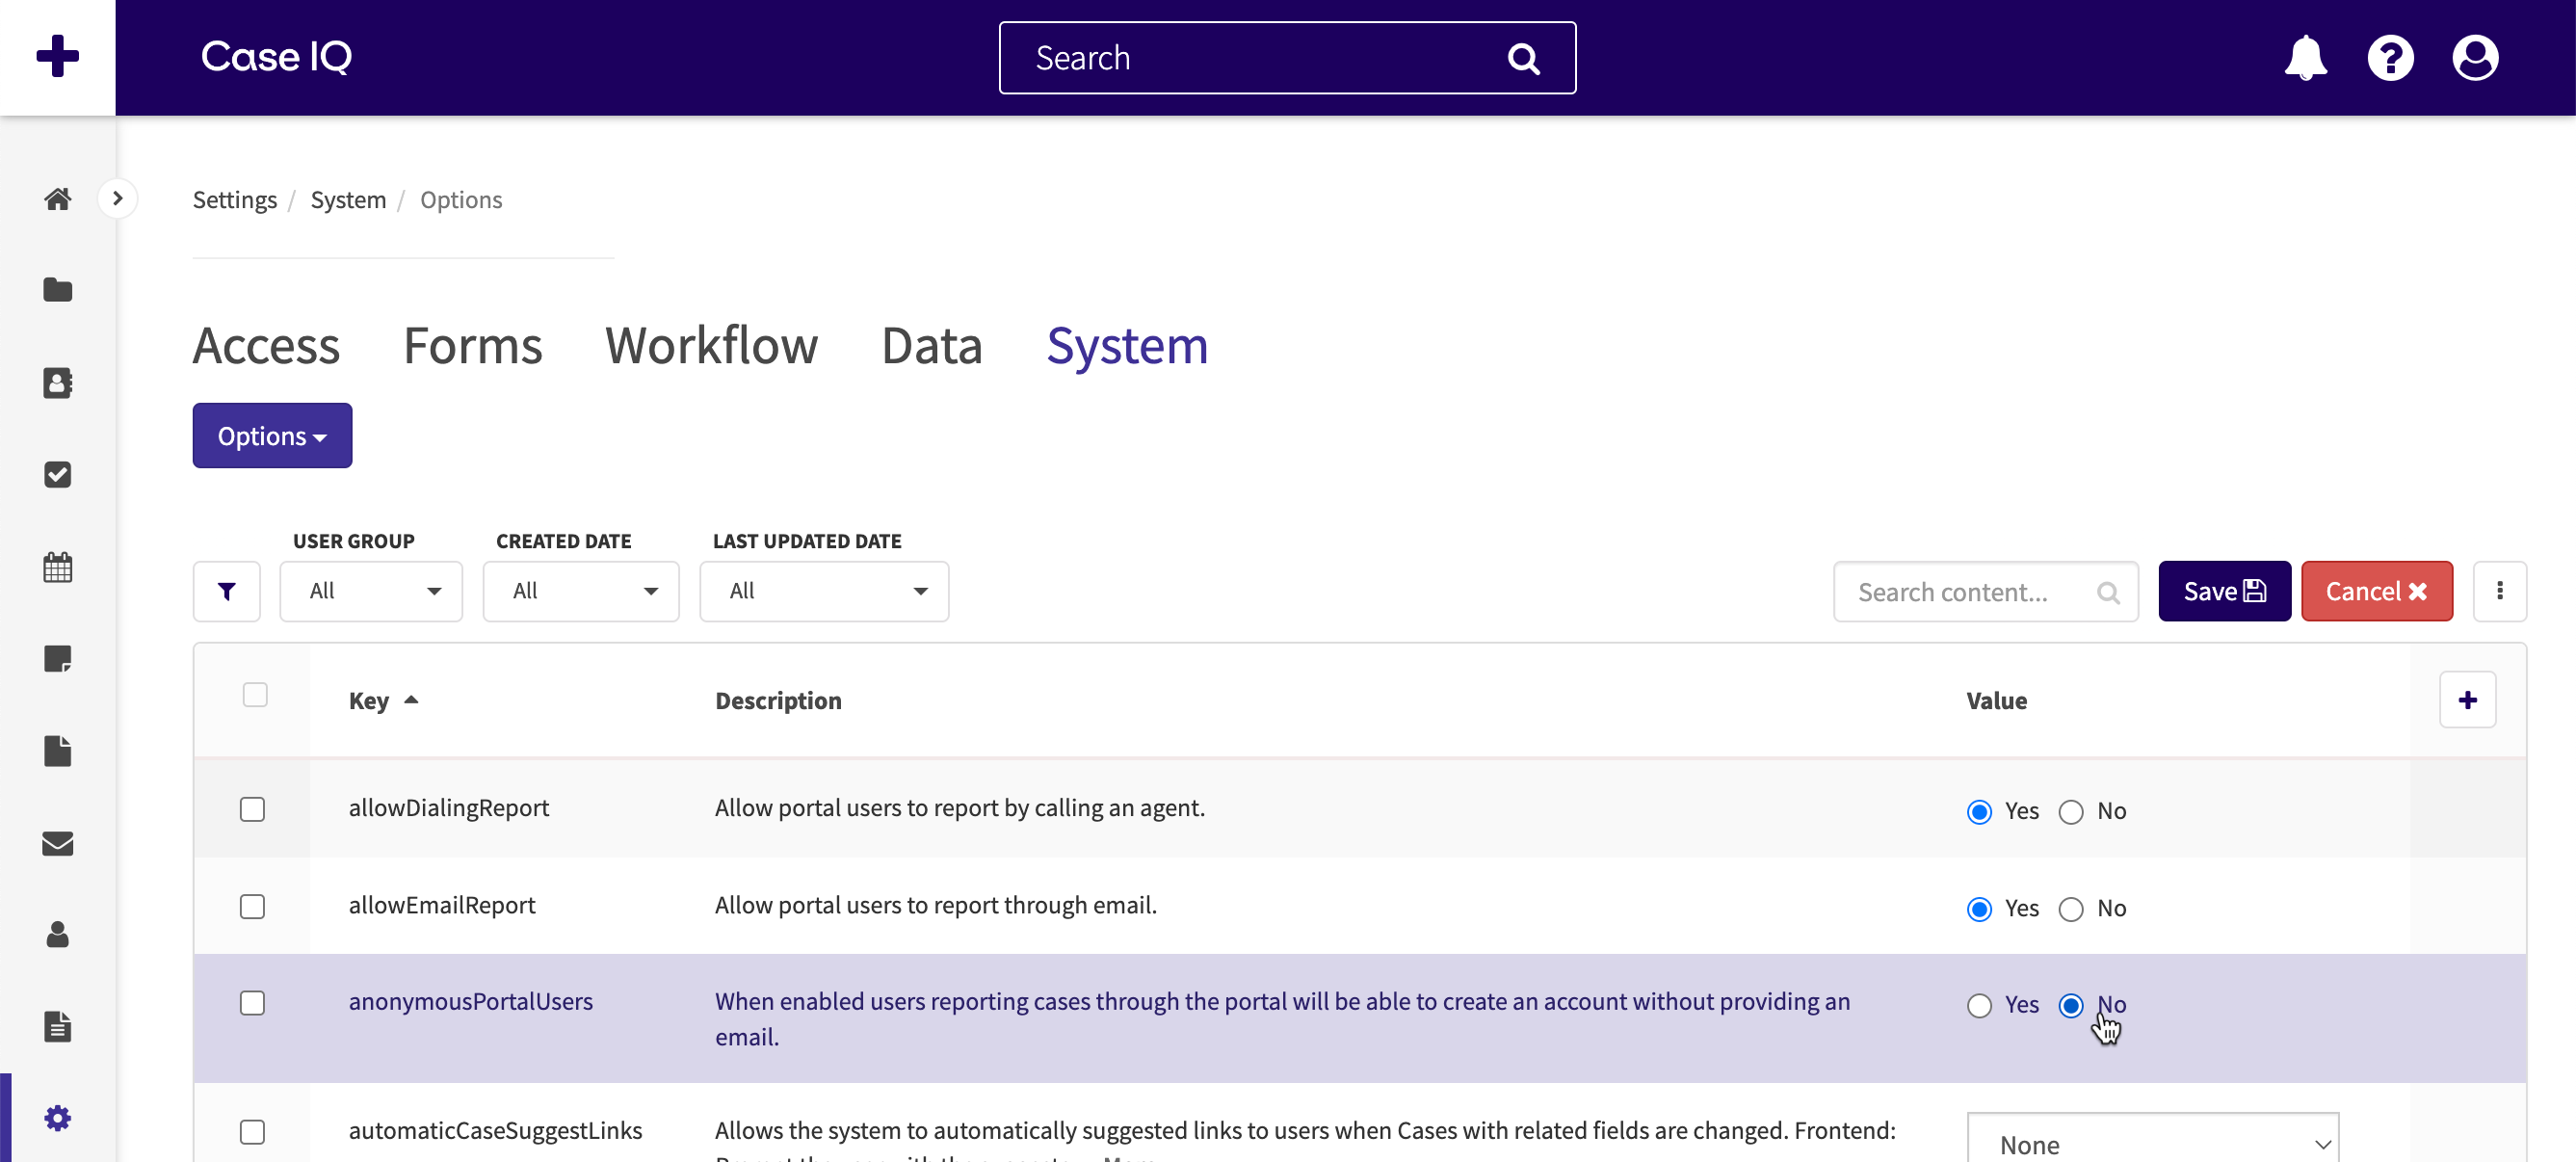
Allow or Disable Anonymous Reporting
You can choose to allow or restrict users from submitting cases anonymously via the portal. If this option is enabled, reporters will not be required to provide their name or email address in the Report Online form.
To enable or disable anonymous reporting, navigate to the Options page in Settings under the System tab. Then, search for the “anonymousPortalUsers" option in the grid, select “Yes" or “No” to enable or disable anonymous reporting respectively, and click Save. By default, “anonymousPortalUsers" will be set to “Yes”.
Allow External Access to Child Records
After a reporter submits a case via the portal, your investigators will pick up the case and document their findings by updating and adding child records for the case, like notes, parties, and files. You can allow investigators to make those child records available to the reporter, so they can request more information from a reporter after submission and keep all relevant documentation in Case IQ.
You can allow investigators to provide access to the child records of cases submitted by the portal with user role permissions. Use the following steps to grant permission to this option:
- Navigate to the User Roles page in Settings under the Access tab.
- Select an existing user role in the page grid.
- Click the Edit button.
- Select the “Set Reporter Access” permission option for each record type to which the role should be able to grant access to external users. “Set Reporter Access” is available in the “Edit” sections of the Files, Notes, and Parties permissions.
- Click the Save button.
Users with the user role to which you gave “Set Reporter Access” will now see the “Allow Reporter Access” checkbox on an external case's parties, files, and notes forms.
