Use the Views Page
Create quick reports in Case IQ on the Views page. A “view” is a grid's filter and column settings that show a specific data set. The default view when you first load the Views Page shows all open cases where you are the case owner. Access the Views page by clicking the “Views” sidebar tab. The main elements on the Views page are numbered in the screenshot below and descriptions are provided following the image.
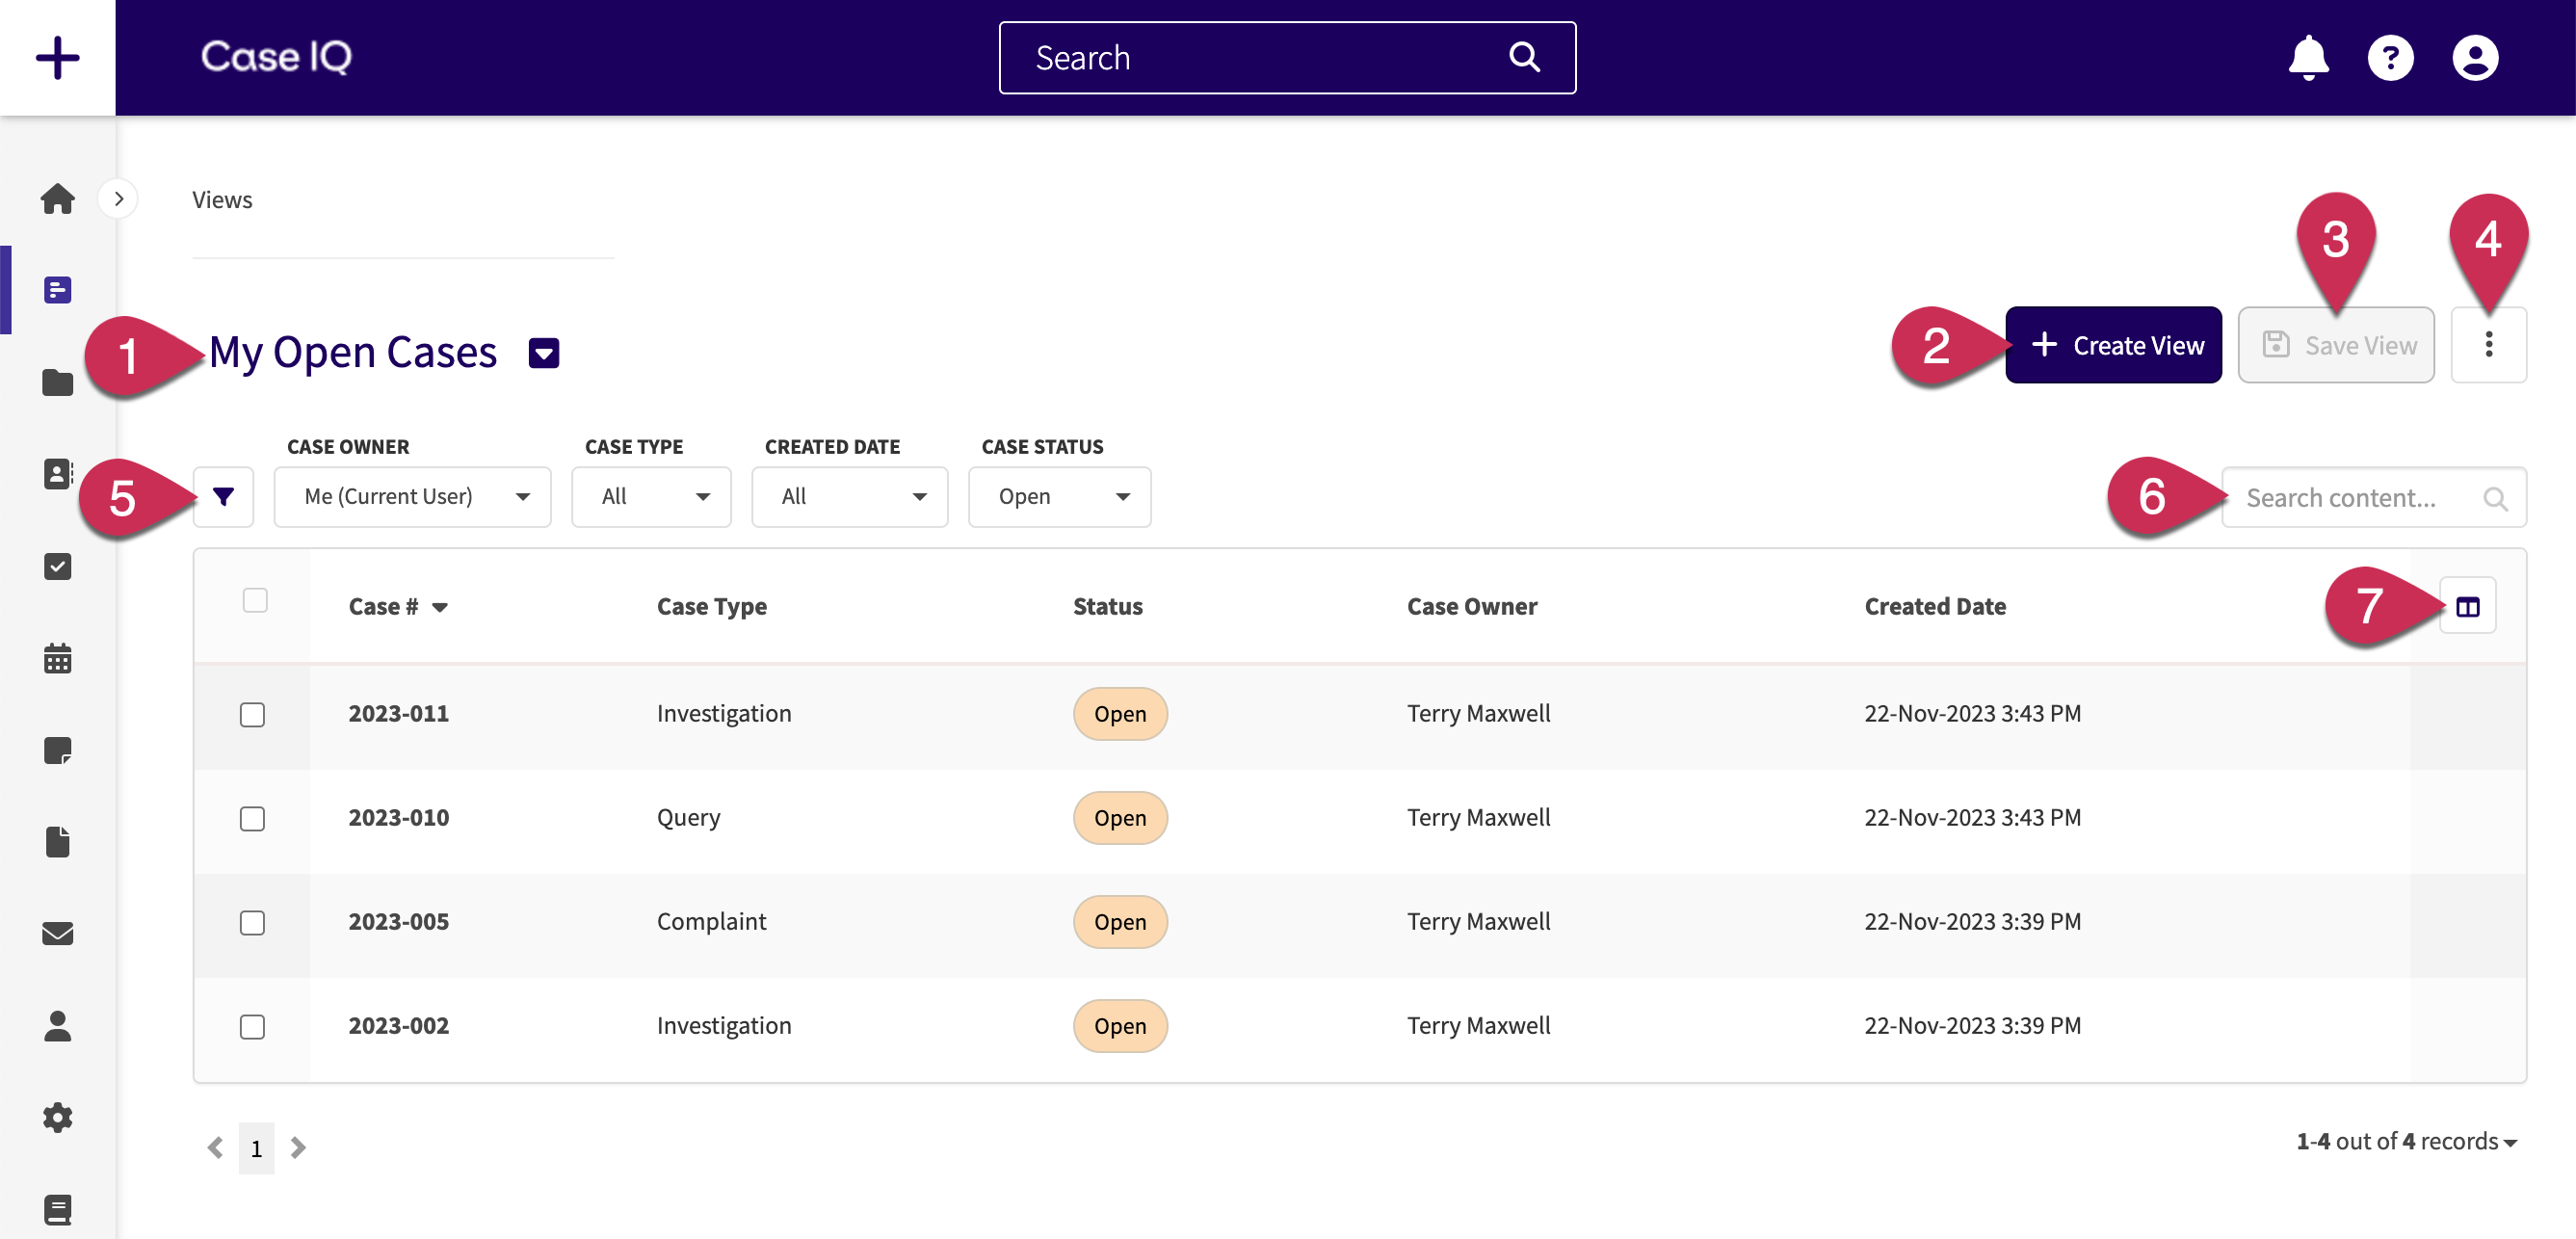
- View Name: click to see a list of your saved views. You can select a view from this list to show on the Views page. The last view you selected will be loaded the next time you access the Views page.
- Create View button: start building a view from scratch (see Create a View).
- Save View button: after changing the filters or columns, click Save View to save your current configuration as a new view (see Save and Edit a View).
-
Options button (
 ): see more options for a view, including export and delete (see Export a View and Delete a View).
 - Filter menu: click the Filter Menu button (
 ) to add filters to your view, just like any other grid (see Grids). The filter menu will include all case fields and you can select up to 20 filters to show at once. Remove filters by hovering over the filter name and clicking the “x”.
 - Search bar: search for keywords or phrases in the view data. Similar to quick searches (see Search in Case IQ), the results will be limited by the filters set for the grid. Case IQ will search for the text you input into the “Search content…” box in all record fields, including columns that are not currently displayed on the grid.
- Column menu: click the Column Menu (
 ) button to add or remove columns for your view, just like any other grid (see Grids). The column menu will include all case fields.
Create a View
You can add filters and columns to show data in the Views grid. To start building a view from an empty grid, click the Create View button.
Add columns by clicking the Column Menu () button and selecting fields in the column menu. You can remove columns by unchecking fields. Click the Done button in the column menu when you have completed adding columns.
To add filters to the view, click the Filter Menu button (), select the fields in the filter menu, then click Done. Then, you can click the newly added filter and select a menu option. You can select up to 20 filters for the view. Remove filters by hovering over the filter name and clicking the “x”.
After adding filters and columns to the view, you can save them as a new view (see the next section, Save and Edit a View).
Save and Edit a View
After you select filters and columns on the Views page, click the Save View button to save your current column and filter configurations for later. Enter a name for the view, then click the Yes, Save View button.
To edit an existing view, select the view, change the filter and columns as needed, and click Save View. You can also save your current filters and columns as a new view without updating the original view by clicking the Options button () and selecting the “Save as…” option.
Export a View
You can export your current view of data as a .xlsx or .csv file using the following steps.
- Click the Options button () and select “Export”.
- The Export pop-up contains the following options to select the data to export.
- File type: choose the file type in which you want the data to be exported. You can select .xlsx or .csv.
- Filters: select the records to include in your .xlsx or .csv file. Choose from the following options.
- All: the export will include all records in the grid, meaning it will not be filtered.
- Current filter: only records in the view's current filters will be exported. “Current filter” will be selected by default.
- Current page: all records displayed on the grid page will be exported.
- Selected: only the records you select using the row's checkboxes will be included in the export.
- Column dropdown: choose the data columns to export.
- All Columns: export all of the data for the records you have selected, including columns that are not currently visible for your view.
- Current columns: only the columns displayed in your current view will be exported. "Current columns” will be selected by default.
- Format: choose whether to format the data in the exported file. If you check the “Formatted” checkbox, any user fields will display their full name and date fields will be in the following time format: “YYYY-MM-DD 00:00 AM/PM”. If you choose not to format the .xlsx or .csv file, any user fields will display the raw full name (i.e. alphanumeric user ID) and the unformatted date and time values.
- Click the Export button. Your browser will begin downloading the file.
Delete a View
To permanently remove a view, click the Options button () and select the “Delete view” option.
FAQ
What data can I see in views?
Only case data is available in views. You can add any case field to a view or filter by any case field.
DeleteCan I filter for multiple workflow statuses?
You can filter your view to see cases in one of many workflow statuses. Add the "Last Workflow Status" filter to your view and select the statuses by which to filter cases. You will now see cases in any of the workflow statuses you selected. In the example below, we filtered the view to show cases in either "Triage" or "Refer to other department" status.
Delete