Create a Dashboard
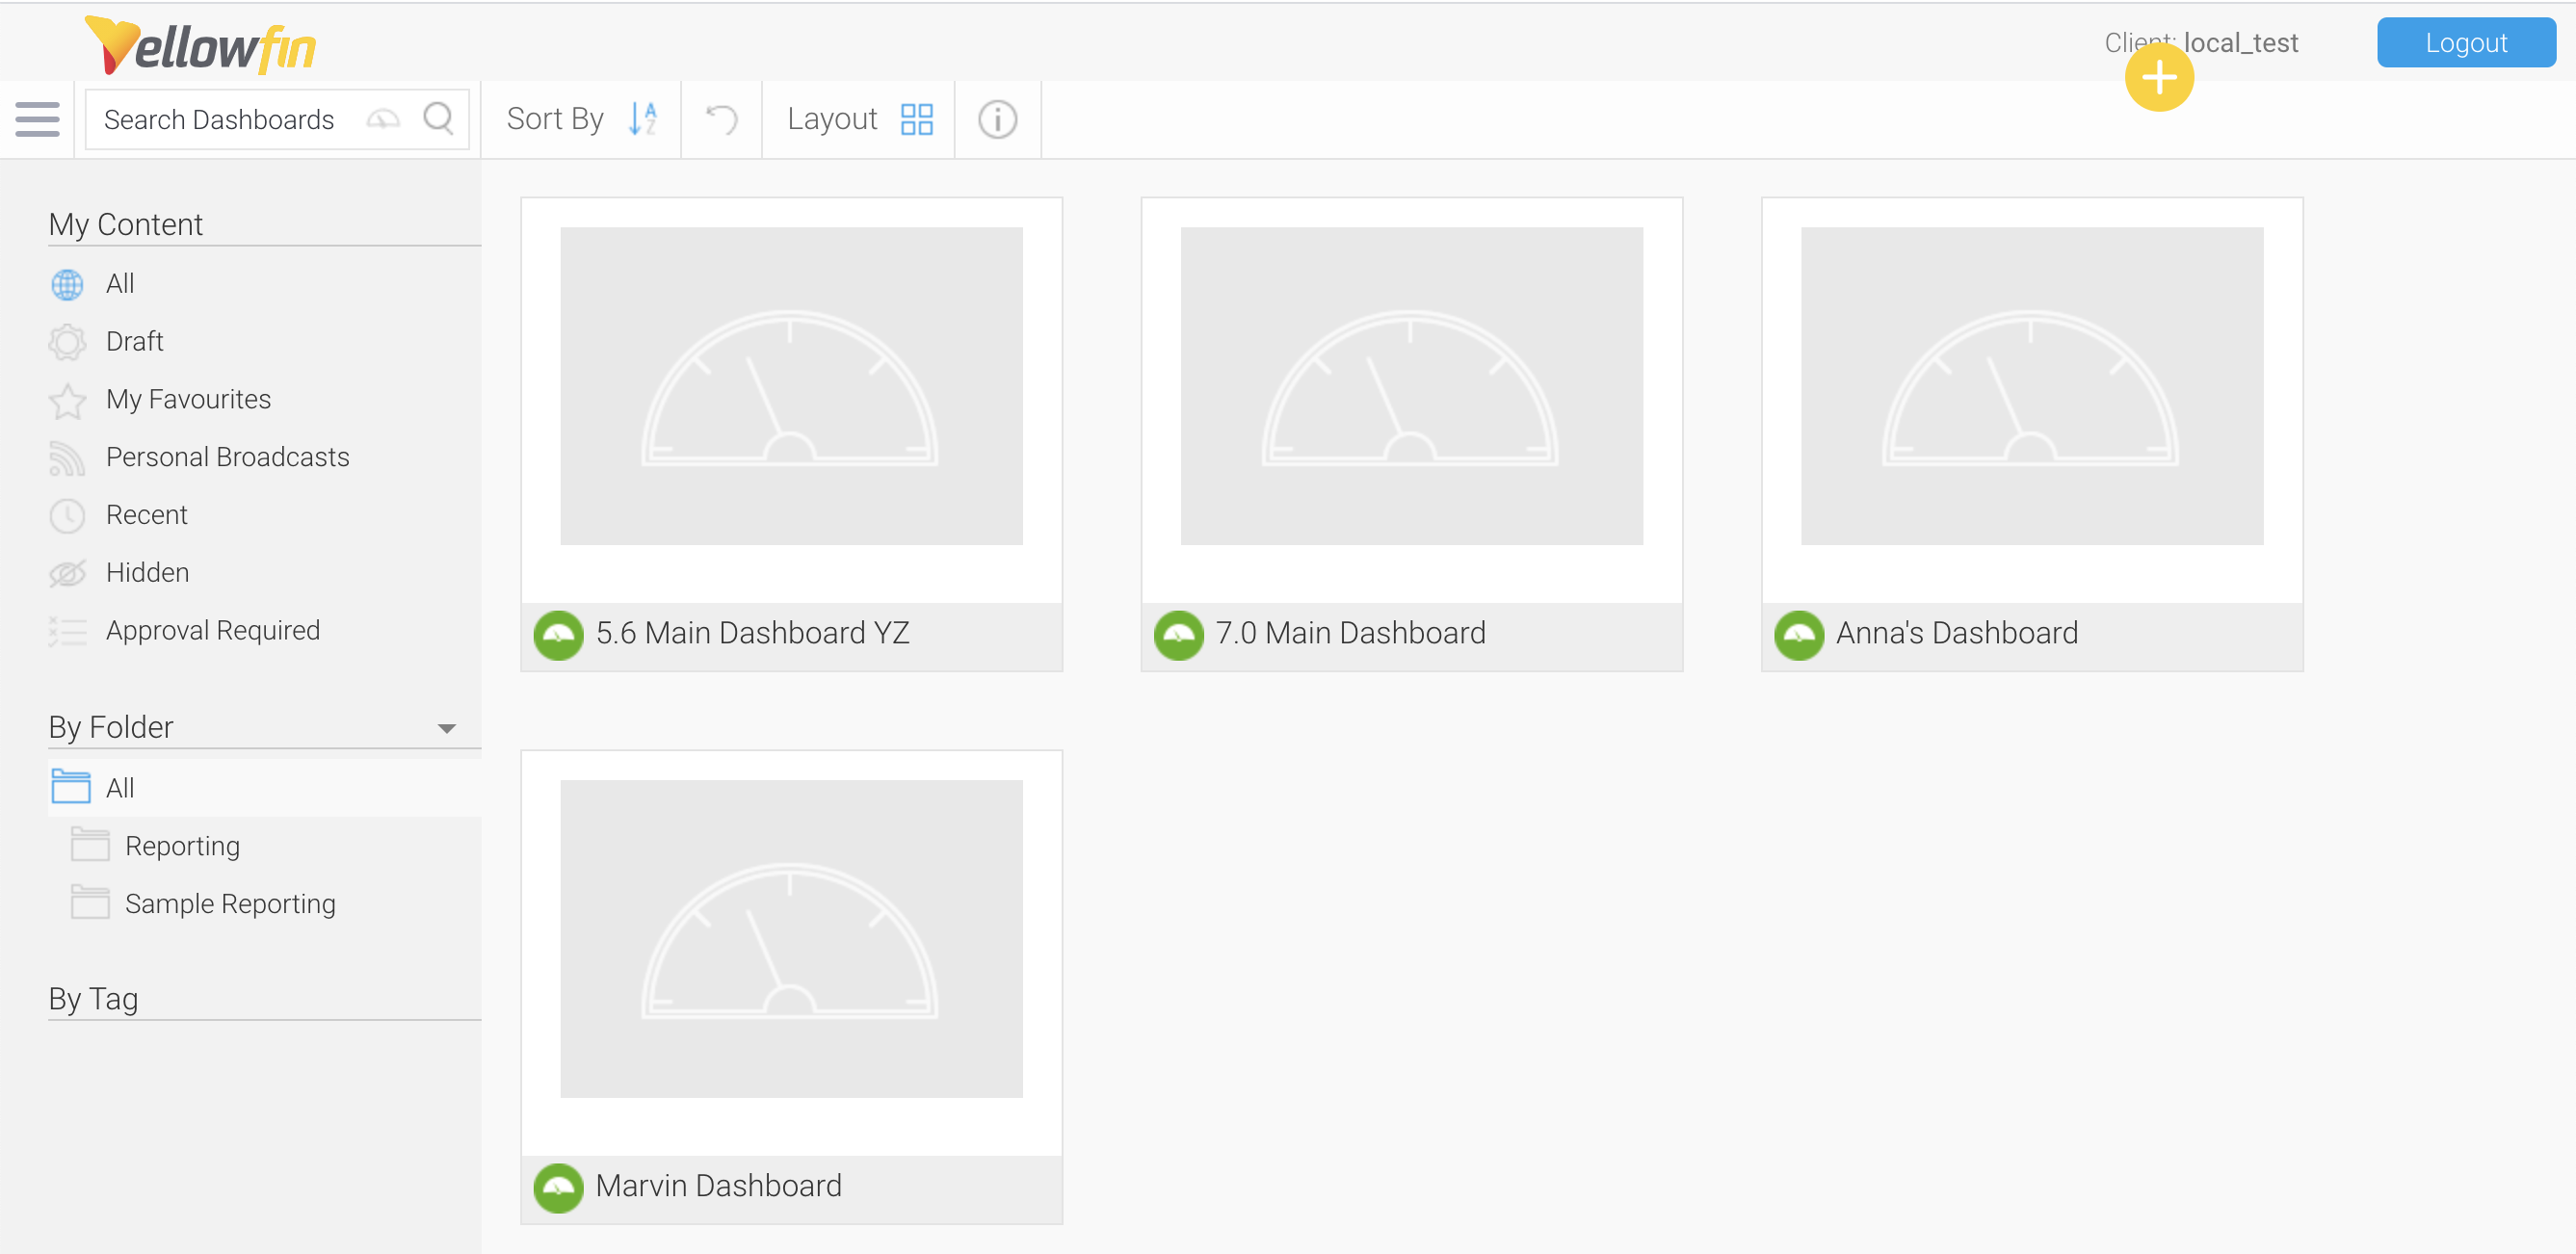
A dashboard is a container of reports and other visuals, such as charts or graphs, to provide a summary of metrics at a quick glance. Dashboards are usually shown on the Yellowfin Home page, which is your personal landing page when you log in to Yellowfin from Case IQ. When you log in to Yellowfin for the first time, your dashboard will likely be empty, as shown in the screenshot below. You can add existing dashboards to your dashboard list or create your own dashboard.

Create a Dashboard
To make your own dashboard in Yellowfin:
- Click the Plus button on the landing page and click Dashboard.
- Enter a name for the dashboard. You may also choose a layout template and a default data set.
- Click the Create button. The Dashboard Builder will be loaded.
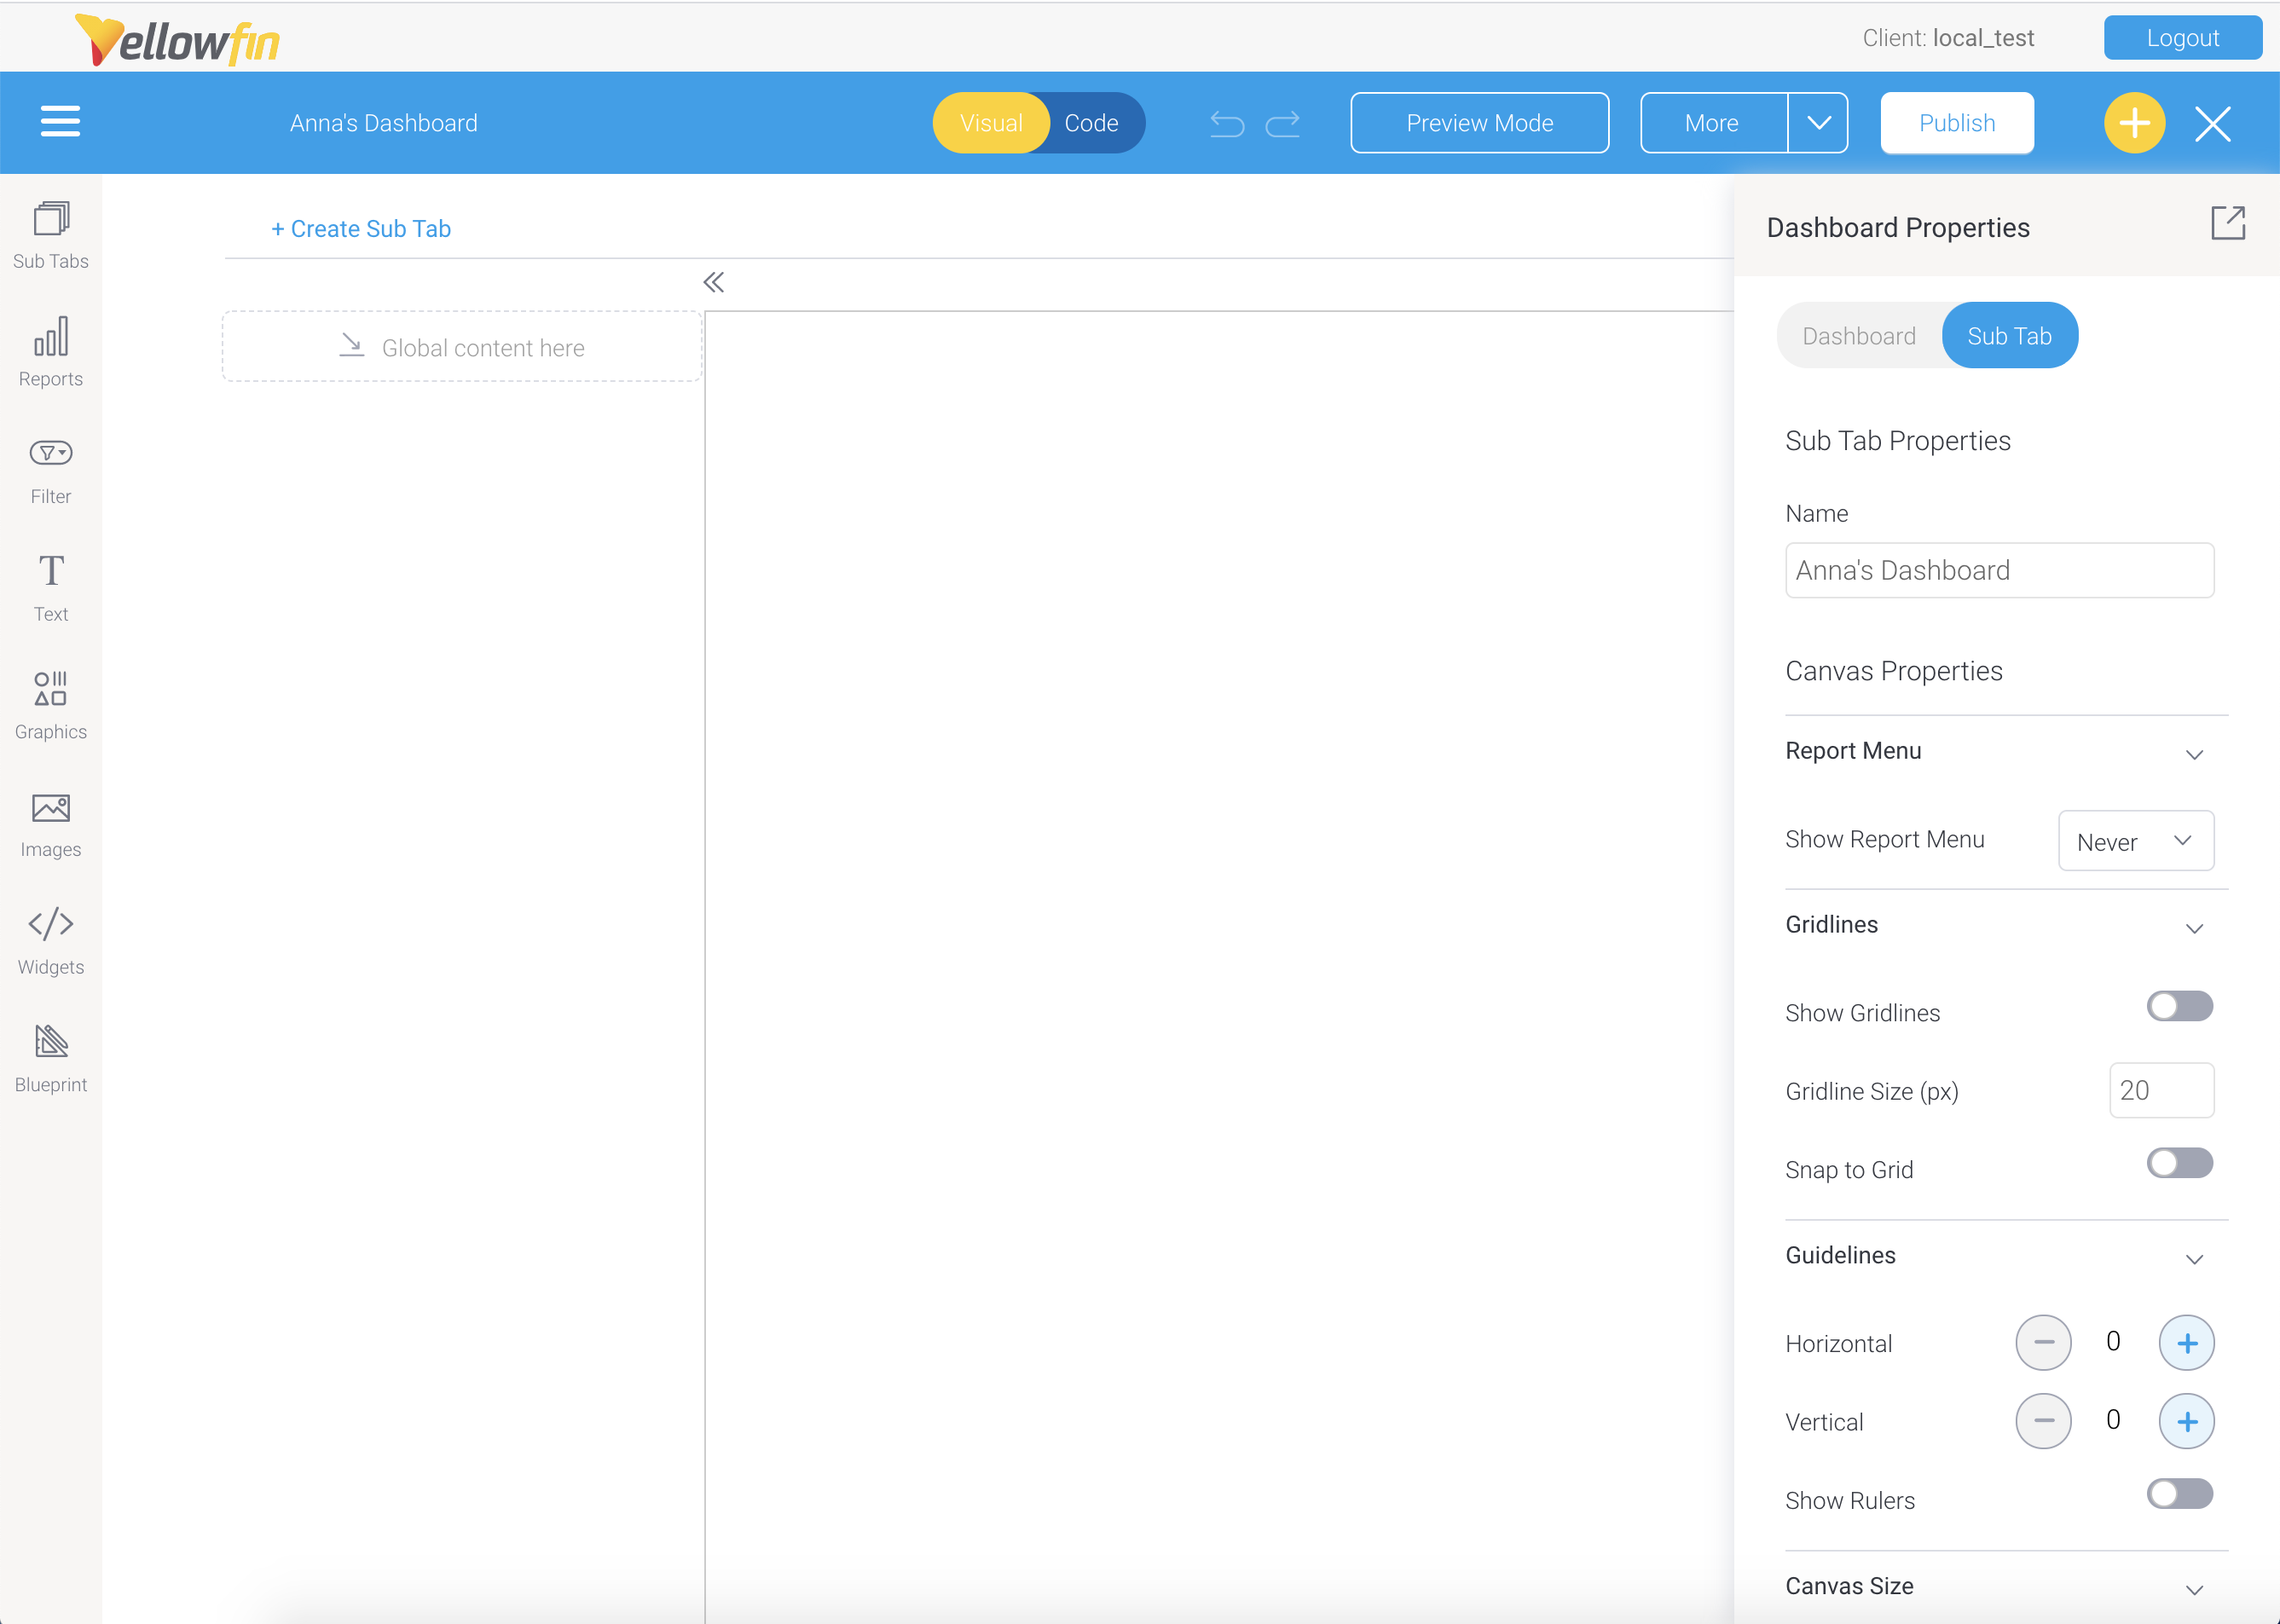
- You can add the following elements to your dashboard by drag and drop them from the sidebar.
- Sub-tabs: organize reports into sub-tabs by theme.
- Reports: search through a list of all available reports on the Browse page to add to a dashboard tab.
- When you add a report to a dashboard tab, you are adding the report's URL. The report itself will remain on the Report Browse page. When you run a report on a dashboard, Yellowfin will use the report’s URL to execute the actual report on the Browse page.
- Filters: add a data filter so users can narrow the scope of the report. You can add filters for either:
- An individual report on a dashboard tab.
- The entire dashboard tab, called a "universal filter". Before adding a universal filter, make sure all reports on the dashboard tab have at least one common User Prompt filter to link all the reports. A user will only need to enter one set of values on the universal filter when they view the dashboard, which will be fed through the linked reports.
- Widgets: see additional widgets available for your Yellowfin application.
- If you need to delete a report or another dashboard element from your dashboard, click the dashboard element. There will be four icons that appear around the report, labelled in the screenshot and described below:
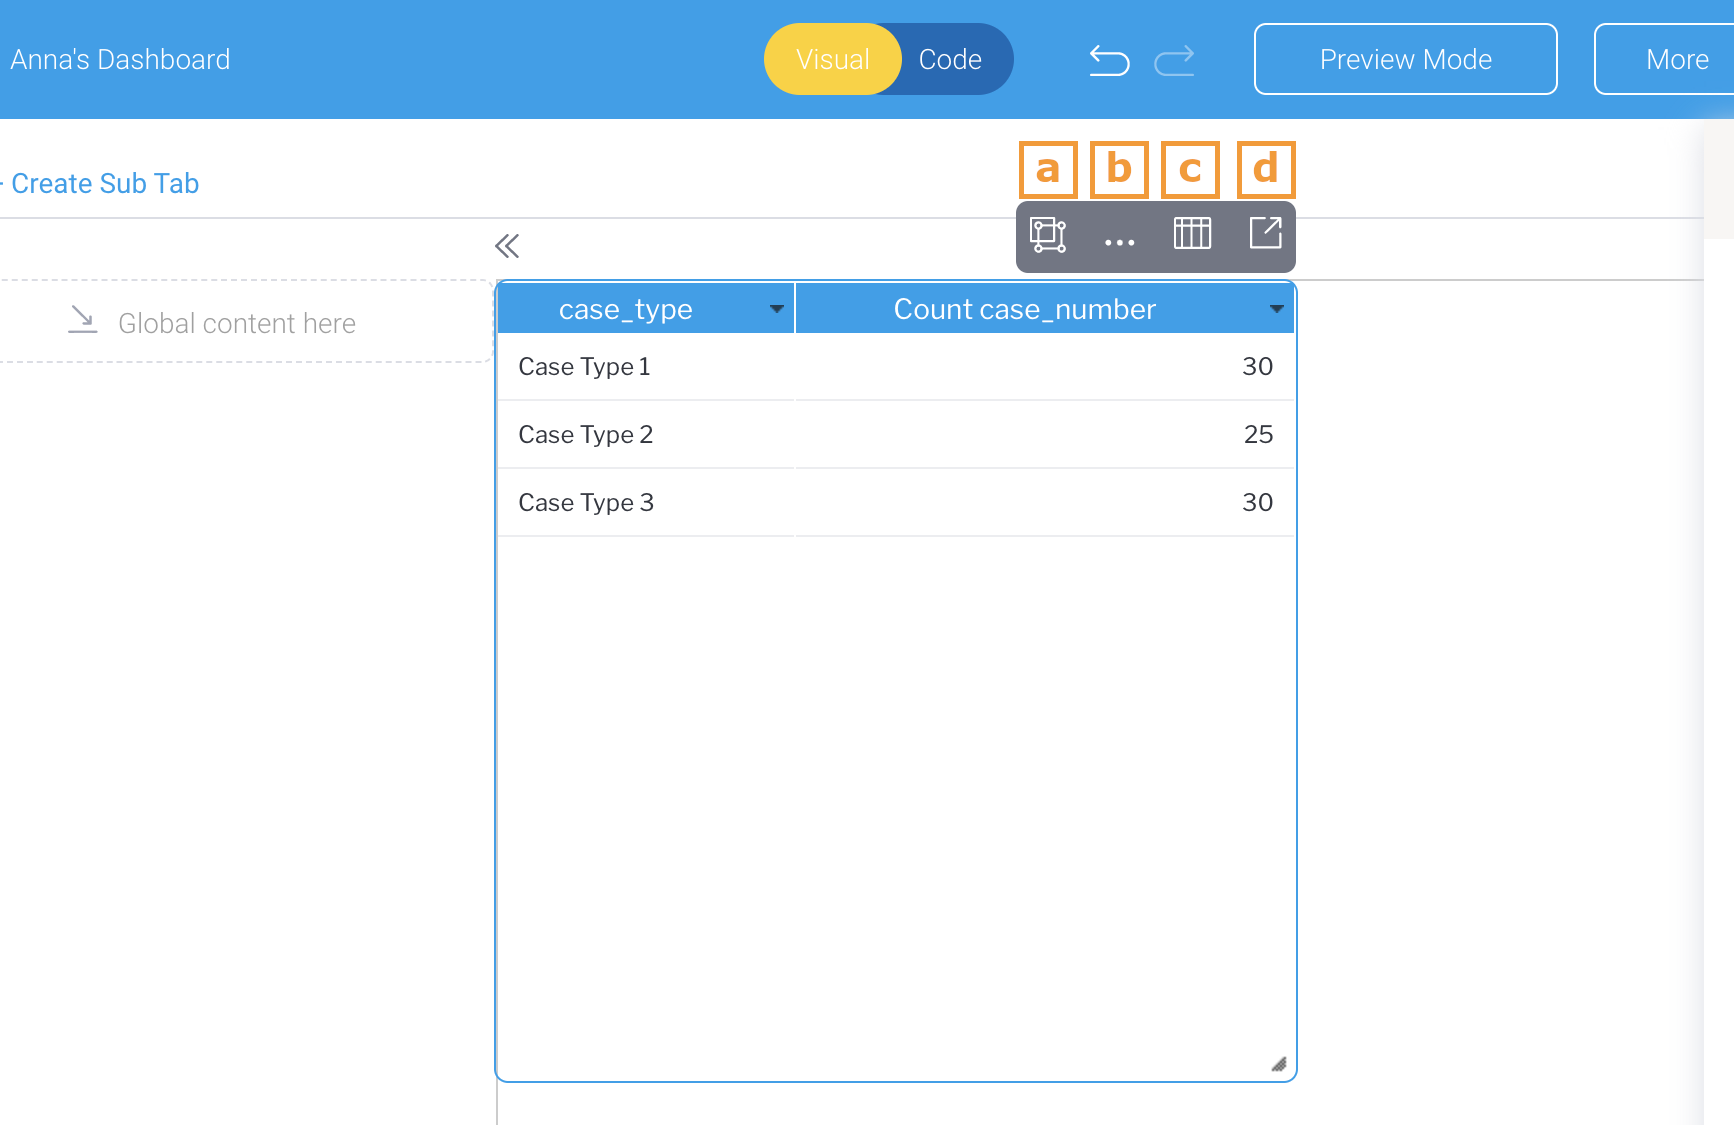
- Options: includes options to copy, paste, branch, edit align, duplicate, arrange, and delete the report. Selecting “Edit” will navigate you to the full report page.
- More options: includes export, share, and information options.
- Report View: toggle between displaying the report’s table and chart, if applicable.
- Open: load the full report.
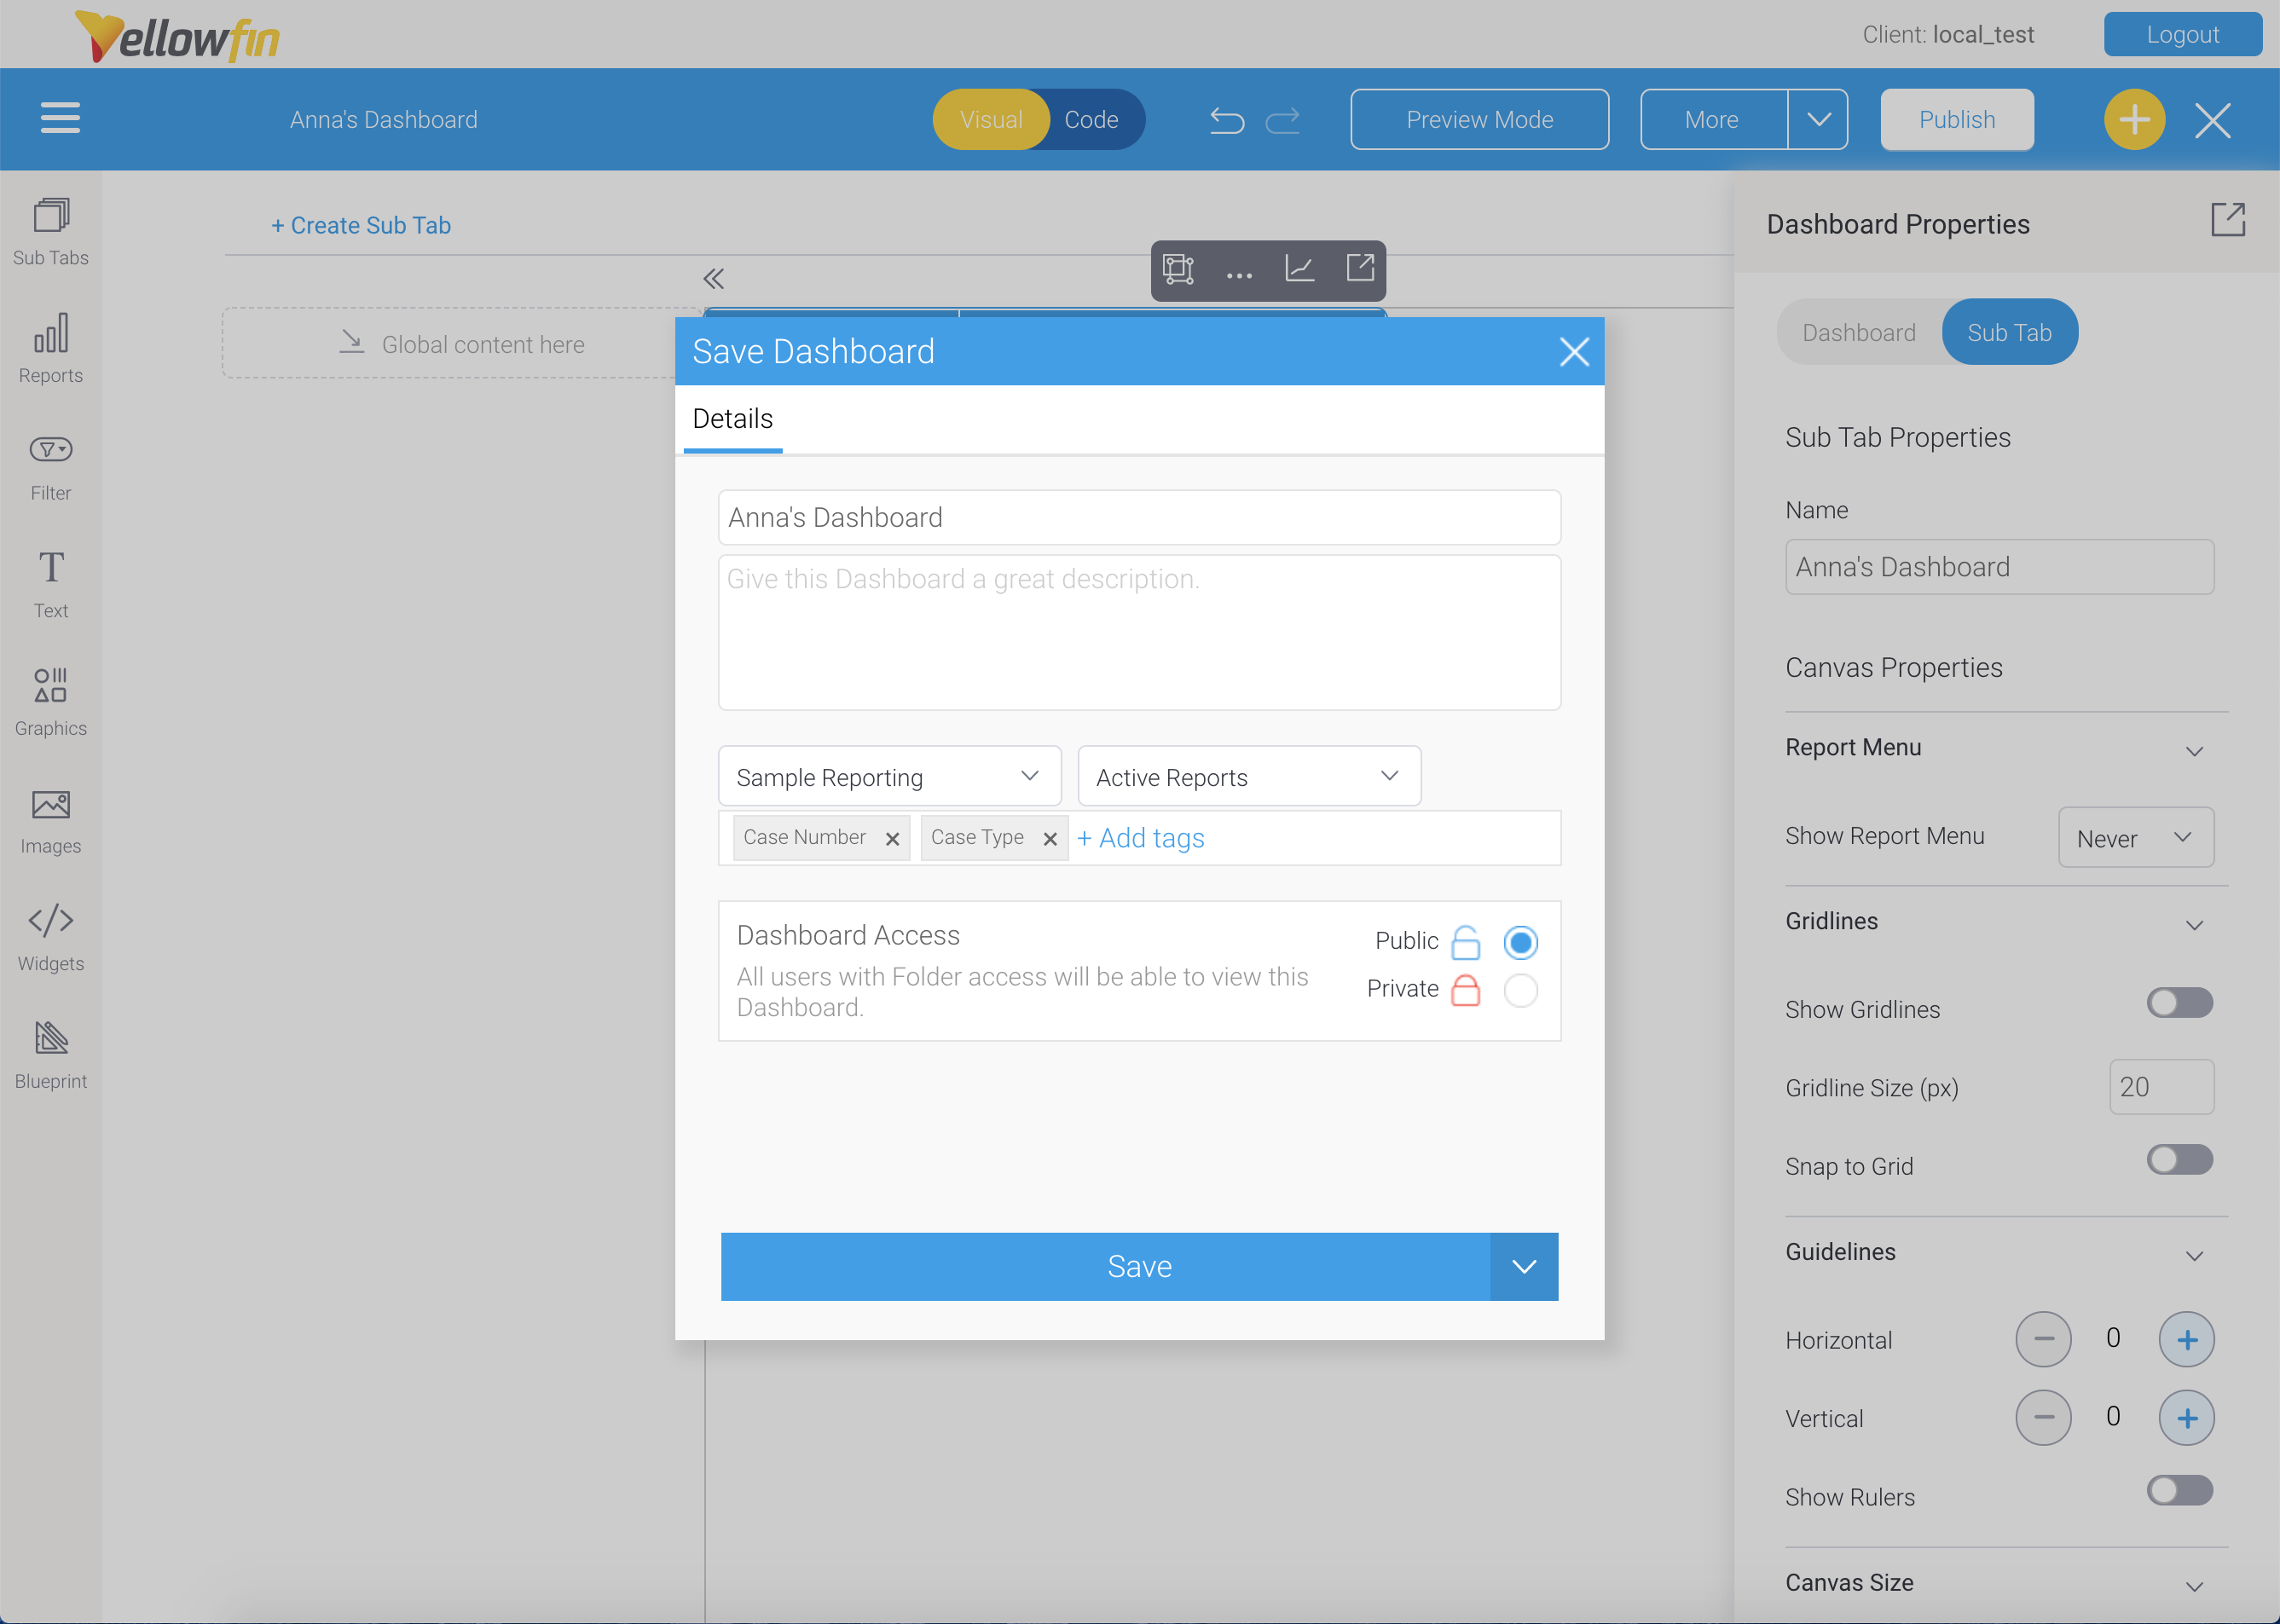
- When you have completed setting up your dashboard, click the Publish button to save and activate the dashboard tab. In the Save Dashboard pop-up, you can edit the name of the dashboard, add a description, add keyword search tags, and set who can access the dashboard. You can save the dashboard in one of the following access modes:
- Public: the dashboard tab will be accessible for all users of your Yellowfin application, meaning other users can add your dashboard to their list.
- Private: the dashboard tab will only be visible and accessible to you and the users you specify on the dashboard’s User Access tab. The User Access tab will be displayed when you save the dashboard tab in Private mode.
- After saving the dashboard, you can use the Share button at the top right of the dashboard tab to share the dashboard’s URL to other Yellowfin users. Dashboard tabs are not shared via email, so the recipients must be able to log in to your Yellowfin application to see the shared dashboard tab on their personal Yellowfin landing page.
- Just like reports, dashboard tabs are stored on the Browse page. When you share a dashboard tab, you are sharing the dashboard's URL. Yellowfin will use the dashboard's URL to execute the dashboard's reports on the Browse page.
Add a Dashboard to your “My Dashboard” List
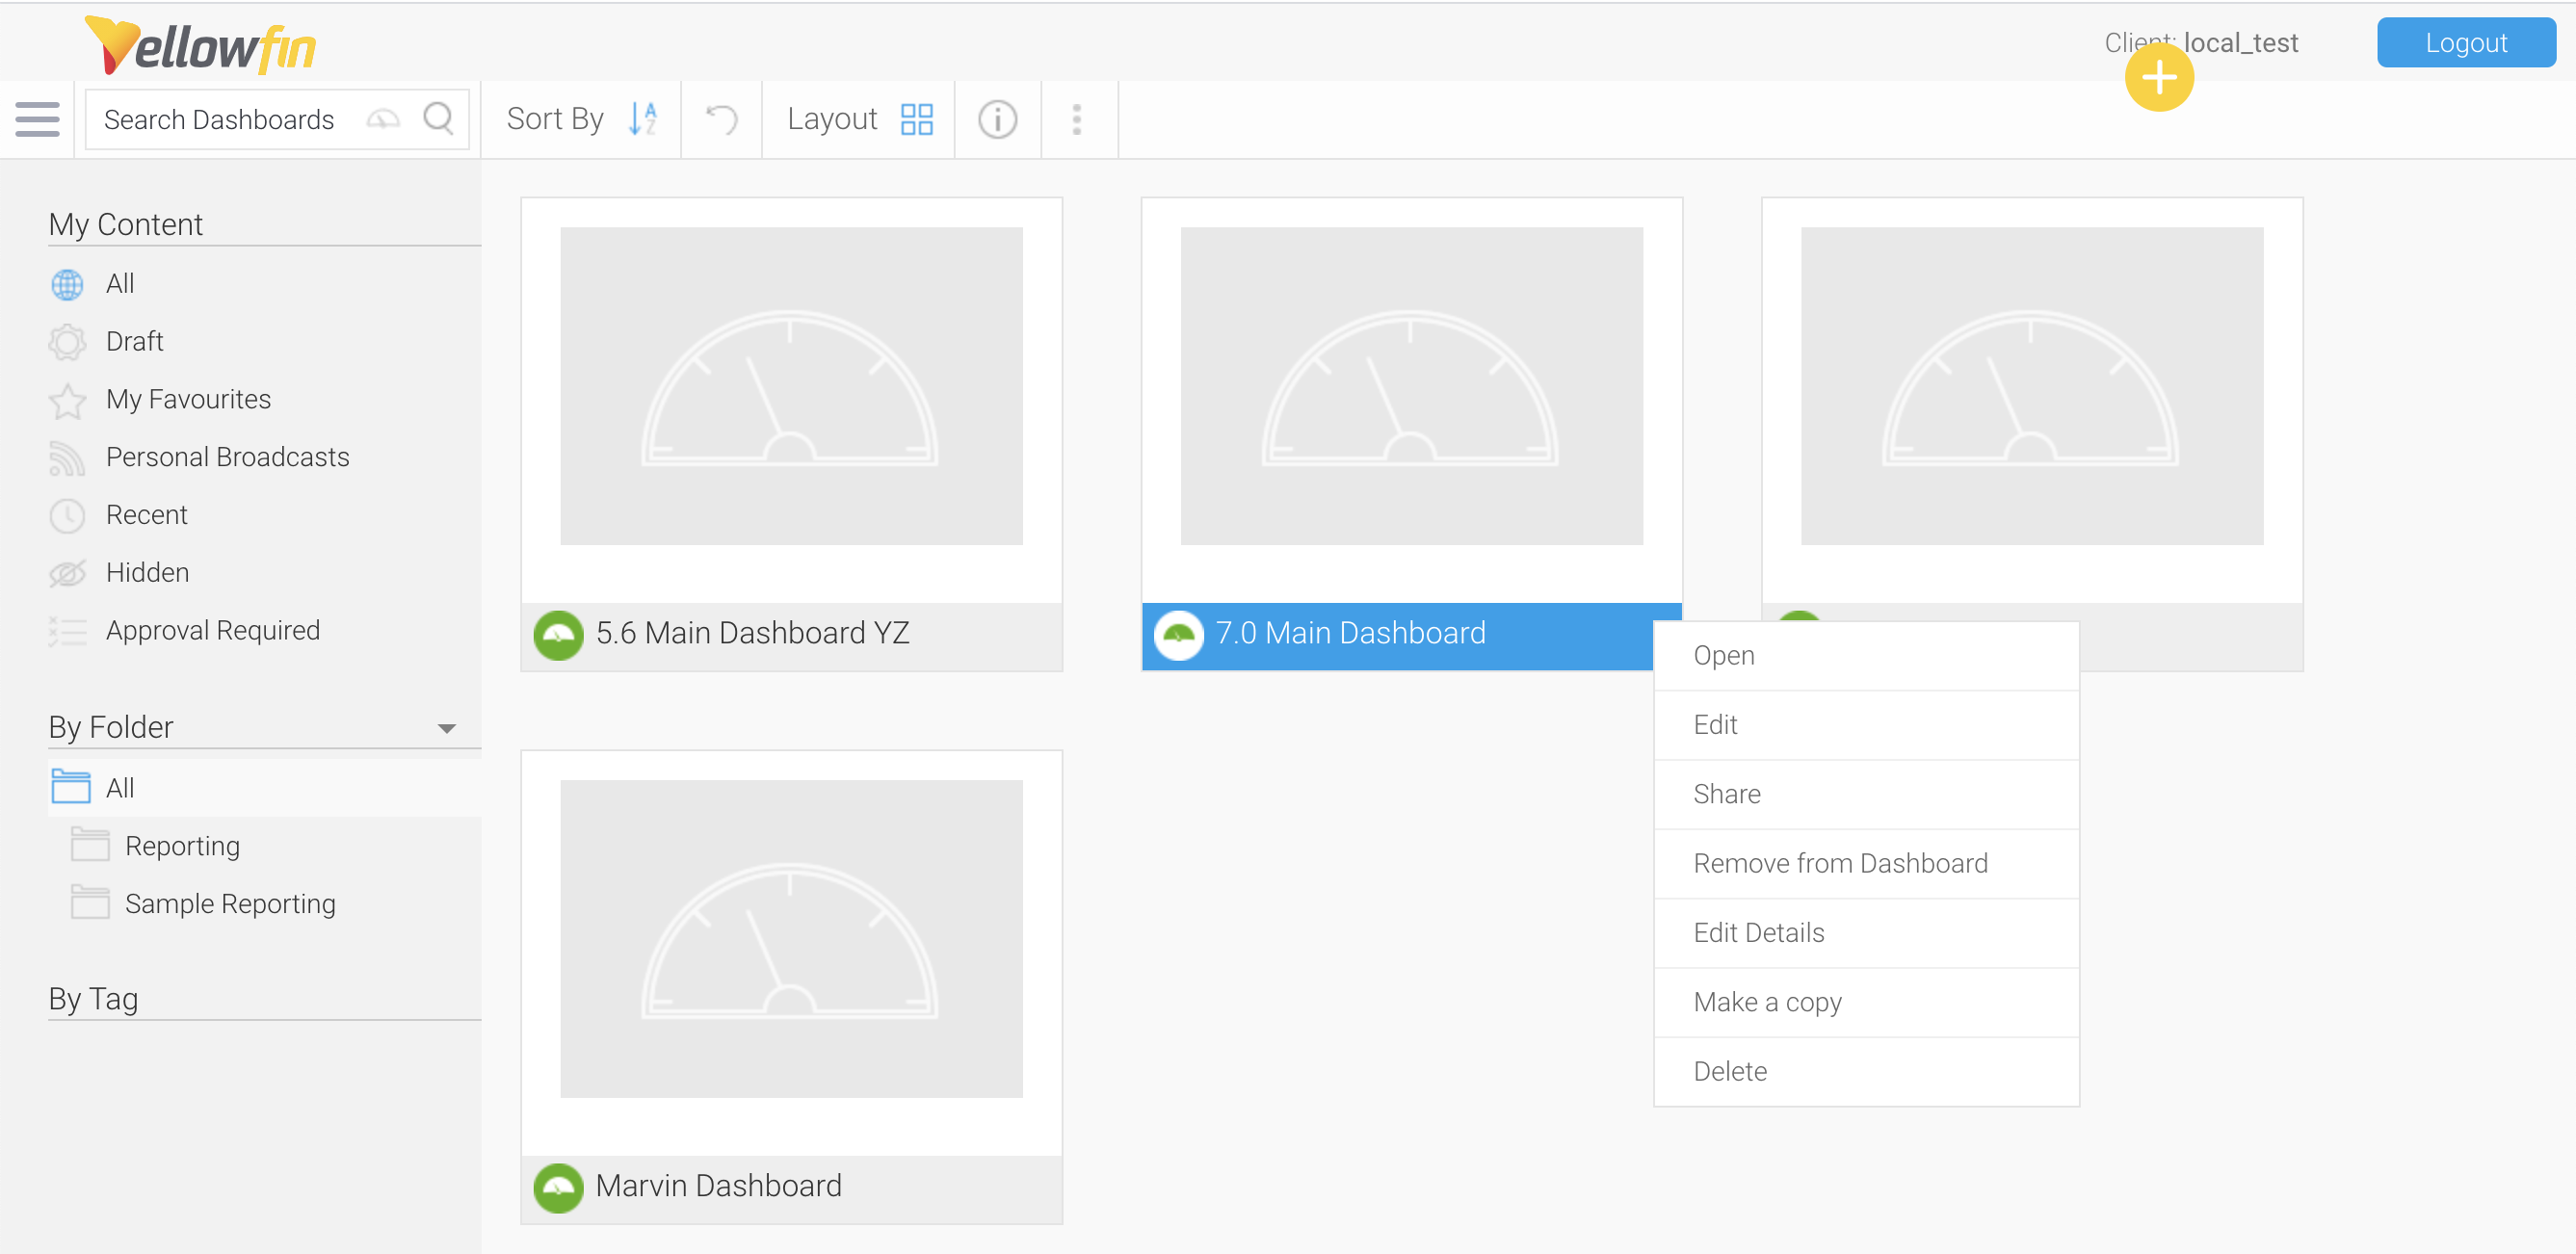
If you want to see the dashboard tabs currently displayed on your personal landing page, open the Menu sidebar and click “My Dashboards”. You can also check out the existing dashboards created by other users of your Yellowfin application by opening the Menu sidebar, expanding the Browse section, and then selecting “Dashboards”. All public dashboards in your Yellowfin application are saved in the Dashboard section on the Browse page.
To add one of the dashboard tabs to your homepage, hover over the dashboard thumbnail and click the menu icon. In the menu, click “Add to Dashboard”.
Remove a Dashboard from your “My Dashboard” List
To remove a dashboard tab from your landing page:
- Select the dashboard tab.
- Click the down arrow beside the dashboard tab name.
- In this menu, you can select either Remove or Delete.
- Remove: remove the dashboard‘s URL from your personal landing page. The dashboard tab will still be stored on the Browse page so it can be used again later.
- Delete: remove the dashboard‘s URL from your personal landing page and permanently delete the dashboard tab stored on the Browse page. If you delete a dashboard tab, it cannot be reused or recovered.
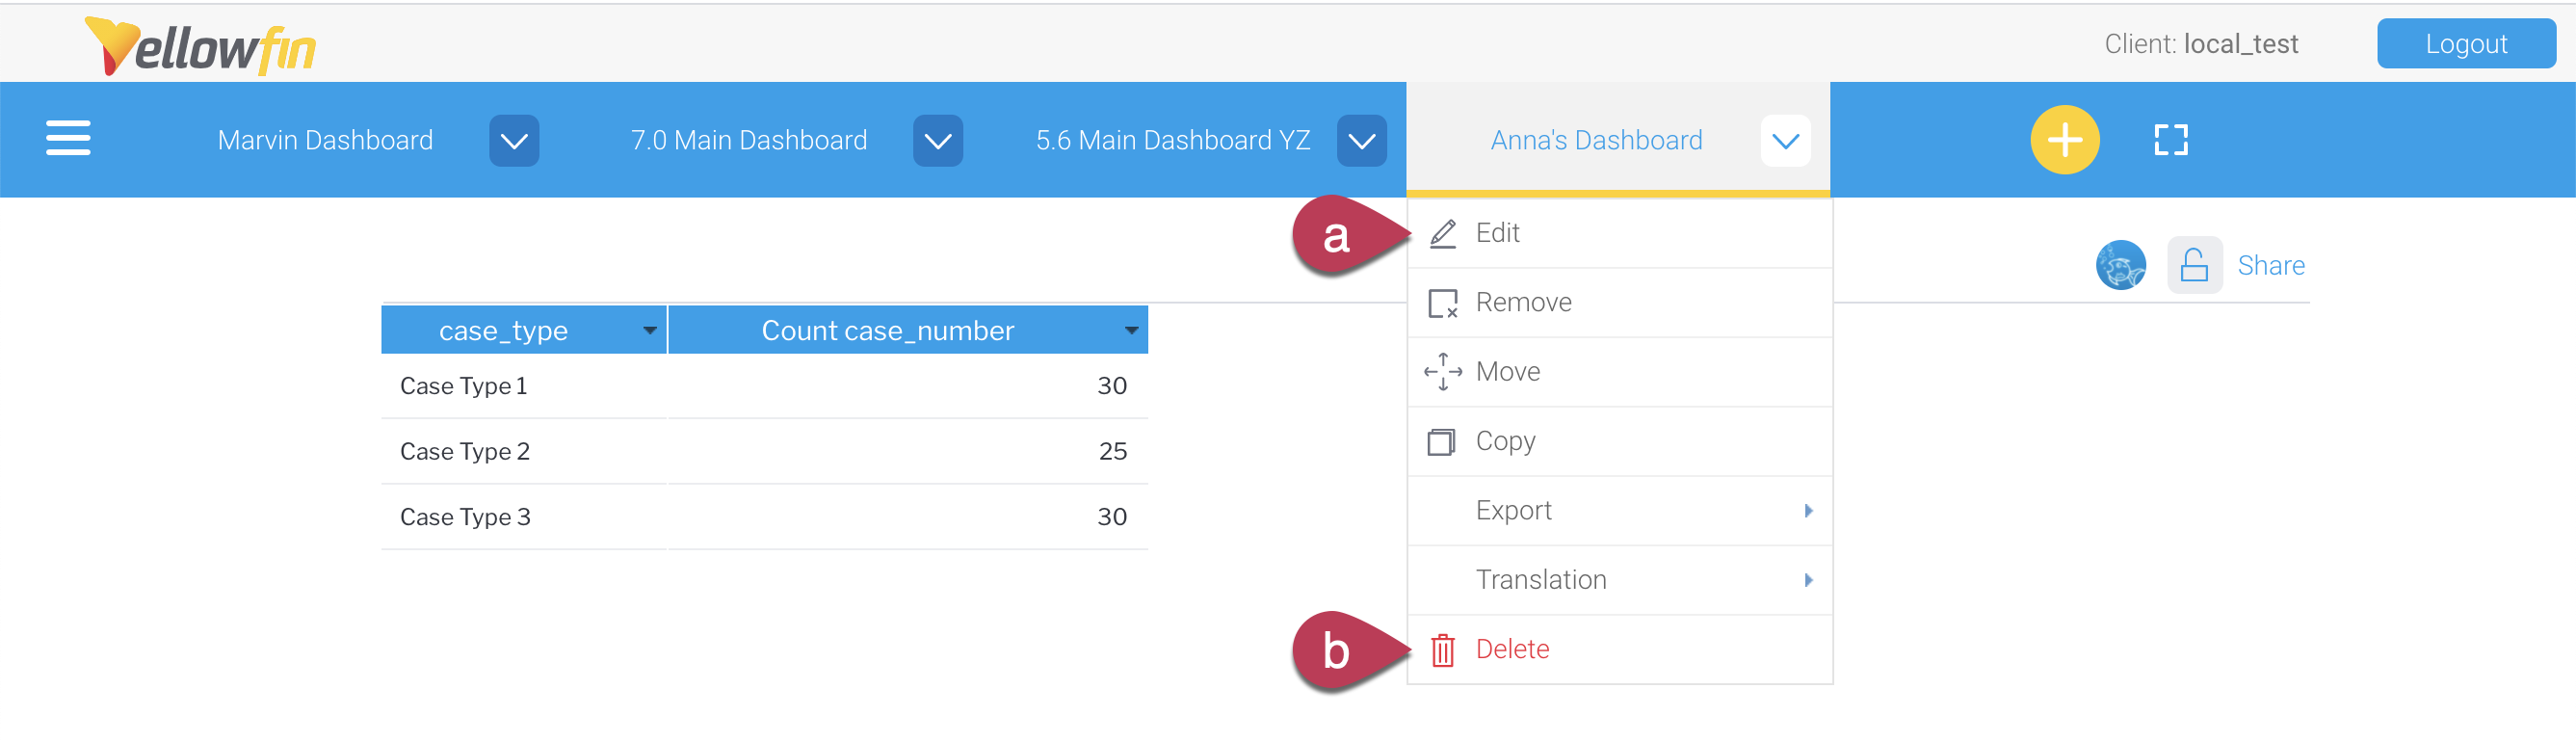
You can also see more dashboard options the dashboard tab menu, you will see options to edit, move, copy, export, and translate a dashboard tab. Using the “Export” option is especially convenient, as you can easily download a file that contains multiple reports.