Configure your Application's Languages
By adding multiple language interfaces for your Case IQ application, your users can select their preferred language in their user profile and easily work in Case IQ (see Change Account Settings on Profile Page for details on setting your language). You can translate your application's interface by either: (1) manually entering translations in Settings or (2) uploading a .csv file of translations. This article covers both methods to translate your application's interface and how to translate your application's system notifications. Make sure to review the Before Entering Translations section before following any of these methods.
Before Entering Translations
Add the language option you want to be available in your application before manually entering or importing translations. To add a language option:
- Go to Settings > System > System > Languages.
- Click the Add Language button.
- On the New Language form, select the language you want to add from the "Language" picklist.
- Click the Save button on the New Language form.
- Your application will begin generating interface phrases and system notifications for the new language option. You will receive a notification when it is finished.
After adding the language option, export your application's translations data in its current state. Do not edit this file. You can use this exported file to return your application to its original state in case there are any mistakes in the translations entered or uploaded. To export your current translations data:
- Navigate to Settings > System > Data Management > Configuration Export & Import.
- Select the “Translations” row in the grid, then click the Export button in the grid header.
- Your browser will download a .csv file of the application’s current translation data.
Manually Input Translations
You can manually enter and edit translations for the application interface on the Translations page under Settings > Data > Translations. Each row on this page is a single text phrase in the application for one language interface option. The Translations grid contains the following columns:
- Group: how the system categorizes the field in the application. Phrases are generally organized by page (e.g. workflow settings) or a feature (e.g. the aggregate field configuration options in the Form Builder).
- Subgroup: the text's type on the form, such as a field, caption, or picklist item.
- Key: the system name for the phrase, also called a “field name tag”. For a field, the key text can be used in ISEL expressions (see Case IQ Expression Language) and document templates (see Create and Upload a Document Template) to refer to the field.
- Description: the phrase in English.
- Translation: the phrase’s translation. By default, the “Translation” cell will contain the phrase in English.

The system will generate new rows in the Translations grid for all the application's phrases after you add a language option (see the Before Entering Translations section of this article). Use the following steps to manually input another language’s translation for each of the new rows:
- Use the Translations grid's "Language" filter to only show the language for which you want to enter translations.
- Based on the part of the app you need to translate, filter the grid for the groups and subgroups for which you need to enter translated values. The “Group” and “Subgroup” columns provide context on the phrase's location in the application.
- Enter the translated version of the phrase in the row’s “Translation” column text box.
- When you click outside the “Translation” text box, a checkmark will appear beside the text box to indicate that the system has saved the phrase translation you entered and it is now displayed in the application.
Enter translations for every row of the language in the Translations grid to completely translate an application. Users who have selected the language option in their user profile will see what you entered in the “Translation” text box in the application the next time they navigate to a page where the phrase is located.
Import Translations in Bulk
Rather than entering each translation manually, you can upload a complete translations configuration file into the application. This method involves exporting the translations data, entering all required translations in the exported file, then importing the updated translations data back into the application. We generally recommend this method because you can translate all phrases at once and complete translations before launch.
Export the Translations Data
- Go to Settings > System > Data Management > Configuration Export & Import.
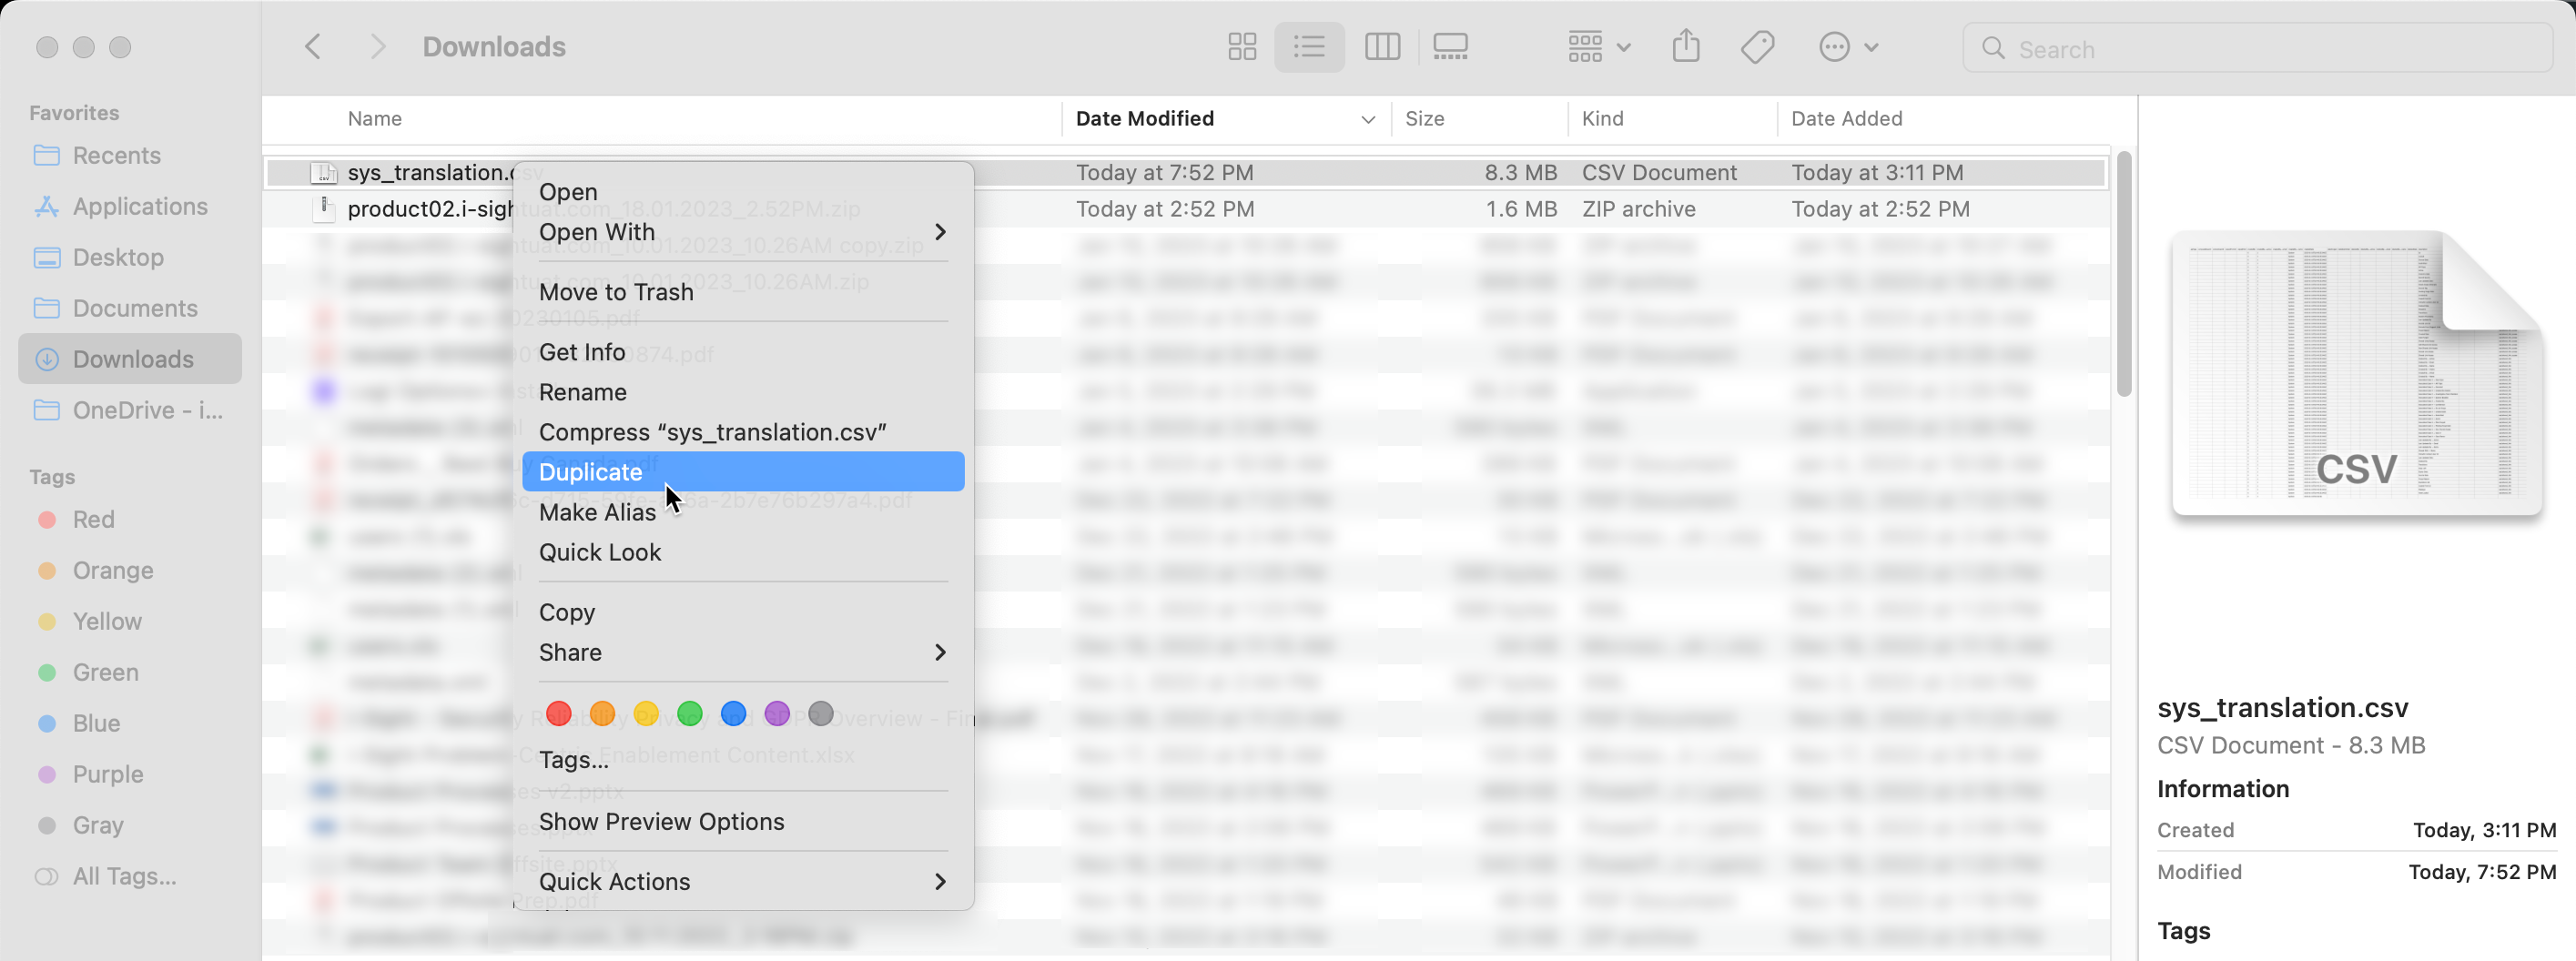
- Select the “Translations” row in the grid, then click the Export button in the grid header.
- Your browser will download a .csv file of the application’s current translation data.
Enter Translations in the Exported File
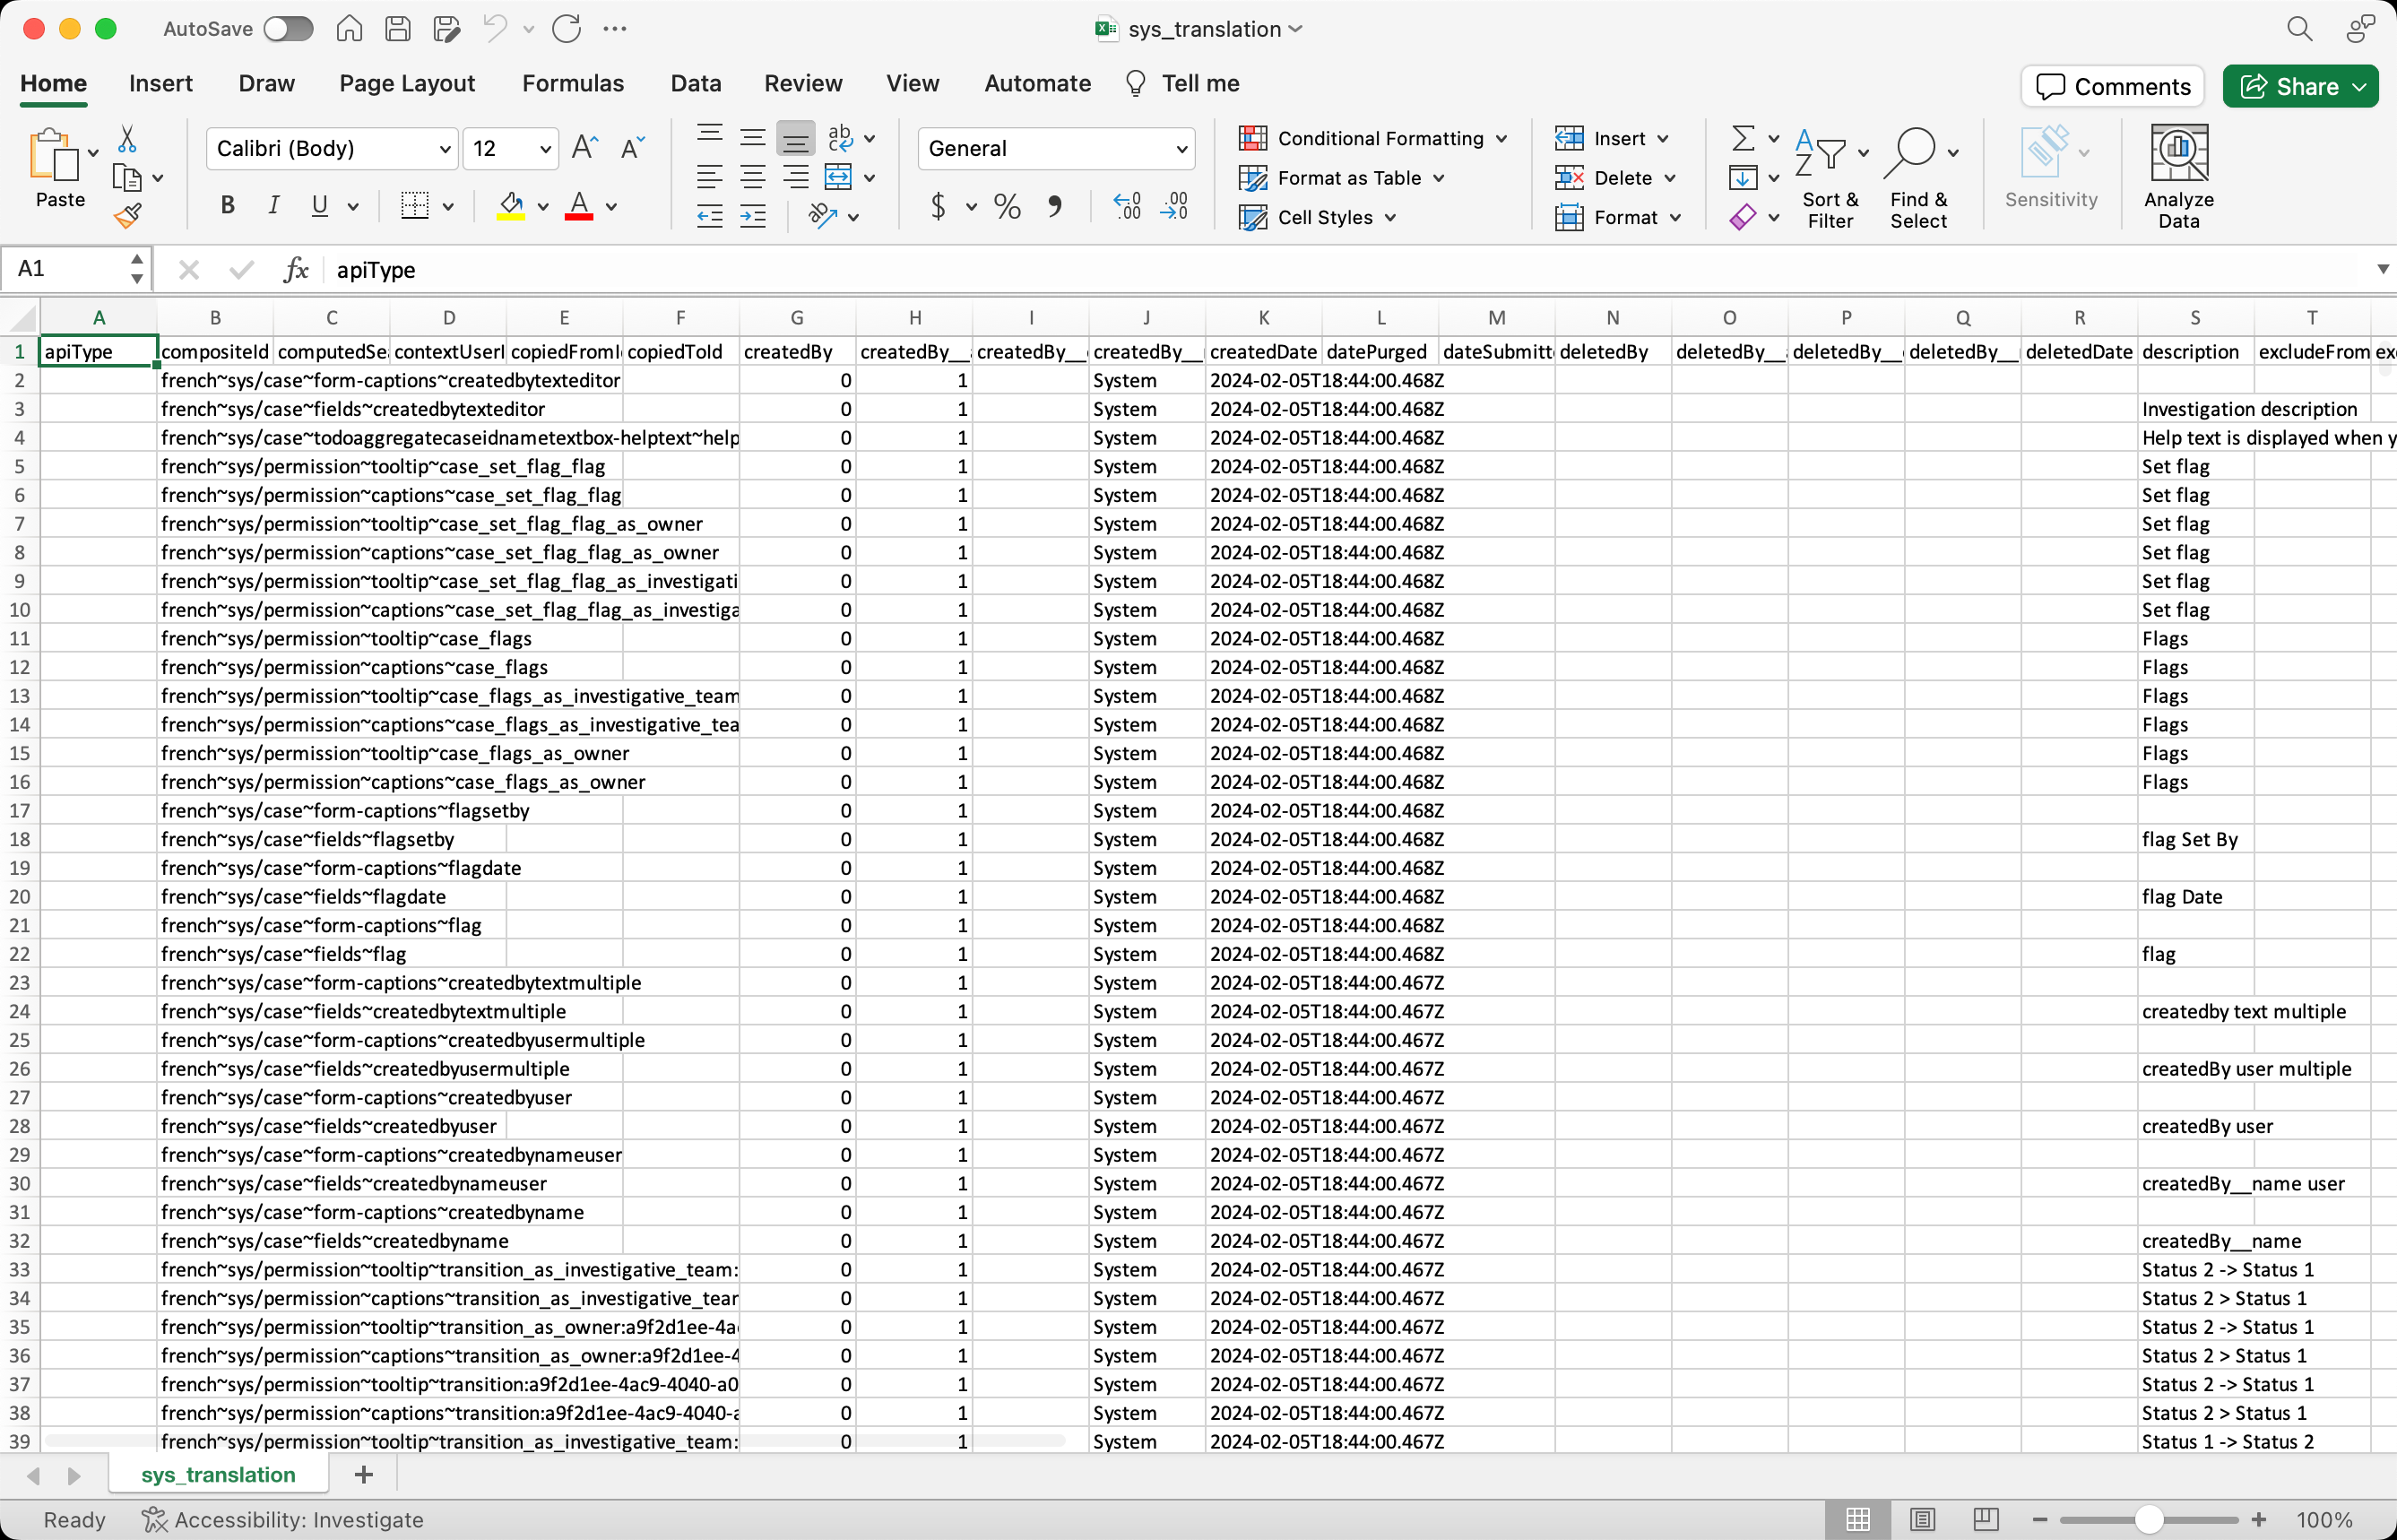
- Open the sys_translation.csv file in Microsoft Excel and save it as a .xlsx Excel document.
- While working in sys_translation.xlsx:
- Only update text in the "value" column. Do not change any other data in the file.
- Use caution when filtering the data to ensure rows do not become misaligned.
- If you need additional columns in the spreadsheet, add them to the right of the "value" column.
- We recommend filtering and sorting the file as described in Tips for Sorting the Translations Data File to make it easier to work with.
- Add filters to the spreadsheet so you only see the language you want to translate.
- Select all data in the document by clicking the triangle in the top left corner of the spreadsheet, beside Column A and above Row 1.
- Select the Data tab, then click the Filter button.
- Filter the “locale” column to only display the language for which you want to add translations. By default, the "value" column of each row will be populated with the English phrases.
- Based on the part of the app you need to translate, determine the groups for which you need to enter translated values.
- The “groupName” and “subgroupName” columns provide context on the phrase's location in the application.
- We recommend highlighting each row that requires translation, as you can easily filter the spreadsheet to show highlighted values.
- If you only want to translate the portal interface, see Standard Groups of the Portal Interface for examples of the groupNames to include.
- Filter the spreadsheet to only show the rows of phrases that require translation.
- You can now enter the translations for each phrase in the "value" column. Entering translations for every row for the language will completely translate an application.
Clean the Translations Data for Import
After entering translations for the language in sys_translation.xlsx, make sure the data is ready for import. Before importing the file into your application:
- Unhide all columns and rows in the spreadsheet.
- Check that the structure is unchanged and all rows are correctly aligned.
- Confirm that the original “sys_translation” tab is the only tab in the file and that there are no hidden tabs.
- Remove all filters from the spreadsheet. In the Data tab, click the Filter button again.
- Make sure that each "value" cell contains a raw text value, rather than a formula (e.g. "=AR300").
- If you used formulas to populate the value column, copy the column, then use the "Paste Special" > "Values" option to paste the values in the same column.
- Delete any columns you added to the spreadsheet.
- Click the Save As button and change the file format to “CSV UTF-8 (Comma delimited) (.csv)”.
- Make sure that the file name is still “sys_translation”.
Import the Translations Data into Case IQ
- In Case IQ, navigate to the Configuration Export & Import page under Settings > System > Data Management > Configuration Export & Import.
- Click the Import button.
- Upload the "sys_translation.csv" file with the new translations to the "Select a csv or zip file to import" pop-up. Click the Upload a File from your Computer button to select "sys_translation.csv" with the file browser or drag and drop the file from your desktop. Click Done when the file has completed uploading.
- All translations will be visible in the application immediately after you import them. If there are no errors displayed, review the application to make sure all sections are translated as expected.
- If anything goes wrong, you can import the copy of the original export you saved before starting the translation process. This will reset all translations to English.
Tips for Sorting the Translations Data File
The translations data export (sys_translation.csv) contains a lot of data, so we recommend sorting and hiding some columns while working with the xlsx file to make it easier to work with. See the following steps to organize the file:
- Select all data in the document by clicking the triangle in the top left corner of the spreadsheet, beside Column A and above Row 1.
- In the Data tab of the ribbon, click Sort.
- The Sort pop-up will be displayed. Select the columns on which to sort the data by clicking the cell under “Column” in the grid and add more columns by clicking the “+” or “Add Level” button. Enter the following columns in this order:
- groupName
- subgroupName
- value
- Make sure the "My list has headers" option is checked, then click the OK button. The rows will now be sorted by groupName, subgroupName, and value alphabetically.
- You can make your column headers stay visible while scrolling by clicking Freeze Top Row under the View tab.
- To get a clear view of the important data, hide all except the following columns. To hide a column, select it on the spreadsheet, right-click or control-click the column, then select the “Hide” option.
- description
- groupName
- key
- locale
- subgroupName
- value
Standard Portal Interface Groups
If you only want to translate your external portal, you can include the rows in the “sys_translation.xlsx” file with the following “groupNames”. These are a guideline, so make sure to scan all “groupNames” in the translation data in case there are additional sections for your application’s portal to ensure all necessary field names and phrases are translated.
- “errors”
- "external"
- “picklist”. Only the picklist options that are visible on the portal.
- “portal”. If the portal does not start on the default page, then all values for that page can be excluded.
- “sys/attachment” if the file form is shown on the portal.
- “sys/case”. Only the fields visible to users, accounting for display rules. Any fields in data form sections on the case form will also have the “sys/case” groupName.
- “sys/document”
- “sys/filestore”
- “sys/party”. Any fields in data form sections on the party form will also have the “sys/party” groupName.
- "sys/[custom form name]" if any custom forms are shown on the portal. For example, if your application has an "Allegation" custom form, its "groupName" would be "sys/allegation".
- “validation”. Only errors that can be displayed on the portal, including:
- {digitLimit} digits maximum, ({integerLimit} integers, {decimalLimit} decimals)
- An error has occurred.
- Application is under maintenance, please try again later.
- Date is not within range
- Invalid {field}
- Invalid email
- Invalid Number Format
- Invalid Pattern
- Invalid pattern.(only A-Z, a-z, 0-9, -, _ allowed)
- Invalid Phone Number
- Invalid Postal Code
- Invalid Time Format
- Max value limit reached
- Max value of {valueLimit}.
- Maximum of {characterLimit} characters.
- Maximum of {digitLimit} digits
- Min value of {valueLimit}.
- Minimum of {characterLimit} characters.
- Must not contain any whitespaces
- Number is not within range
- Number of characters exceeds maximum value
- Number of characters falls short of the minimum value
- Number only
- Positive value only
- Required
- The field "{field}" cannot be empty
- The field "{field}" did not meet the required pattern
- The field "{field}" is not formatted properly
- The field "{field}" is not in a valid format
- The field "{field}" is not a valid Postal Code
- The field "{field}" is required
- The field "{field}" is not valid. Please provide a valid country code and phone number.
- The field "{field}" is not within range
- The field "{field}" must contain a valid postal code
- The field "{field}" must contain at least one letter or number.
- The field "{field}" must match the current password
- The field "{field}" must not contain any whitespaces.
- The field {field} only accepts alphanumeric without special characters.
- The field "{field}" should be higher than {spec}
- The field "{field}" should be lower than {spec}
- The New Password must meet required strength
- The files are too large to upload
- Too High
- Too Low
- The server is currently unresponsive. Please try again in a few minutes.
- Unable to understand your request
If your application has a two-way portal, you will also need to translate the Reporter section on the Report Online form. Include the following rows, where the "groupName" is "sys/user". However, fields such as "Username" and "Email Address" are in multiple other places in the application. You can look for the keys indicated below to confirm that the row refers to the field found on the Report Online form.
- "Are you a returning user?"
- "Confirm Your New Password". Look for the row where the "Key" is "portaluserconfirmedpassword".
- "Email Address". Look for the row where the "Key" is "portaluseremail".
- "Enter Your New Password". Look for the row where the "Key" is "portalusernewpassword".
- "Password". Look for the row where the "Key" is "portalloginpassword".
- "Username". Look for the row where the "Key" is "portalloginusernameemail".
- "Would you like to confidentially provide your email address?"
- "Would you like to receive updates?"
- "Would you like to remain anonymous?"
If Automatic Translation is enabled for your application, include rows with the following "groupNames" as well:
- "case-intake-translation-status"
- "dynamic-entity-data-intake-translation-status"
- "note-intake-translation-status"
- "party-intake-translation-status"
|
Automatic Translation Premium Feature Reach out to your Customer Success Manager or Account Executive to learn more about this feature. |
Translate System Notifications
You can manually enter and edit translations for your application's notification content as well. Use the following steps to enter translations for system notifications:
- Navigate to Settings > System > Communications > System Notifications.
- Click a row in the System Notifications grid to open its page.
- On the notification's page, select the language for which you want to enter in the "Language" picklist.
- Click the Edit button.
- The "Subject", "HTML Body", and "Text Body" fields will now be editable. You can enter the translation of these phrases in these text boxes. See Edit, Disable, or Configure a System Notification for more details on editing System Notification content.
- When you have finished translating the notification content, click the Save button.
Repeat these steps to enter translations for all system notifications. Users who have selected the language option in their user profile will see what you entered in the "Subject", "HTML Body", and "Text Body" fields when they receive a notification.