Add, Edit, or Delete a Packet Option
A packet is a collection of templates (see Create and Upload a Document Template) configured by System Administrators that Case IQ will use to generate and combine multiple documents into one PDF. If a user adds a “Packet” type file for a case, the application will simultaneously use all the template file formats to merge information from the case into the template content, then gather all the merged documents into one file.
You can use packets to summarize all case documentation in one file. When configuring a packet, the System Administrator may choose to include attached files of the case in packet documents.
To manage packet options, navigate to the Data tab in Settings and select "Packets" in the page menu. This article details how to add, edit, and delete packet options in the application. To generate packet files for a case, see Add a File.

Add a Packet
Click the Add Packet button on the Packets page and see the following guidance to fill in the New Packet form.
- Packet Name: type in a name for the packet. The name will be displayed in the “Packet” dropdown on the New File form when choosing the packet option to generate for the case.
- Apply page numbering: check the box to ensure that the system adds page numbers to the packet PDF.
- Generate a Table of Contents (ToC): check to add a Table of Contents before the documents to help navigate the packet PDF. If you check the box, the “ToC Template” field will be displayed.
- ToC Template: choose how to structure the Table of Contents in the packet document.
- The “Default” ToC includes each template name of the document and the page number on which the content begins. See an example in the screenshot below.
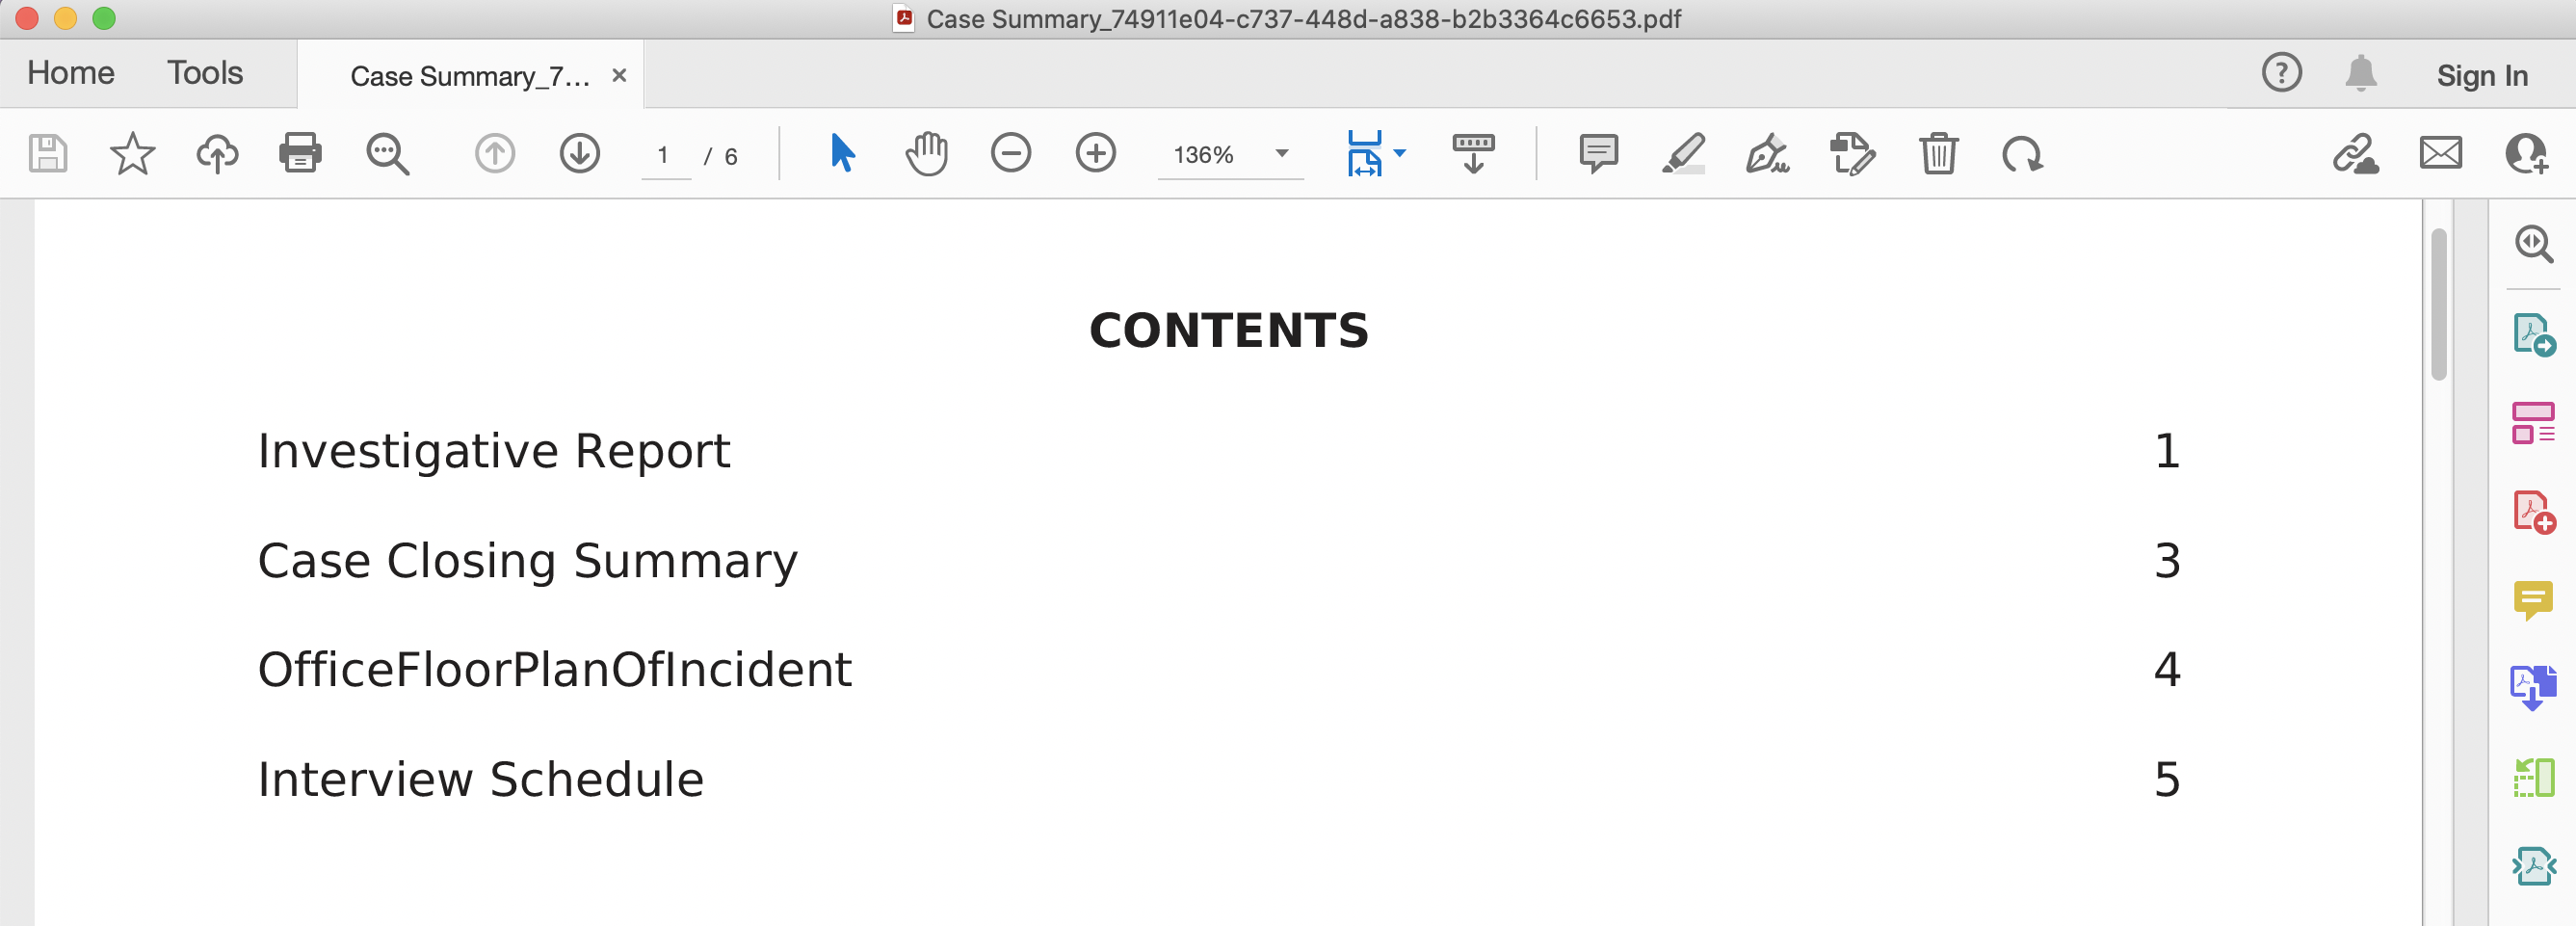
- If you select “Custom”, you can upload a Word document of the template you would like Case IQ to use to generate the ToC. See details in the Create a Table of Contents Template section of this article below.
- The “Default” ToC includes each template name of the document and the page number on which the content begins. See an example in the screenshot below.
- Include Files attached to Case: you can choose to include all file records of the case, allow users to manually select the files to include when generating the packet, or exclude any file records in the packet. Each image file will be in landscape orientation and span the full length of the PDF page when the packet is generated. Only files in the following formats can be included in packets: PDF (.pdf), Microsoft Word (.docx and .doc), Microsoft Excel (.xlsx and .xls), Microsoft PowerPoint (.ppt, .pptx), and images (.jpg, .png, and .gif).
- Document generation method: choose if the system should merge the latest case information or use a previously generated document for the template by selecting one of the following options.
- Always New: upon generating the packet, the system will merge each template document using the current case information.
- Most Recent: the system will include the most recently generated document for each template in the packet. If a template has not been used to generate a document for the case yet, the system will create a document with the template using the current case information to put into the packet.
- Most Recent in Last 3 Days: include the latest document created within the last 3 days for each template in the packet. If a template has not been used to generate a document for the case yet or has not been used in the last 3 days, the system will create a document with the template using the current case information to put into the packet.
- Only Most Recent: include the latest created document for each template in the packet. Case IQ will not generate a document for any templates that have not been used for the case yet.
In the New Template section of the New Packet form, you can select the templates you want to be included in the packet PDF. See the steps to fill in the New Template form below.
- Click the “+” button to load the New Template form, which contains the following fields.
- Locale: if your application supports multiple languages, choose the appropriate language of the template.
- Order: enter a numeric value to indicate where the template should be placed in the document.
- Template: choose the template of the document type to include the packet. You will only be able to select templates that have already been uploaded in Case IQ.
- Click the Save button in the New Template section.
- Repeat these steps to add more templates into the packet.
Finalize your packet by clicking the Save button at the top of the New Packet form. Users will now be able to select the packet option on the New File form to create a PDF of all template documents for the case. See the Add a File article for details on creating packet files for cases.
Create a Table of Contents Template
Similar to creating a document template to upload in Case IQ (see Create and Upload a Document Template), you can use tags as placeholders where the application will populate information when the packet is generated. When formatting is applied to tags in a ToC template file, the formatting is maintained in the generated ToC.
You can use the following tags to create your custom ToC:
- {title}: the name of a document. When used without a loop, the “Packet Name” field will be populated in place of {title}. When used with a {#chapters} and {/chapters} loop, the “Template Name” fields and the case’s file names will be merged instead.
- {#chapters} and {/chapters}: a loop to tell the system to pull template and file record information.
- {pageNum}: the system will populate the page number where the relevant content begins in the packet document.
See two example ToC templates attached below, which you can use to get started creating your own custom ToC.
Edit a Packet Option
System Administrators can update packets from the Packet's page. Your changes to the packet option will only affect packets generated after your updates, but will not impact the packet documents that have already been generated.
- Click the Edit button. The Packet's page will now be in edit mode, so you can use the text boxes, picklists, radio buttons, and other data input options to update the packet details, i.e. all information above the Template section.
- Complete your changes to the packet details and click the Save button to submit your changes.
- To manage the templates in the packet, click a row in the Templates grid, then click the Edit button and update any of the template's fields. Click the Save button in the Templates section to record your changes.
- Add a new template to the packet by clicking the “+” button in the Templates grid. See the "Add a Packet" section in this article for details on completing the New Template form.
- Remove a template from the packet by clicking the Delete button in the Templates section.
Delete a Packet Option
If you need to permanently remove a packet option, you can delete it from the Packets page or from the Packet's page directly.
If you only need to delete a single packet option, navigate to the Packet's page. Click the Options ( ) button, then select "Delete".
You can also delete multiple packet options from the Packets grid. Select the checkbox for each row you would like to delete, then click the Delete button above the grid.