Progress a Workflow to the Next Step
You can move a case to the next step in a workflow to follow the case management process set by your System Administrator. As each workflow is configured for your application, this article includes screenshots of a simple workflow example, called “Status”, to show you how to complete case workflows in Case IQ.
- Hover over the workflow timeline. The hover message will display (1) the description of the next step in the workflow, (2) the user that created or last updated the workflow, and (3) the date that the workflow was created or last updated.
- Click the arrow at the end of the timeline to see the next step or steps in the workflow. There may be multiple options for next steps depending on the workflow set up by your System Administrator.
- You can also click the page menu to see the next workflow steps.
- Click a step in the step dropdown and a confirmation pop-up will be displayed. The step pop-up may include the following additional sections depending on your System Administrator’s customizations:
- Any criteria or mandatory fields that must be completed before you can progress the case in the workflow. If the criteria have not been met, each item will have an “X” beside it. The list item will be updated with a checkmark when the criteria have been met or the mandatory field has been filled in. For example, you may need to assign a case owner, as shown in the example below.
- The “Reason” dropdown, which allows you to explain why you are moving the case to the next step, using one of the options set by your System Administrator.
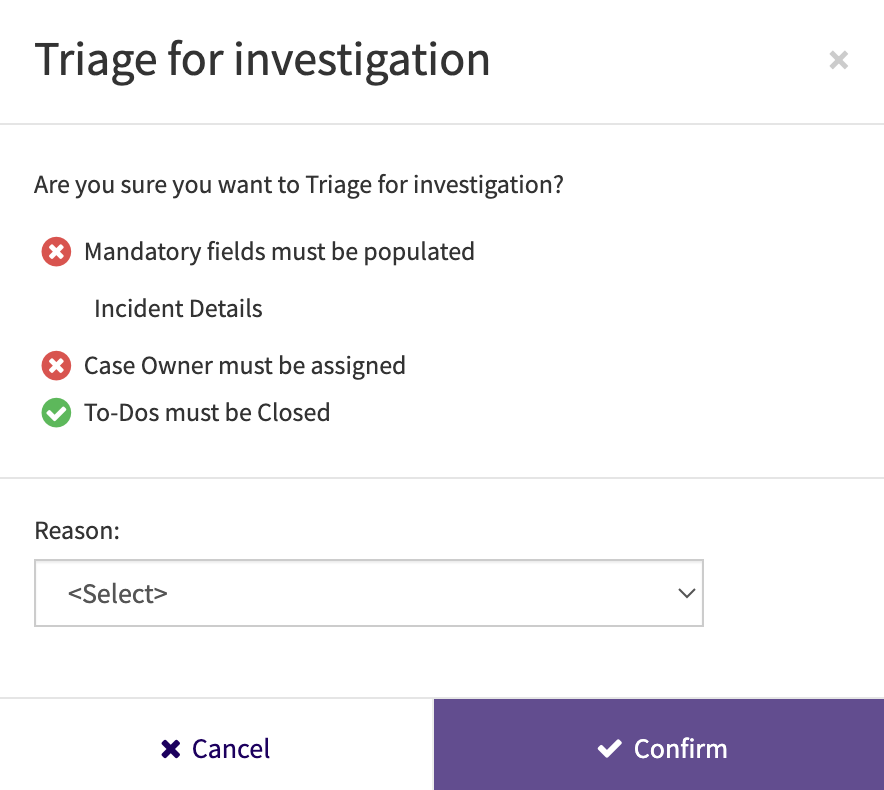
- If the step does not have criteria or mandatory fields, you can click the Confirm button in the step pop-up to move the case to the next step in the workflow. If there are step criteria or mandatory fields, click Cancel to exit the step pop-up.
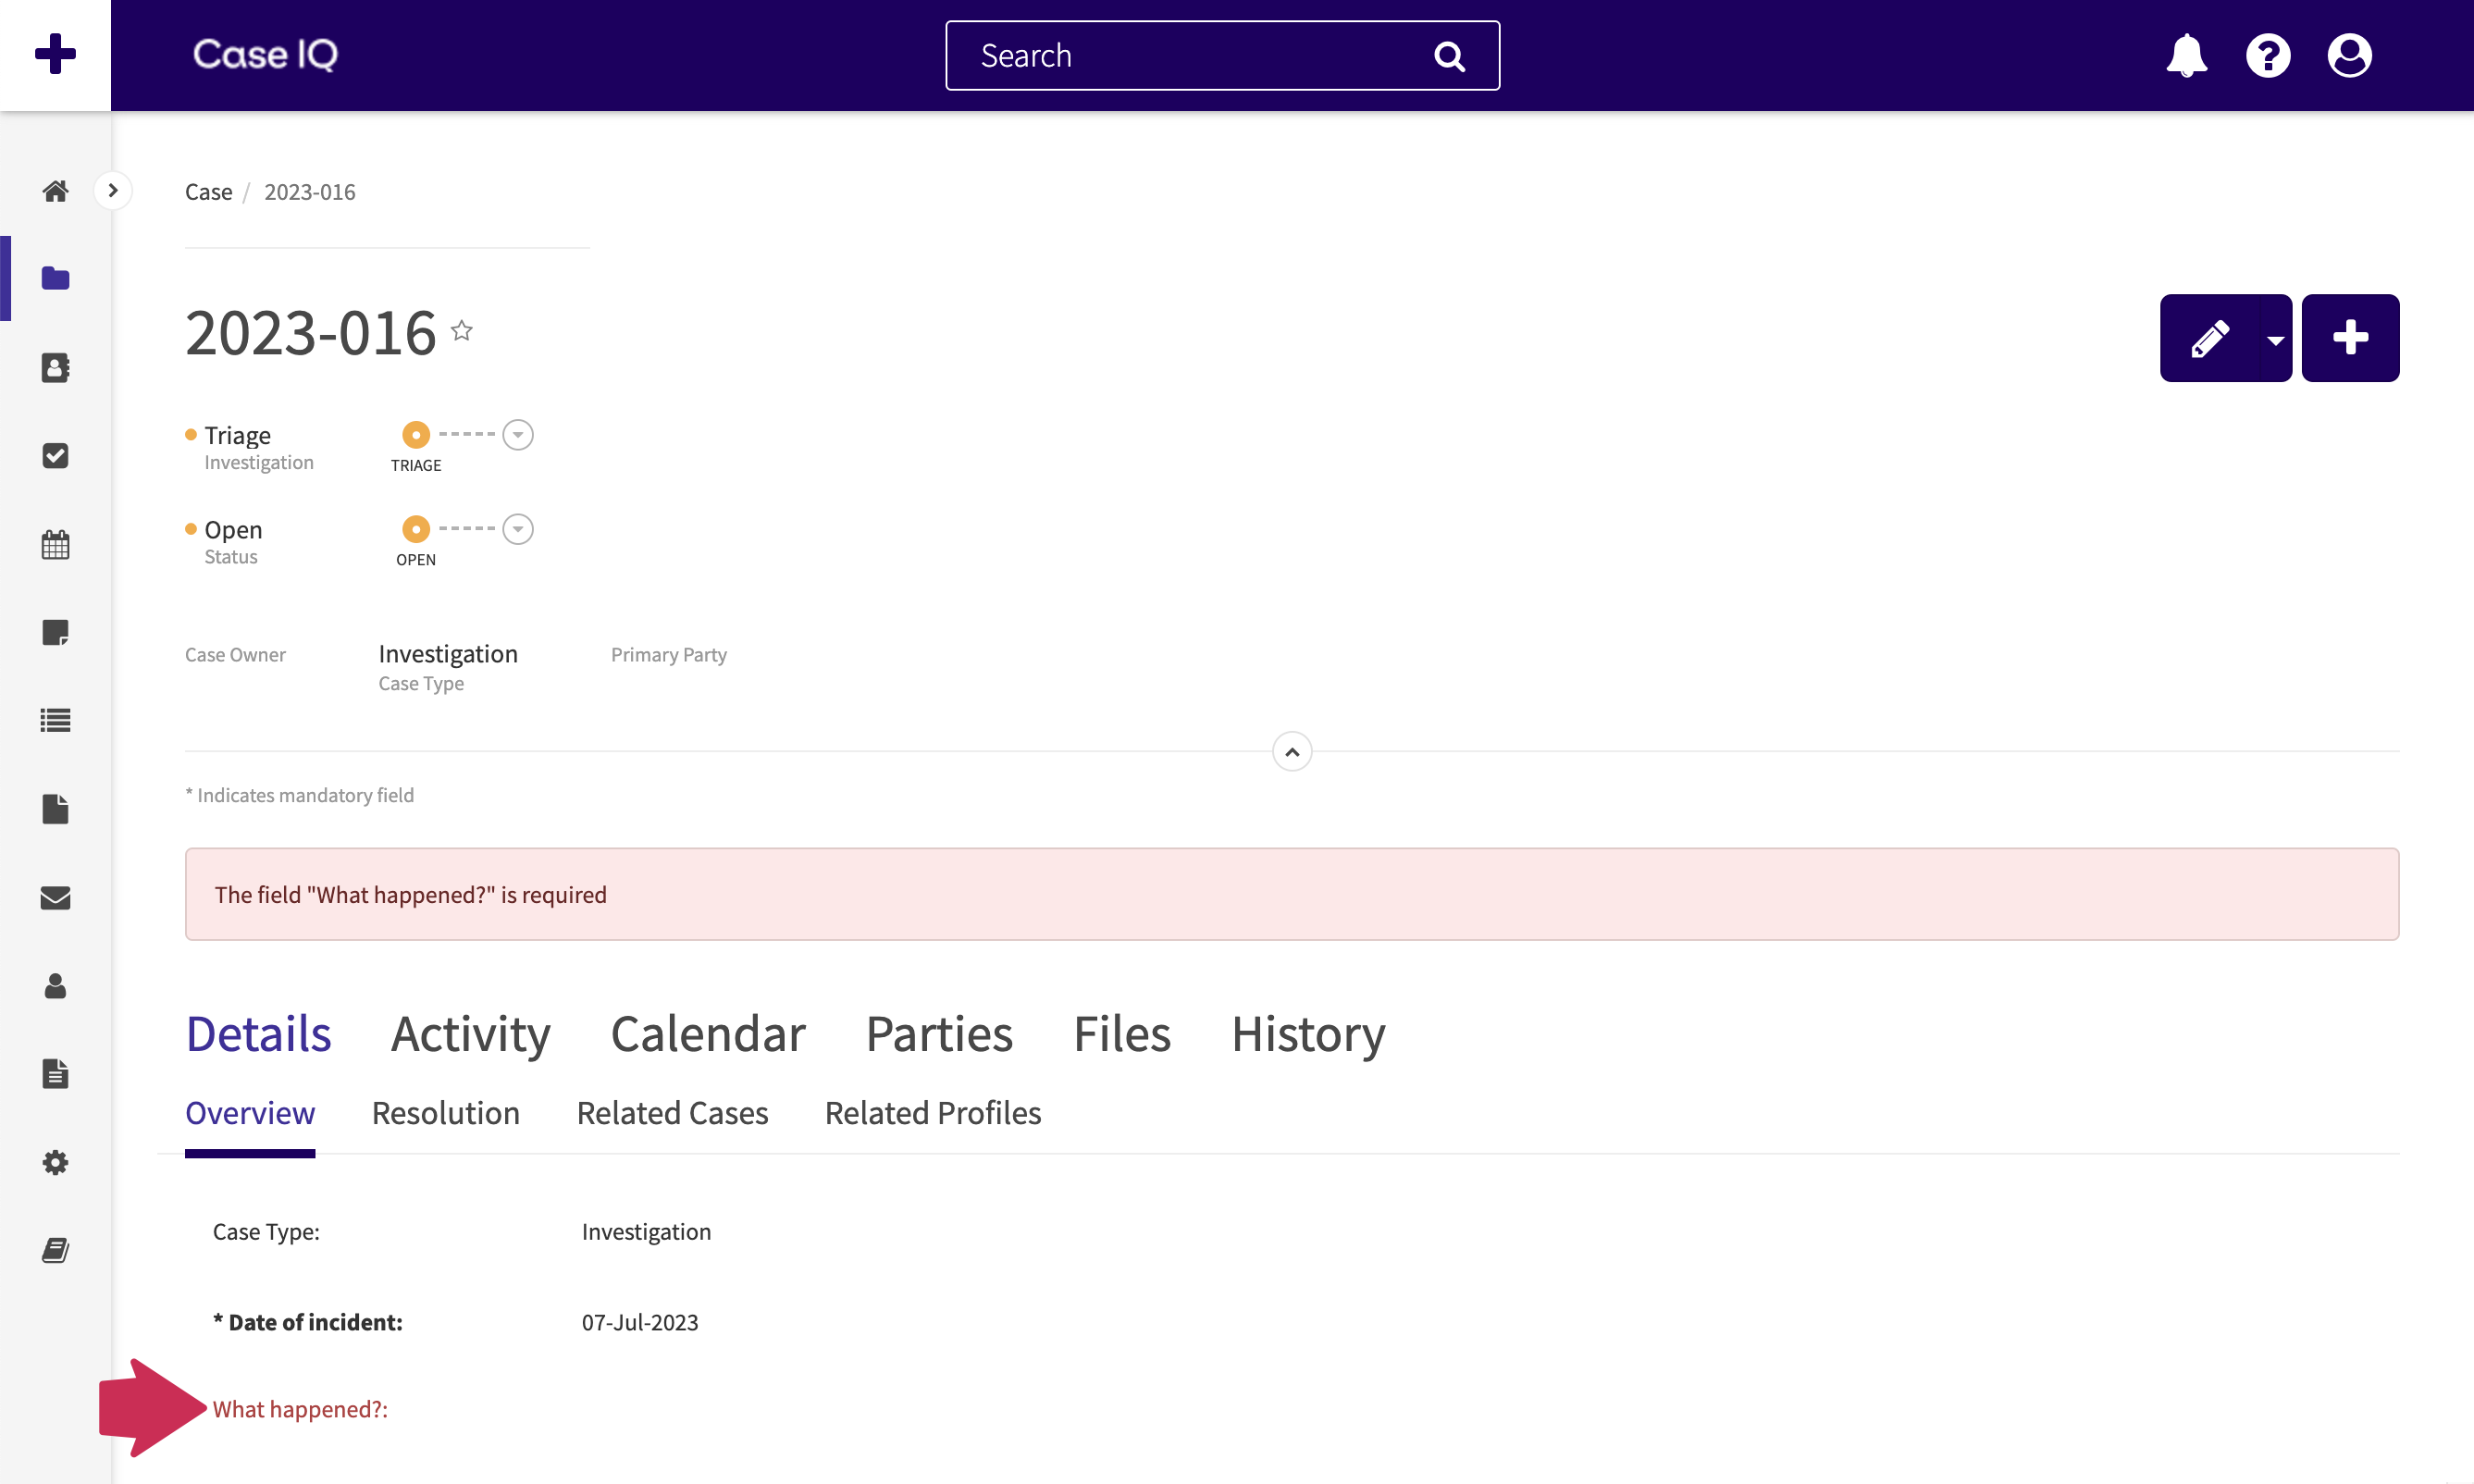
- The application will display a message listing any mandatory fields you need to complete and highlight them in the case details. Update the case to fulfill the required criteria.
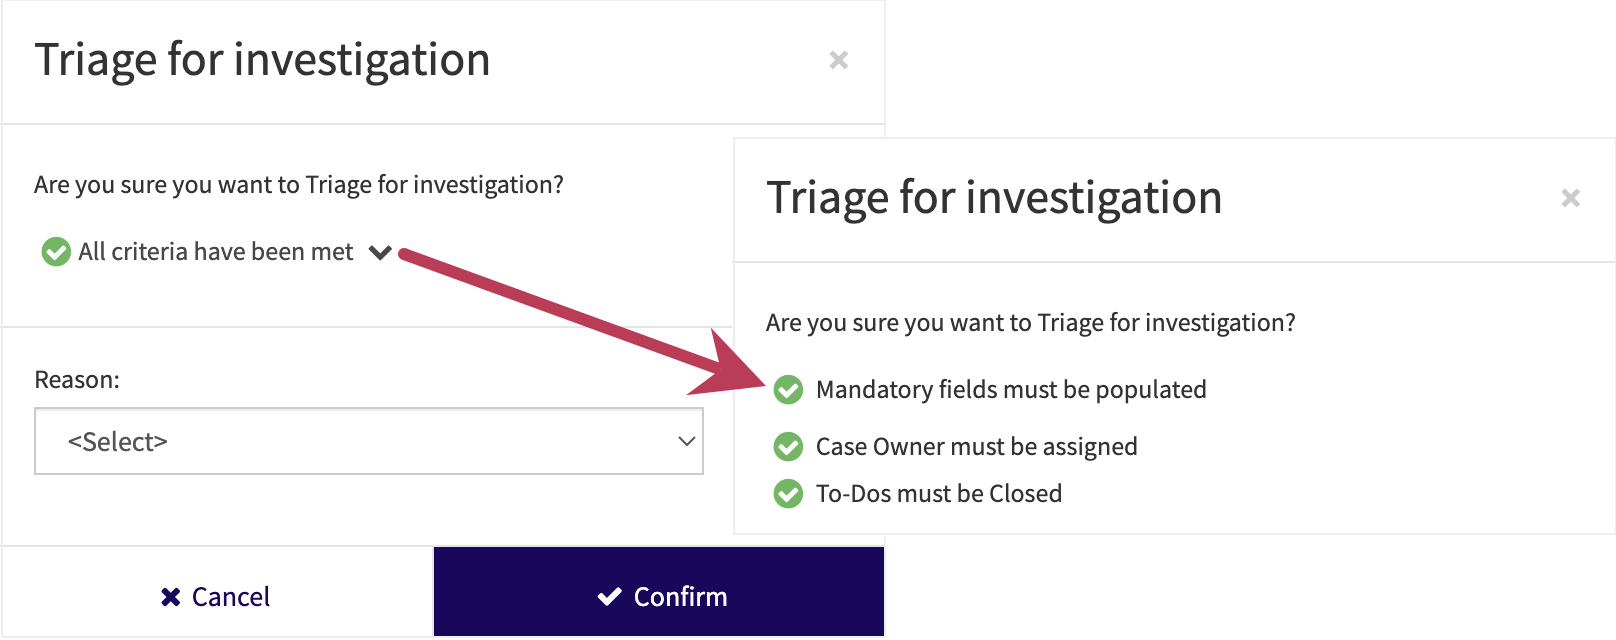
- When you have completed updating the case, click the timeline arrow again and click the next step. The criteria list will have checkmarks beside each item, indicating that all criteria have been met. You will now be able to click Confirm to move to the next step in the workflow.
- To-dos, notifications, assignments, field values, and flags may have automatically been added or updated for the case after moving the case to the next step. Your System Administrator may set up actions to automatically occur immediately after the workflow step or after a set period of time passes. Check the case to-dos and assignments to confirm if there are tasks that you need to complete as part of the case workflow. Any notifications that your System Administrator has set up will be sent to the appropriate distribution list automatically.
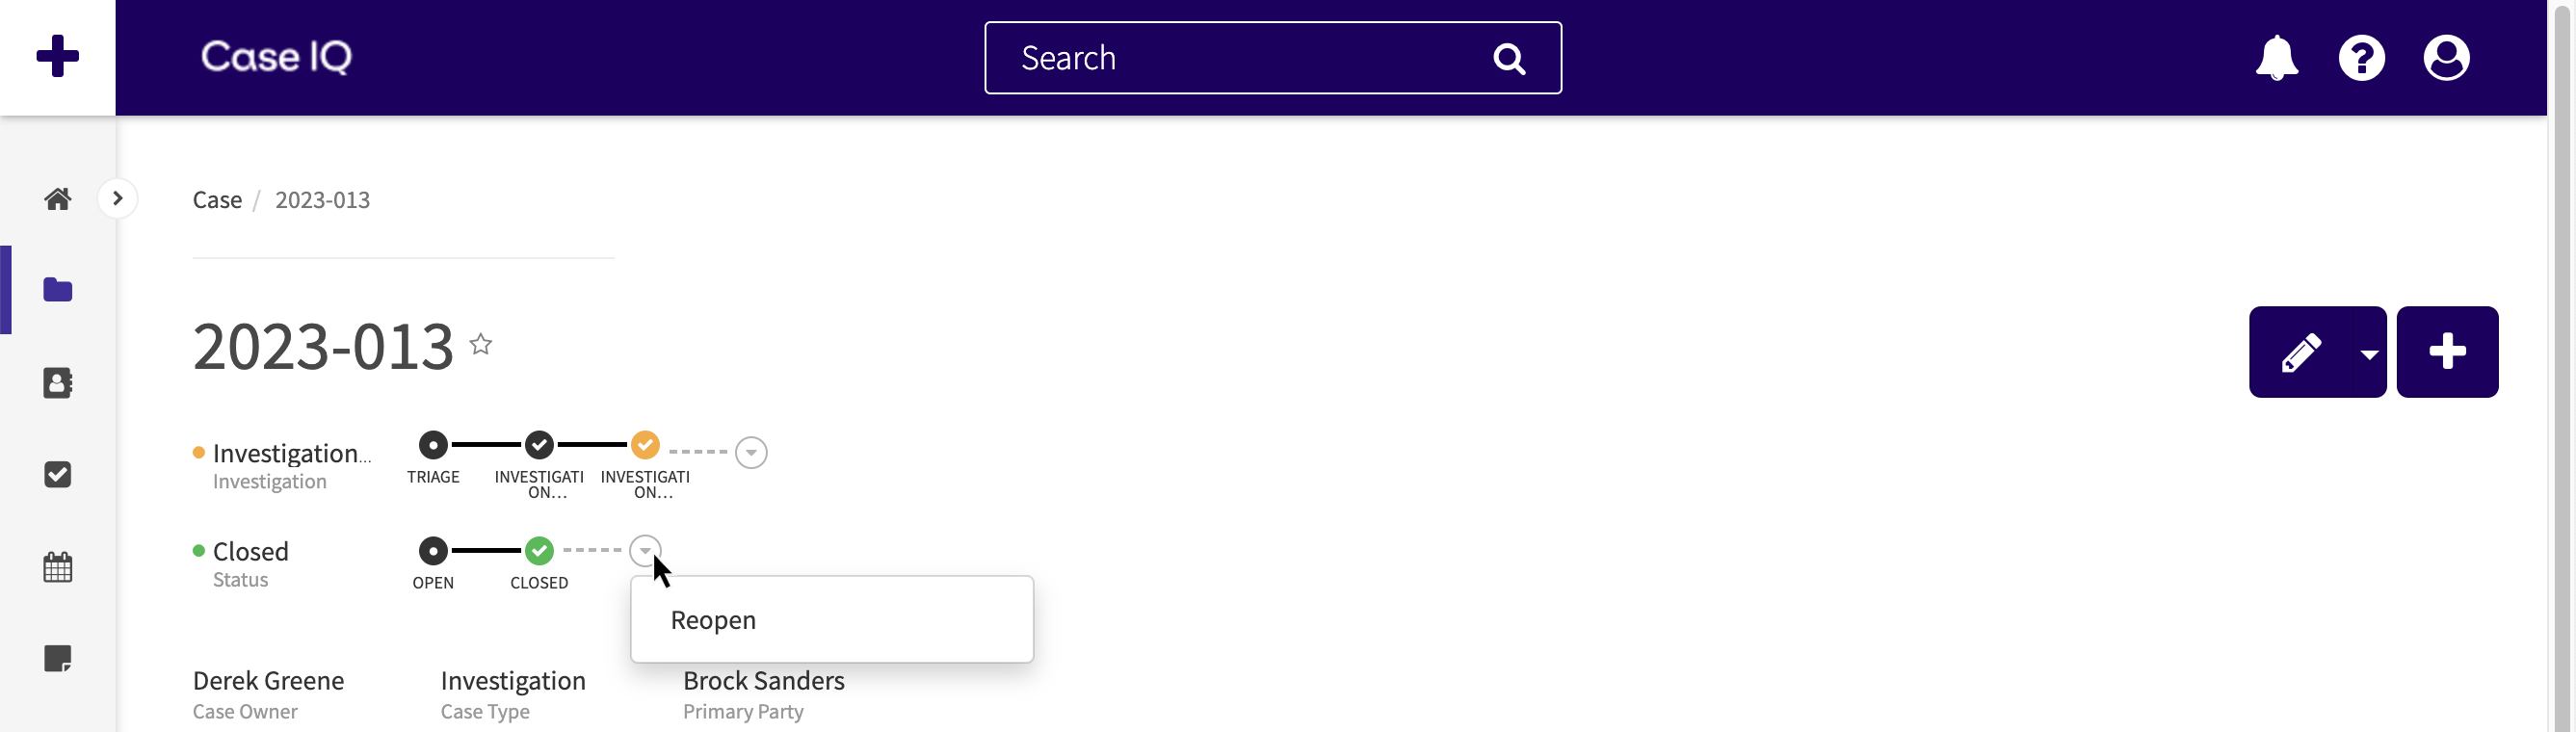
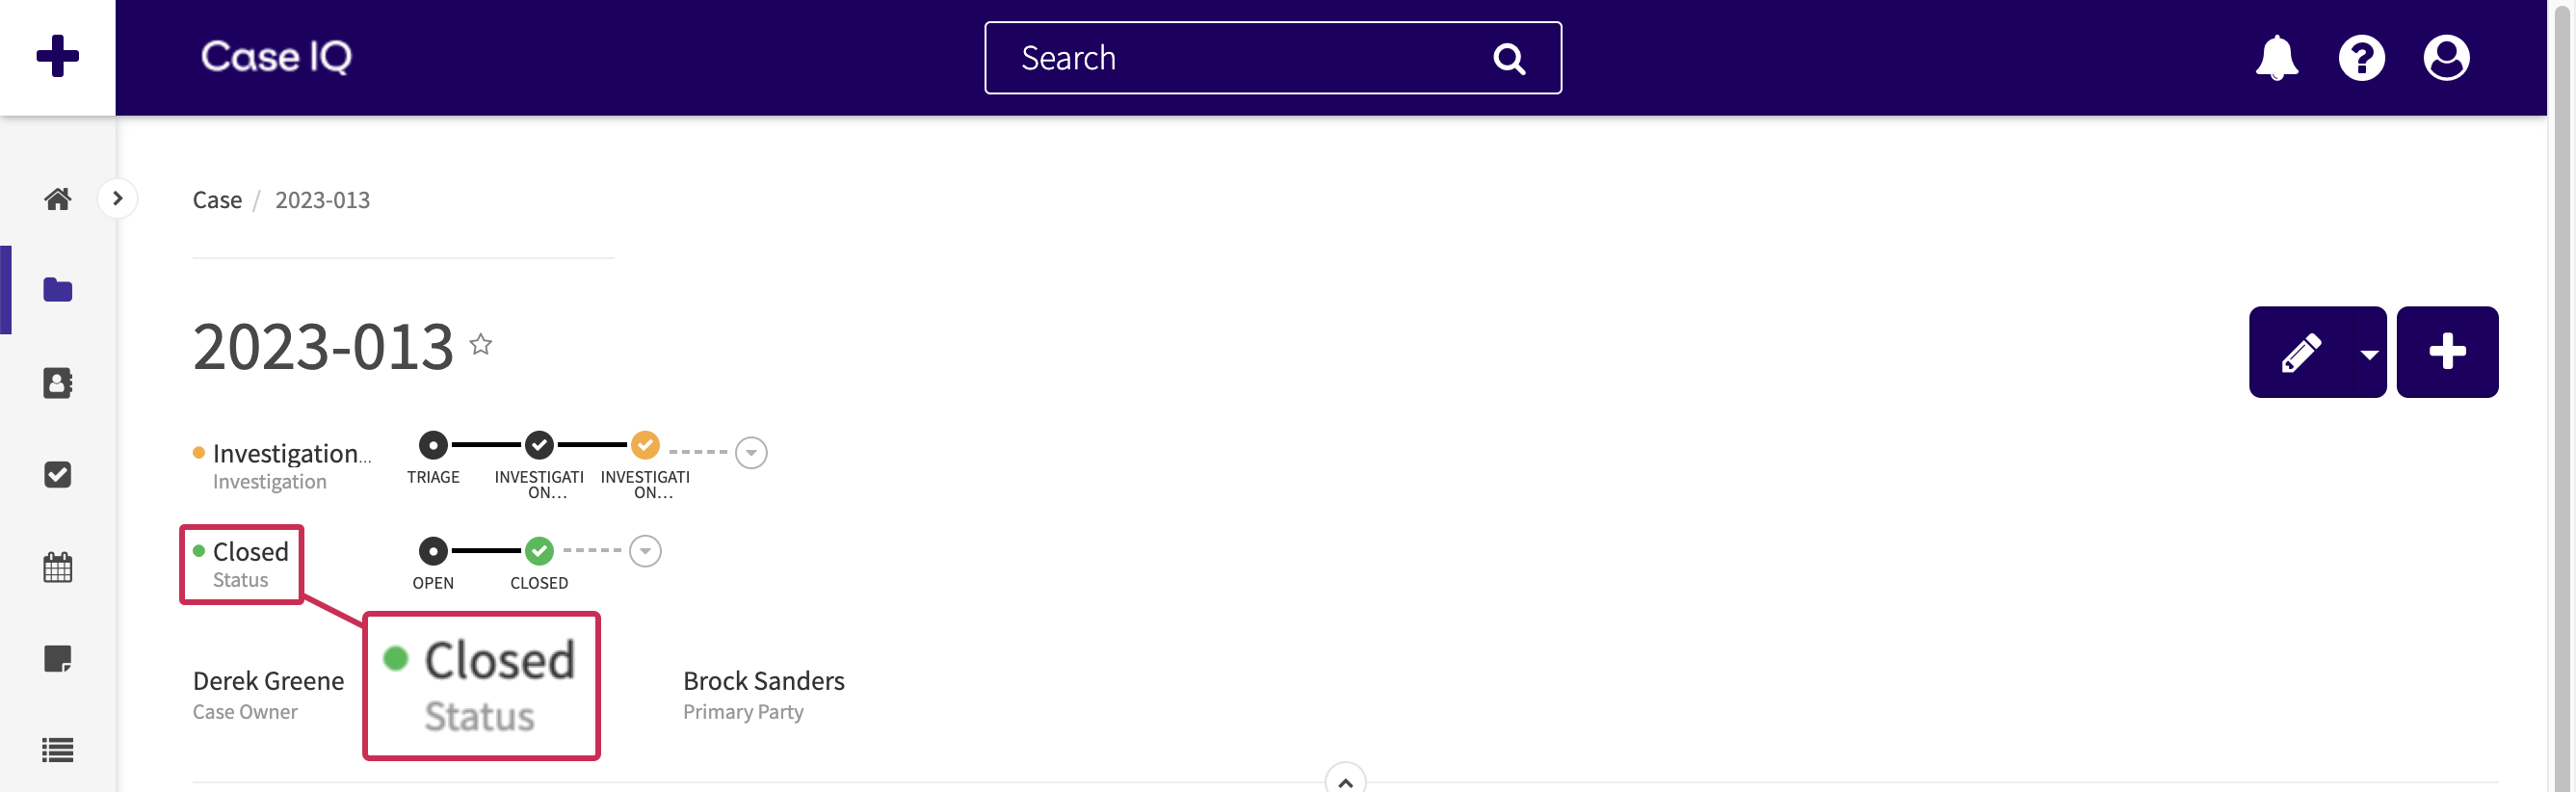
Continue completing steps in the case workflow. When you progress to the step that completes the workflow, the dot for the workflow timeline will be green.
However, the workflow can be reopened if the case was closed in error or there are additional details to add to the case. Click the workflow timeline arrow again. In the step dropdown, select a step to move the case back into “in progress” status.