View, Edit, or Delete a Note
If you have permissions to view notes, you can access a note’s details by clicking on a note record row in the Notes grid (see Notes Grid Page) or via a case under the Notes sub-tab of the Activity tab see (View a Case's Details).
Note's Page Features
The following section will review all note details on a note's page, as illustrated in the screenshot below.

- Case number: the number of the case associated with the note.
- Note number: a number is generated to identify the note for the case. For example, if you added another note for this case, it would be 2024-002/3.
- Edit button: click the Edit button to change the note details. See more details in the Edit a Note section of this article.
- Link button: click the Link button to see all linked records to the note. See more in the Link a Note section of this article.
- Options button: access additional note actions, including the "View Record Source" and "Delete" options (see details in the View Record Source and Delete a Note sections of this article respectively).
- System-generated fields: data collected by the system when the note is submitted. These fields cannot be updated.
- Note details: the note content that the creator entered. See Add a Note for details.
The Files and Comments sections are below the note details on a note's page, where you can add files and comments that will be linked to the note. See Add a Note: Attach a File to a Note and Add a Comment to a Note for details.
Edit a Note
You can edit the details of a note record from its page. If you have permission to edit note records, use the following steps to make updates:
- Click the Edit button on a note's page.
- The note's page will now be in edit mode. Use the text boxes and picklists options to update the information in the note form fields.
- When you have completed your changes, click the Save button.
Link a Note
You can link a note with another record, such as a party, to-do, or file, for the same case to show a connection. For example, you could link a note to one of the case's parties if the note is a transcript of an interview with the party. You can link a note to another record from its page using the following steps:
- Click the Link (
 ) button on the note's page.
 - In the "View all linked records" pop-up, click the Link Records button.
- Select a "Record link type" for the link. The link type indicates how the records are related to each other.
- Administrators can configure the available record link types in Settings, see Add, Edit, and Delete Record Link Types for details.
- In the grid, you will see all the case's records to which you have access. Select one or more records to which you want to link to the note. You can link up to 50 records with the note at once.
- When you have finished choosing the record link type and records, click the Link Records button.
- The system will create the links in the background. When they have been created, the links you added will be displayed on the note's page, the other record's page, and the case's page under the Links tab.
Refer to Link a Case's Records for details on editing and deleting record links.
Delete a Note
If you need to permanently remove a note, you can delete it from the note's page directly. Click the Options ( ) button, then select "Delete".
Allow a Portal Reporter to View a Note
If the note's case is external and you have the appropriate permissions, you can allow the individual who reported the case to access the note. This means that the reporter can log in to your application's portal and view the note for the case they added. Use the following steps to set a note as external:
- Click the Edit button on a note's page.
- Check the "Allow Reporter Access" checkbox.
- When you have completed your changes, click the Save button.
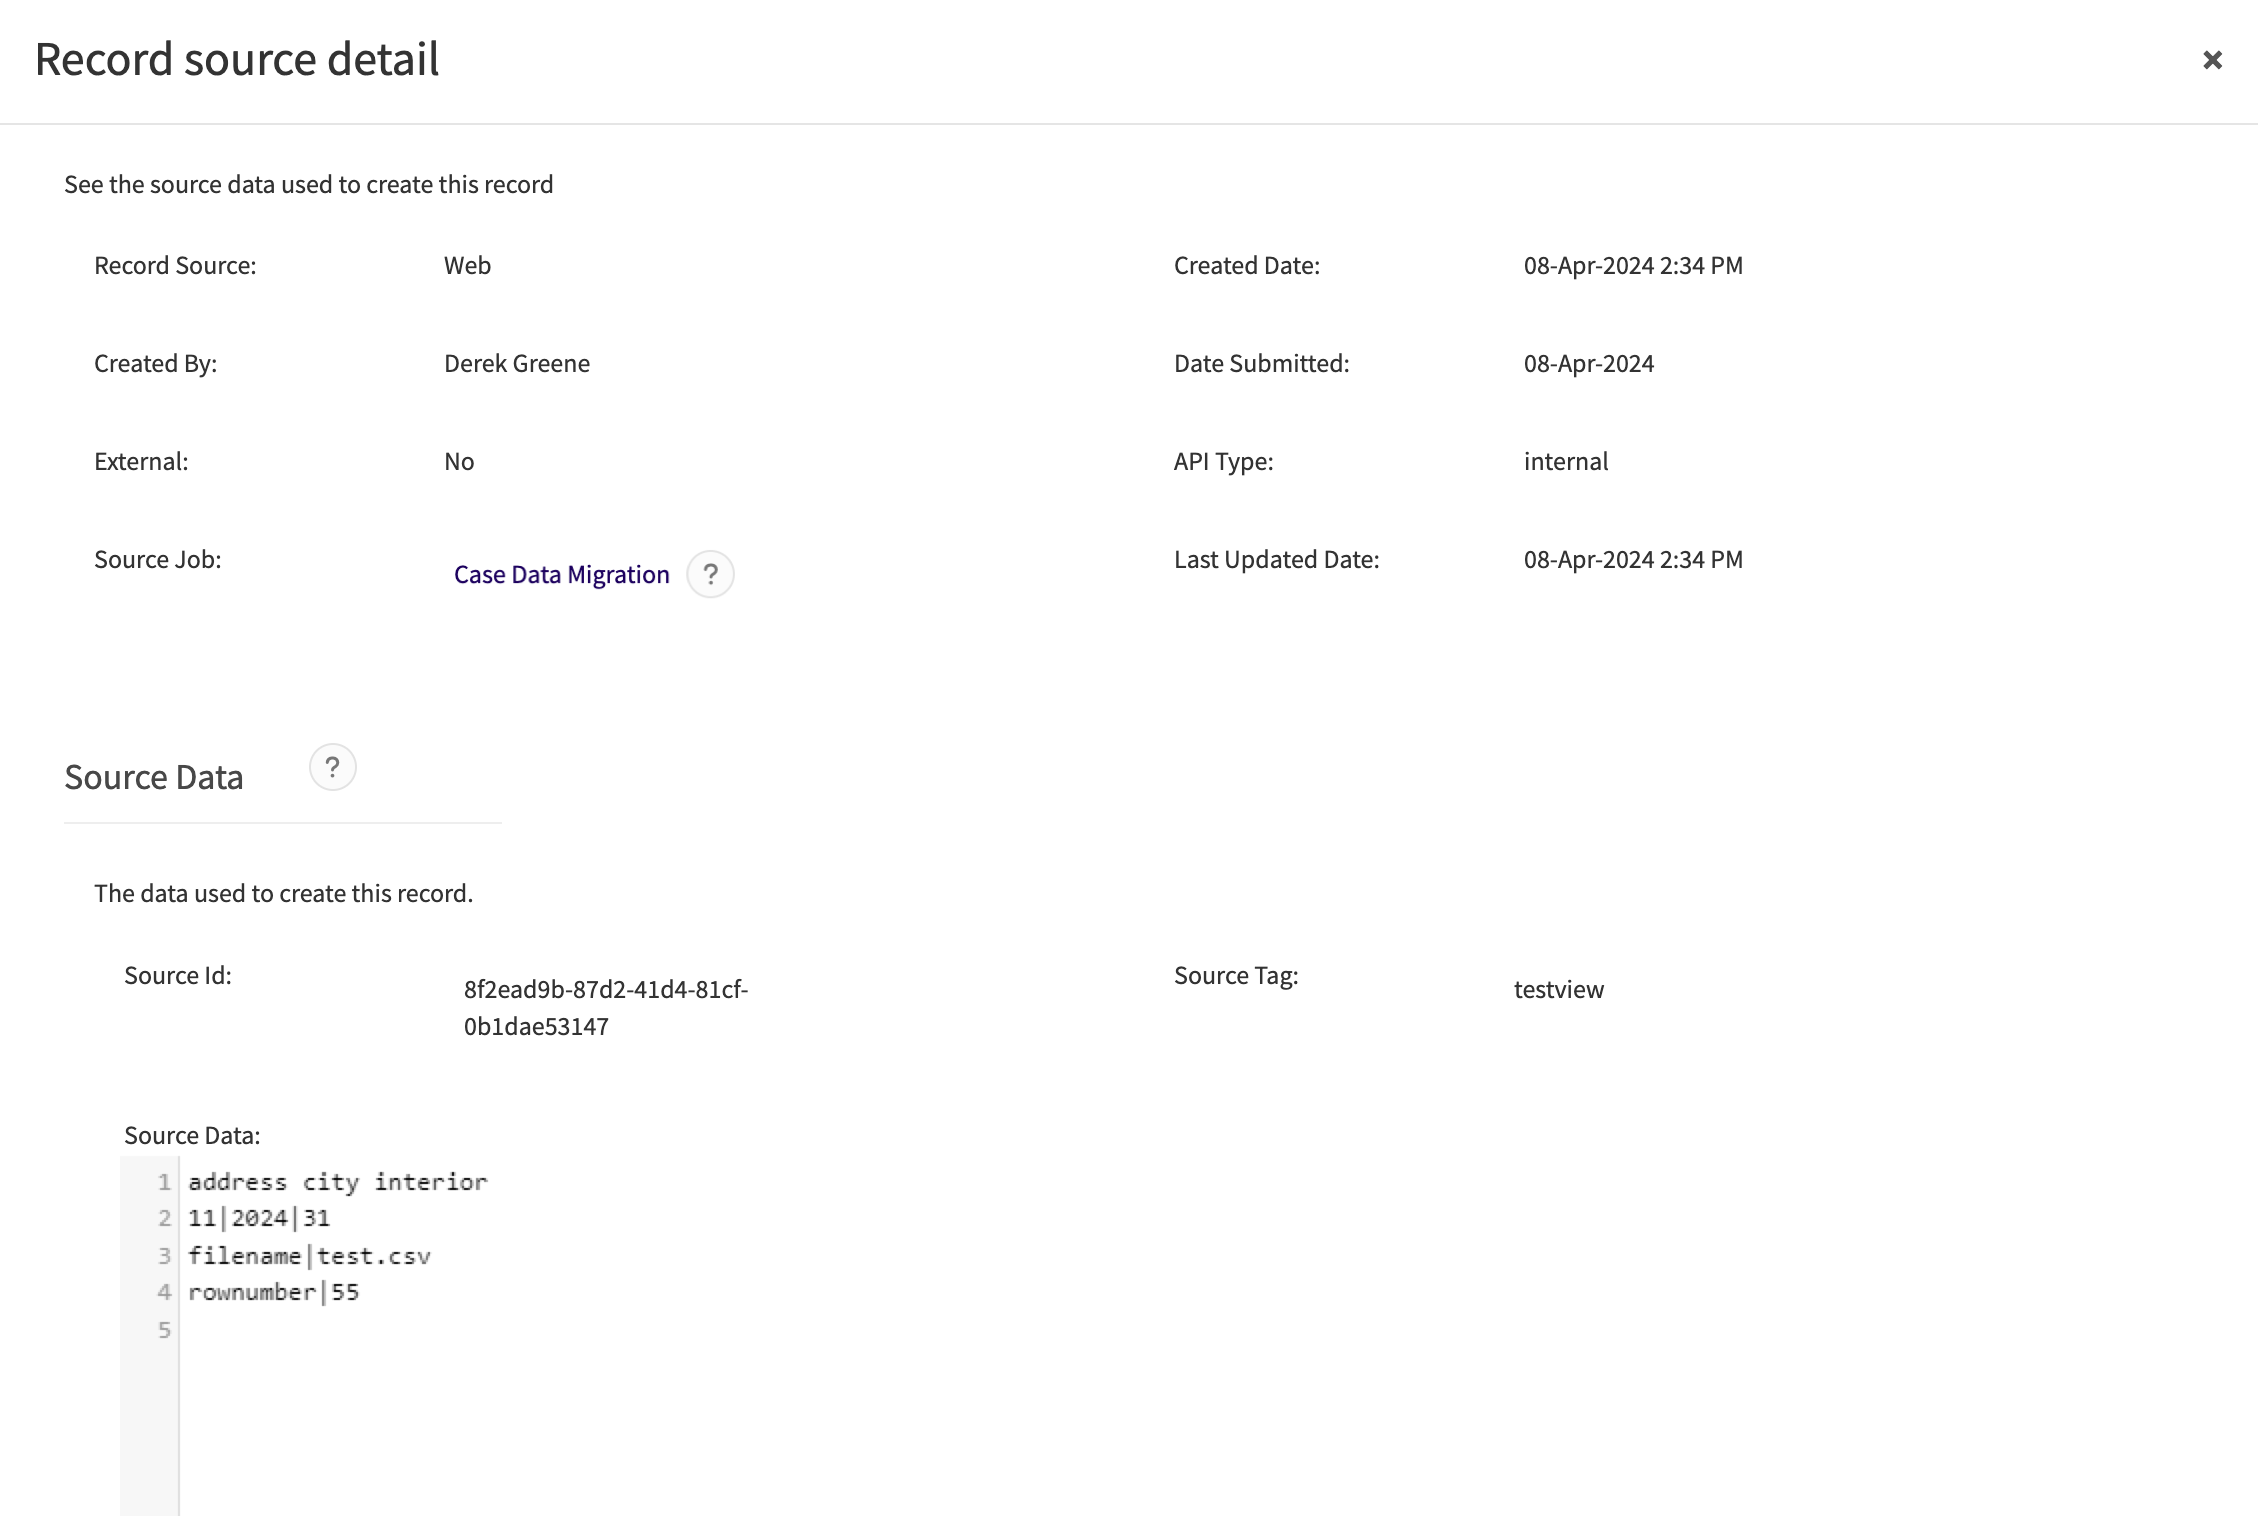
View Record Source
You can use the "View Record Source" option to monitor or troubleshoot your application’s data migrations or integrations. "View Record Source" will pull up the "Record source detail" pop-up, so you can check the system fields' values when the note was created. If the note was created by an integration or data import, you will also see the "Source Job" field and "Source Data" section in this pop-up. The "Source Data" section will show the row in the data import file that the system used to create the note. You can check out the integration log that the system recorded when it processed that data import file by clicking the link in the "Source Job" field.