Add an Entity Grid to the Case Form
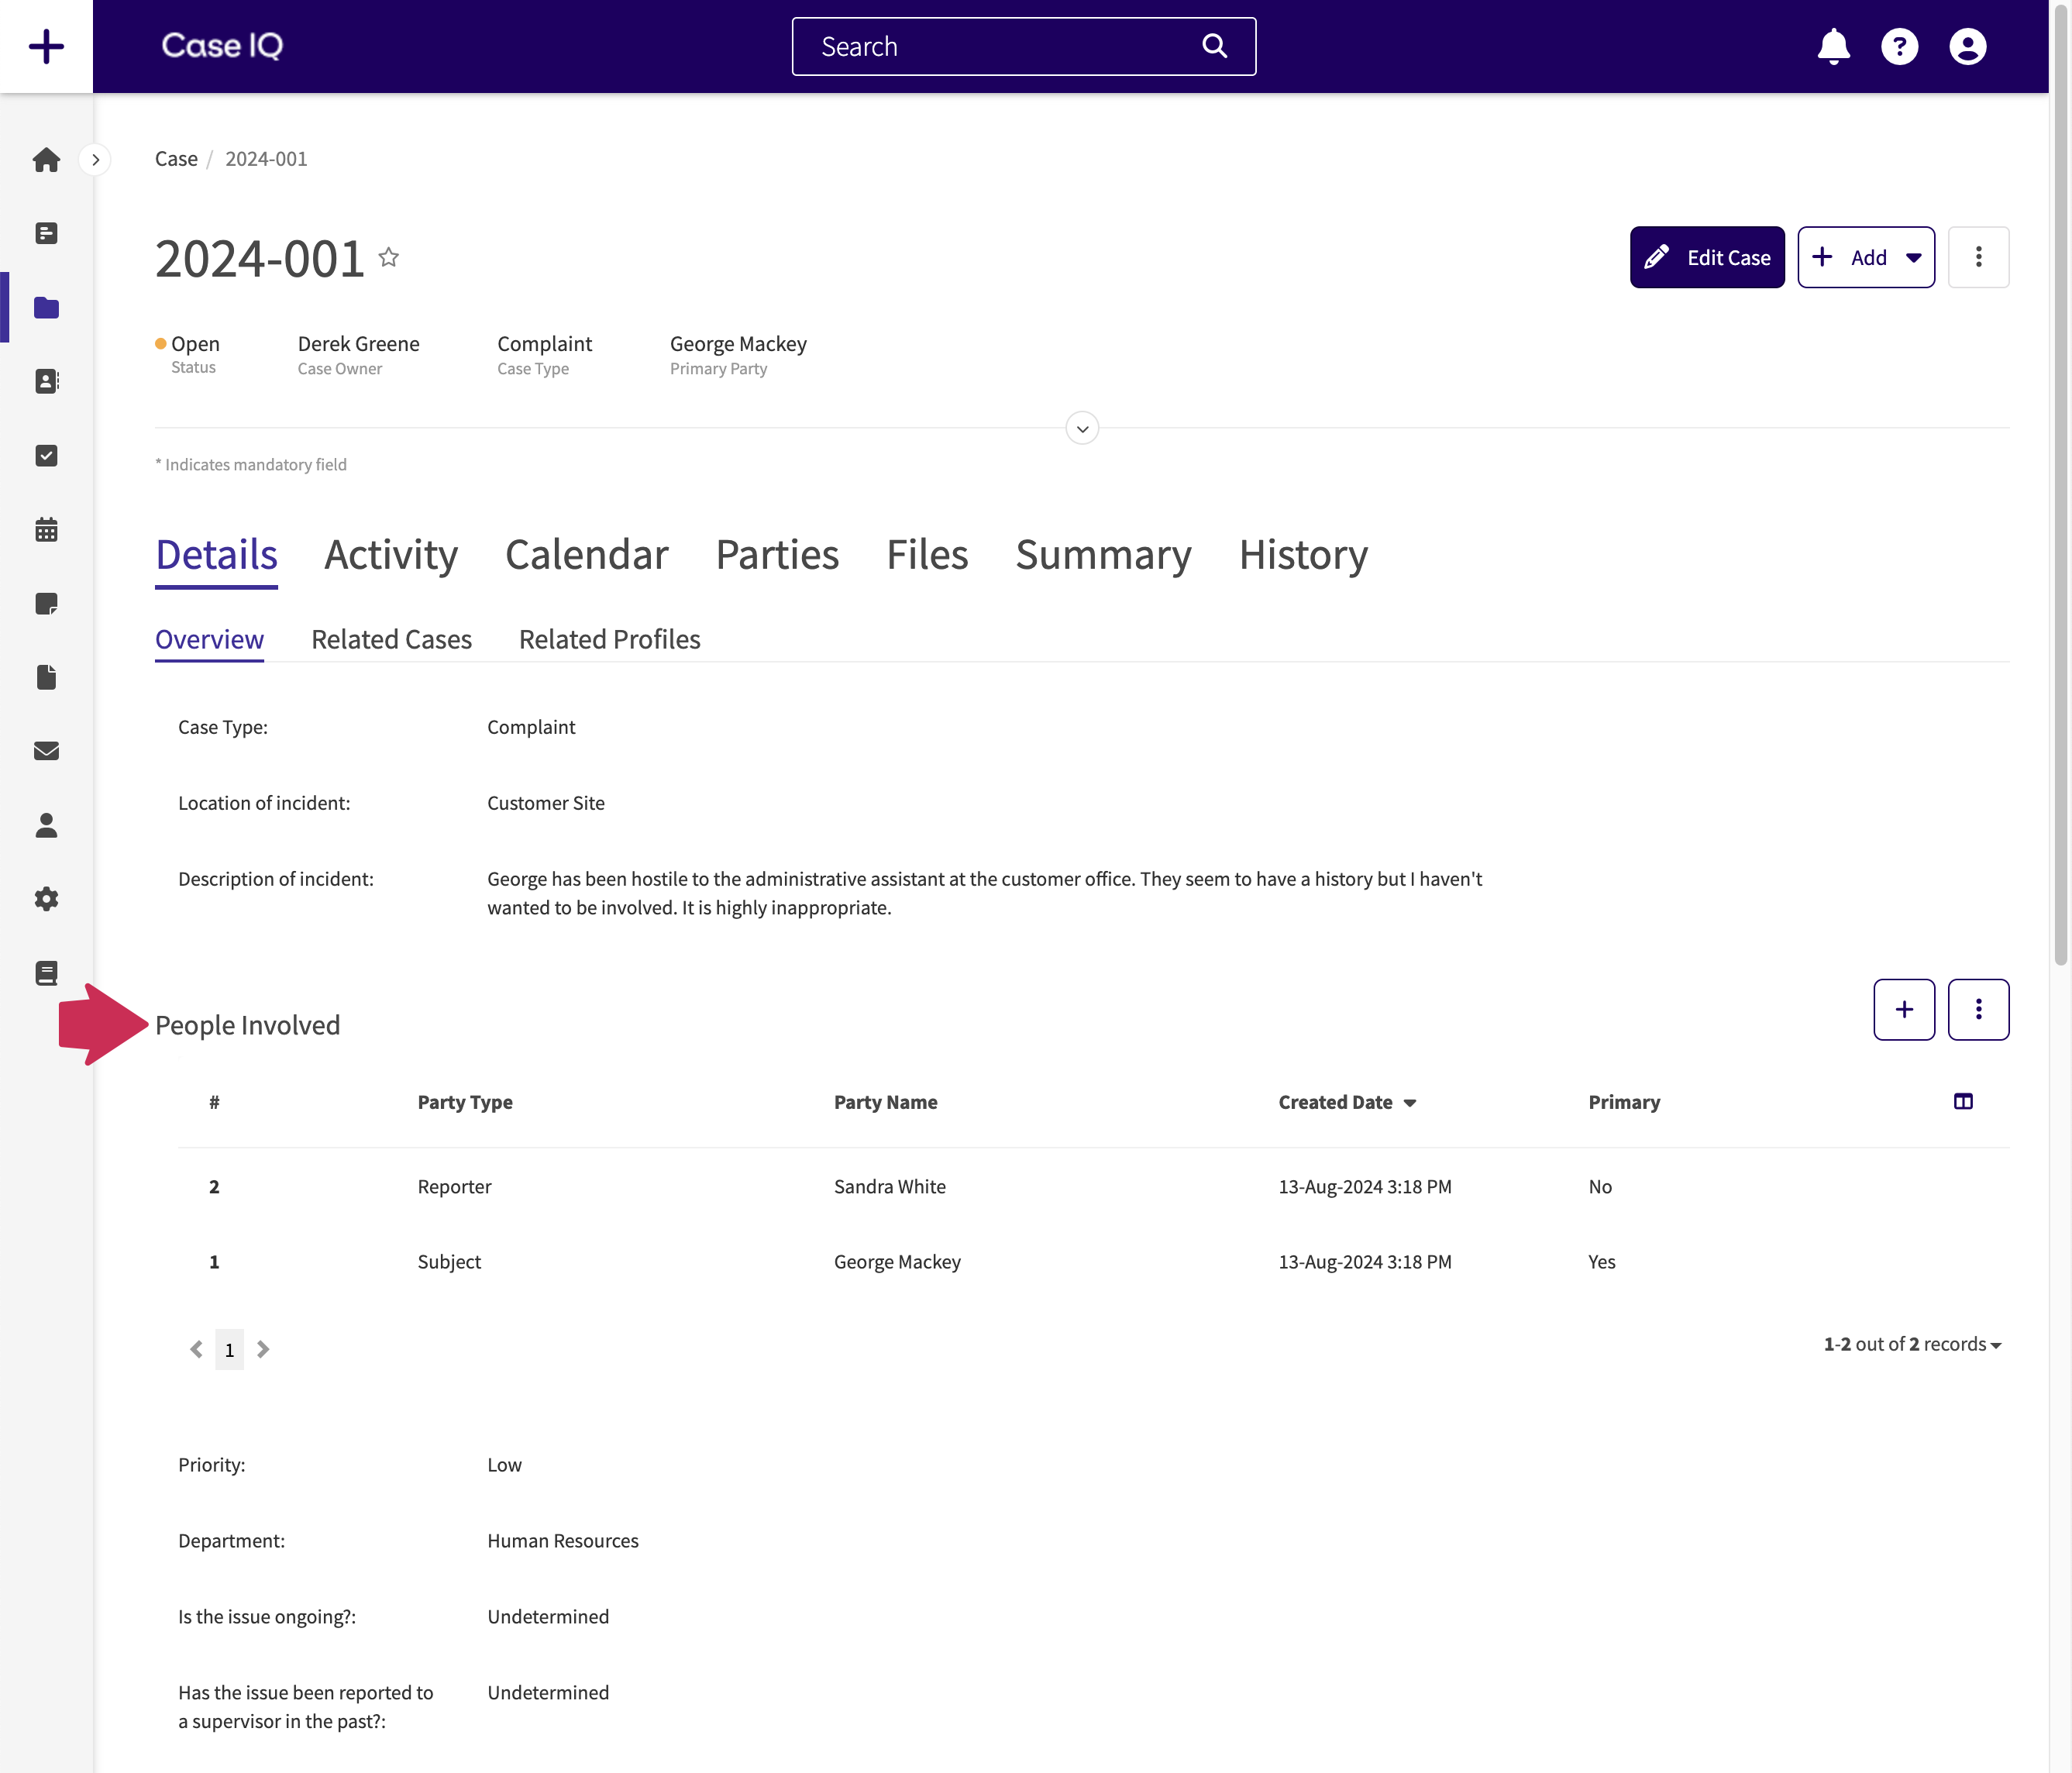
You can show a case's records directly on the case form in "entity grids", so users can easily add records to their case and access their cases' records. Entity grids are simplified grids of records that you can place anywhere on the case form. See an example of a party entity grid below. If a user does not have permissions for an entity, they will see the entity grid’s caption but not the records.
Add an Entity Grid
You can add entity grids to the case form in the Form Builder. Each entity grid is a unique component, so you can add multiple entity grids for the same entity and choose different properties. To add an entity grid to the case form:
- Navigate to the Forms page in Settings.
- Click "Case" in the Forms grid.
- Click the Edit button in the Form Builder.
- The form will now be in edit mode. Click the + Insert Fields button or the right arrow icon to open the Field Type sidebar.
- Search for "Entity grid" in the Field Type sidebar.
- Click and hold "Entity grid" in the Field Type sidebar, drag it to the Form Builder, and let go of your cursor. You can add entity grids to any case form tab, except Related Cases and Related Profiles.
- The Entity Grid pop-up will be displayed, where you can fill in the following properties:
- Caption: enter the header to display above the entity grid on the case form. You can enter a different caption for each entity grid.
- Entity: you can select custom form, file, note, party, and to-do. You can add multiple entity grids for the same entity with different properties.
- Show on intake: choose if the entity grid should be displayed on the New Case form.
- When you have finished entering properties for the entity grid, click Save on the pop-up. The entity grid will now appear on the Form Builder.
If you are done making changes to the case form, click the Publish button on the Form Builder, so users can see the new entity grid. To continue to make changes, such as adding display rules to the entity grid, stay in edit mode and continue to the next section in this article.
Set Up Display Rules for an Entity Grid
You can use display rules for entity grids so that the case form changes depending on user input. Case IQ will only show an entity grid to a user when the display rule's criteria are met. You can also create complex display rules to describe multiple, separate scenarios in which an entity grid should be shown. Use the following steps to add display rules to an entity grid:
- Click the entity grid on the Form Builder.
- Click the “Rules” tab in the sidebar, then click the Add Display Rule button.
- In the Display Rules pop-up, use the “Search fields…” dropdown menu to select another field on the form on which to base the display rule, or the “parent field”.
- Choose an operator for the statement, or a logical phrase telling the system how to search for the keywords or values you will enter in the next box, e.g. “contains”, “is”, or “is not”. The available operator options depend on the data type of the field chosen in the “Search fields…” dropdown.
- Type in or select the value of the parent field for when the entity grid should be displayed. In the example below, the "Allegation" entity grid will only be displayed when the “Multiple allegation” checkbox is checked. The keyword or value input method depends on the record field data type chosen in the “Search fields…” dropdown.
- If the display rule should be dependent on more than one field, you can add parent fields by clicking the + Criteria button.
- Using the “All/Or toggle”, you can set whether the record must meet all or one of the statements on your list.
- By selecting “All”, the entity grid will be displayed only if all criteria statements are met.
- Choosing “Or” means that the entity grid will be displayed even if only one of your criteria is met.
When you have completed setting up criteria, click the Save button on the Display Rule pop-up.
After saving one display rule for the entity grid, you can add more display rules to show the entity grid in multiple different specific situations. Click Add Display Rule again, set up another display rule in the Add Display Rule pop-up, and click Save. There will now be an "And/Or" toggle under the display rules.
- If you select "And", the entity grid will not be displayed unless all of your display rules are met.
- If you choose "Or", the entity grid will be displayed if it meets one of your display rules.
Make sure to click Publish on the Form Builder when you are done setting up display rules for the entity grid.
Move an Entity Grid
You can move the entity grid to a different place on the case form. Click and hold an entity grid, move your cursor to another location, then let go of your cursor to place the entity grid. If your form has more than one tab, you can move an entity grid to another tab by dragging the entity to the tab name and dropping the entity grid on the Form Builder. You can move entity grids to any case form tab, except Related Cases and Related Profiles.
Edit an Entity Grid
To update an entity grid’s properties, click the entity grid on the Form Builder when the form is in edit mode. The sidebar will load the properties of the entity grid. Complete your adjustments as needed and click the Save button at the bottom of the sidebar. Publish the form when you have finished your changes so users can see your updates. You cannot change the entity of the grid after adding it.
Delete an Entity Grid
You can delete an entity grid on the Form Builder using either of the following methods:
- Hover your cursor over the field on the Form Builder and click the Delete icon.
- Click the field on the Form Builder, then click the Delete button on the left sidebar.
Deleting an entity grid will not delete child records displayed in or added using the entity grid, but it will delete all users' column configurations for that grid.